1. 전체 시스템 구조
이번 예제에서는 2개의 ROS 2 패키지를 먼저 사용합니다.
turtlebot3_ws/src/
├── robot_audio_interfaces/
│   ├── msg/
│   │   └── AudioCommand.msg
│   ├── CMakeLists.txt
│   └── package.xml
│
└── robot_audio_output/
    ├── robot_audio_output/
    │   ├── __init__.py
    │   └── audio_output_node.py
    ├── sounds/
    │   ├── start.mp3
    │   ├── waypoint.mp3
    │   ├── goal.mp3
    │   ├── warning.mp3
    │   └── error.mp3
    ├── setup.py
    ├── setup.cfg
    └── package.xml
각 패키지의 역할은 다음과 같습니다.
| 패키지 | 역할 |
|---|---|
robot_audio_interfaces | 음성/효과음 명령 메시지 정의 |
robot_audio_output | 터틀봇3 버거에서 실제 음성 및 효과음 출력 |
토픽의 흐름은 다음과 같습니다.
원격 PC 또는 다른 ROS 2 노드
        |
        |  /audio/command 토픽 발행
        v
터틀봇3 버거 robot_audio_output
        |
        |  gTTS / mpg123 실행cd ~
        v
USB 스피커에서 음성 또는 효과음 출력
2. 음성/효과음 명령 메시지 만들기
먼저 음성 출력에 사용할 메시지 타입을 정의합니다.
패키지 이름은 robot_audio_interfaces입니다.
cd ~/turtlebot3_ws/src
ros2 pkg create robot_audio_interfaces --build-type ament_cmake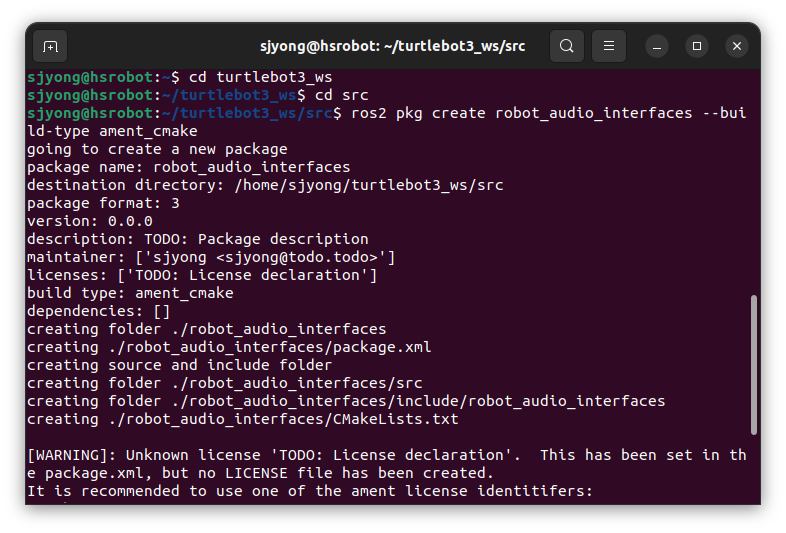
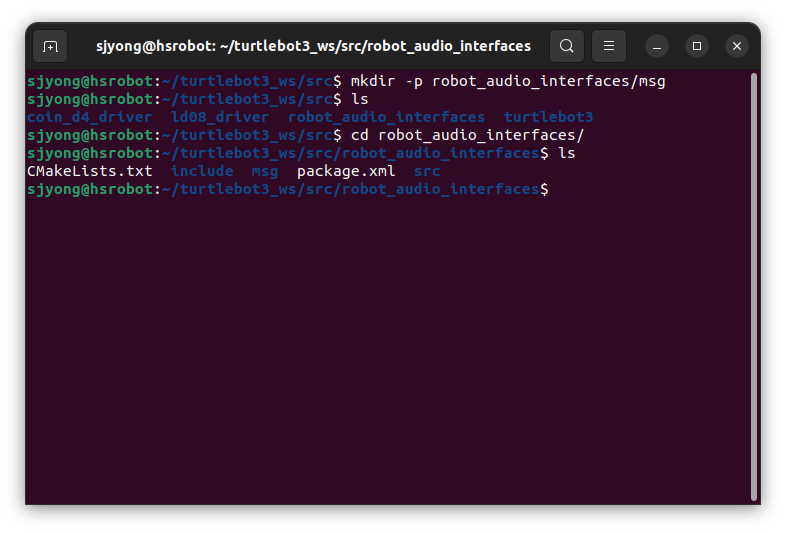
다음 파일을 생성합니다.
touch robot_audio_interfaces/msg/AudioCommand.msg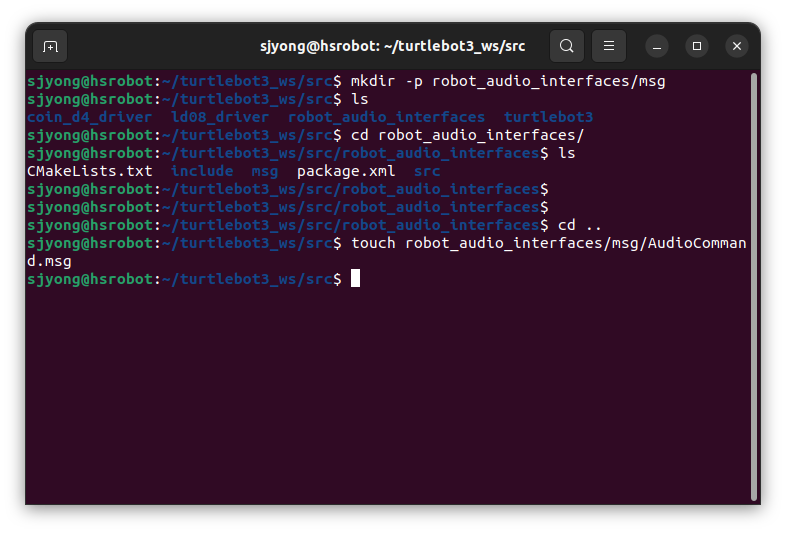
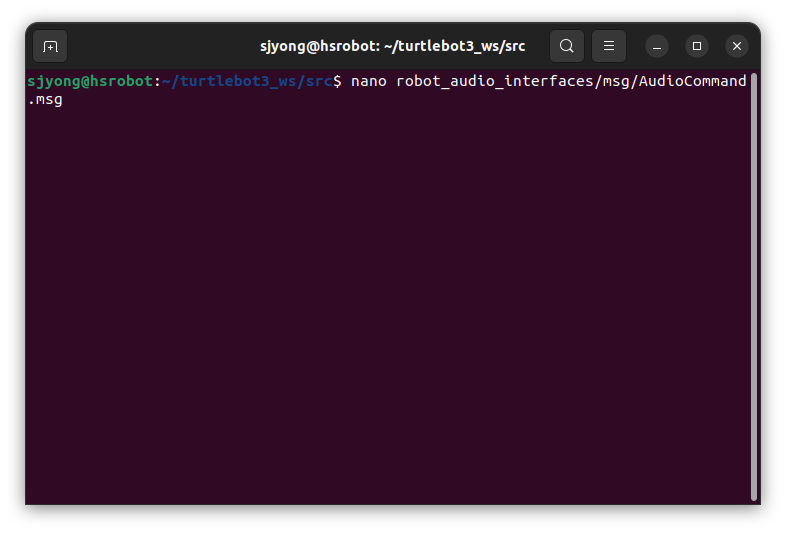
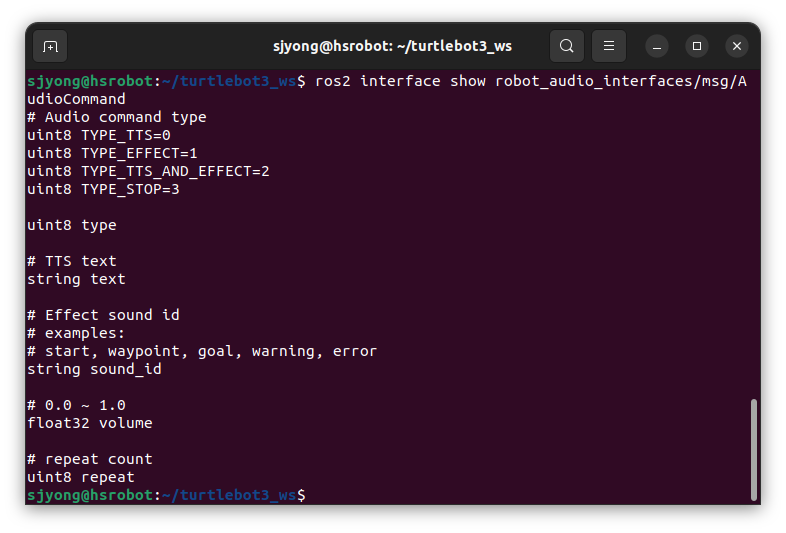
내용은 다음과 같습니다.
# Audio command type
uint8 TYPE_TTS=0
uint8 TYPE_EFFECT=1
uint8 TYPE_TTS_AND_EFFECT=2
uint8 TYPE_STOP=3

uint8 type

# TTS text
string text

# Effect sound id
# examples:
# start, waypoint, goal, warning, error
string sound_id

# 0.0 ~ 1.0
float32 volume

# repeat count
uint8 repeat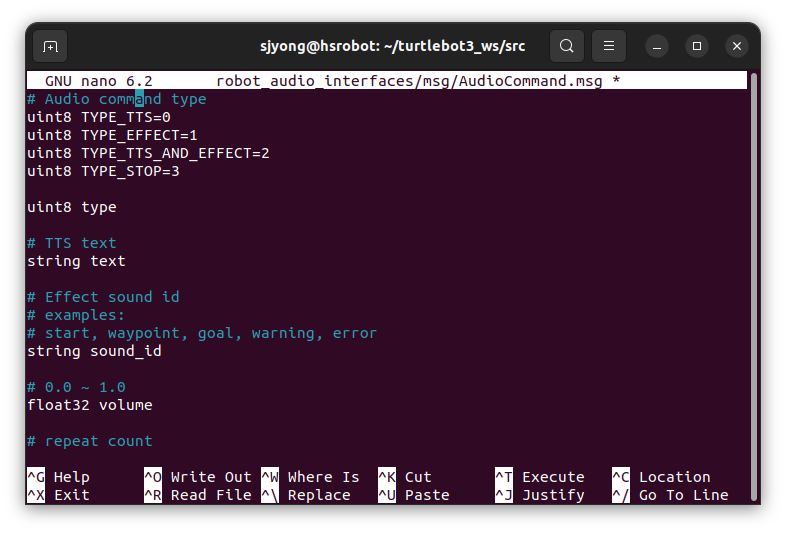
이 메시지는 네 가지 명령을 처리합니다.
| type 값 | 의미 |
TYPE_TTS | 텍스트 음성 출력 |
TYPE_EFFECT | 효과음 출력 |
TYPE_TTS_AND_EFFECT | 효과음 출력 후 음성 출력 |
TYPE_STOP | 현재 재생 중인 음성/효과음 중지 |
예를 들어 음성만 출력하려면 다음과 같은 메시지를 보냅니다.
ros2 topic pub /audio/command robot_audio_interfaces/msg/AudioCommand \
"{type: 0, text: '경유점 주행을 시작합니다', sound_id: '', volume: 1.0, repeat: 1}"
효과음만 출력하려면 다음과 같이 보냅니다.
ros2 topic pub /audio/command robot_audio_interfaces/msg/AudioCommand \
"{type: 1, text: '', sound_id: 'waypoint', volume: 1.0, repeat: 1}"
효과음 출력 후 음성을 출력하려면 다음과 같이 보냅니다.
ros2 topic pub /audio/command robot_audio_interfaces/msg/AudioCommand \
"{type: 2, text: '첫 번째 경유점에 도착했습니다', sound_id: 'waypoint', volume: 1.0, repeat: 1}"
현재 재생 중인 MP3 출력을 정지하려면 다음과 같이 보냅니다.
ros2 topic pub /audio/command robot_audio_interfaces/msg/AudioCommand \
"{type: 3, text: '', sound_id: '', volume: 1.0, repeat: 1}"
3. robot_audio_interfaces 패키지 설정
1) package.xml
robot_audio_interfaces/package.xml 파일을 다음과 같이 작성합니다.
<?xml version="1.0"?>
<package format="3">
  <name>robot_audio_interfaces</name>
  <version>0.0.1</version>
  <description>Audio command message interface for robot voice and sound effects</description>

  <maintainer email="user@example.com">user</maintainer>
  <license>Apache-2.0</license>

  <buildtool_depend>ament_cmake</buildtool_depend>

  <build_depend>rosidl_default_generators</build_depend>
  <exec_depend>rosidl_default_runtime</exec_depend>

  <member_of_group>rosidl_interface_packages</member_of_group>

  <export>
    <build_type>ament_cmake</build_type>
  </export>
</package>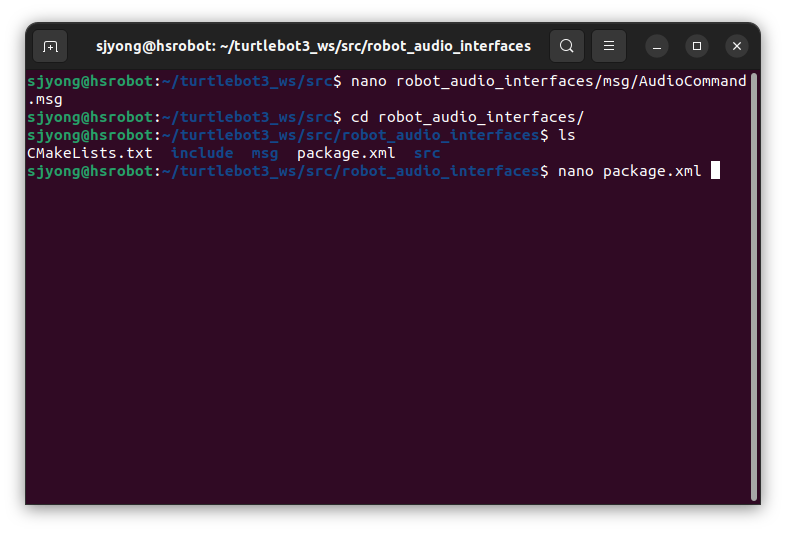
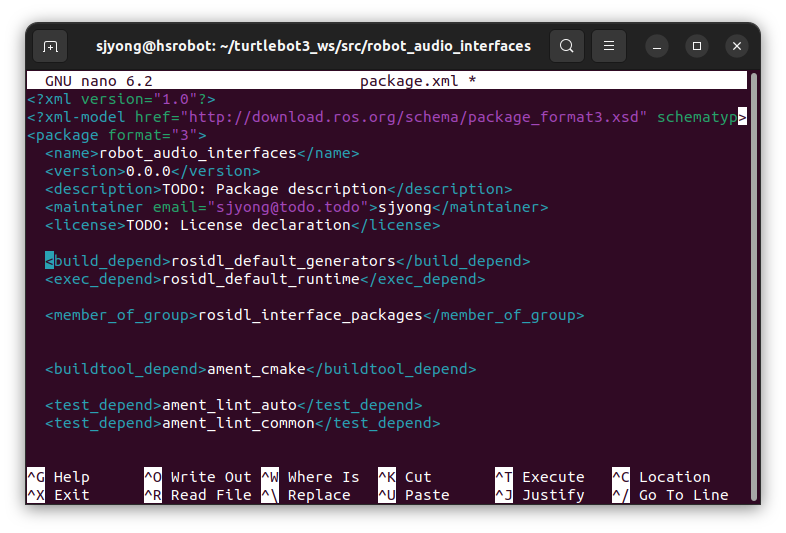
여기서 중요한 부분은 메시지 생성을 위한 의존성입니다.
<build_depend>rosidl_default_generators</build_depend>
<exec_depend>rosidl_default_runtime</exec_depend>
<member_of_group>rosidl_interface_packages</member_of_group>
ROS 2에서 커스텀 메시지 패키지를 만들 때는 위 설정이 필요합니다.
2) CMakeLists.txt
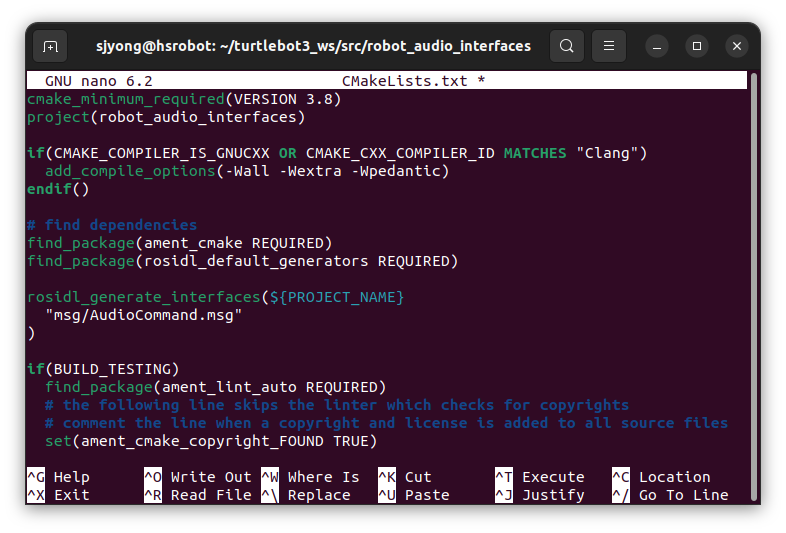
robot_audio_interfaces/CMakeLists.txt 파일은 다음과 같이 작성합니다.
cmake_minimum_required(VERSION 3.8)
project(robot_audio_interfaces)

find_package(ament_cmake REQUIRED)
find_package(rosidl_default_generators REQUIRED)

rosidl_generate_interfaces(${PROJECT_NAME}
  "msg/AudioCommand.msg"
)

ament_export_dependencies(rosidl_default_runtime)
ament_package()
이 설정을 통해 AudioCommand.msg가 ROS 2 메시지 타입으로 빌드됩니다.
빌드를 수행하고 인터페이스가 적용되는 것을 확인합니다.
colcon build --packages-select robot_audio_interfaces
source install/setup.bash
ros2 interface show robot_audio_interfaces/msg/AudioCommand 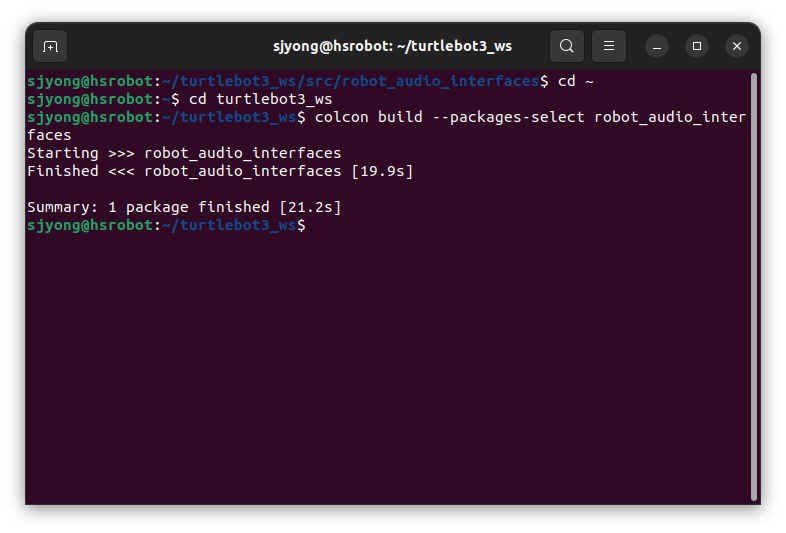
4. 터틀봇3 음성 출력 패키지 만들기
이제 실제로 스피커에서 음성 및 효과음을 출력하는 패키지를 만듭니다.
패키지 이름은 robot_audio_output입니다.
cd ~/turtlebot3_ws/src
ros2 pkg create robot_audio_output --build-type ament_python --dependencies rclpy robot_audio_interfaces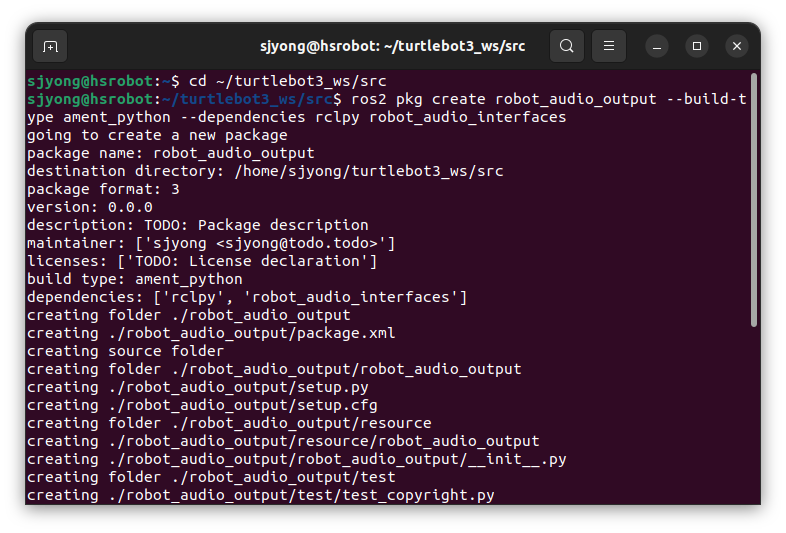
패키지 내부에 효과음 폴더와 리소스 파일을 생성합니다.
cd ~/turtlebot3_ws/src/robot_audio_output

mkdir -p sounds
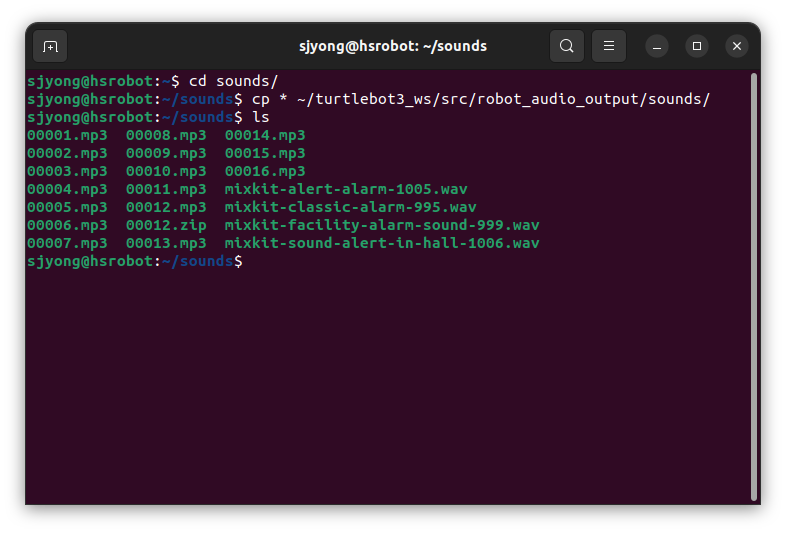
sounds 폴더에는 MP3 효과음 파일을 넣습니다.
sounds/
├── start.mp3
├── waypoint.mp3
├── goal.mp3
├── warning.mp3
└── error.mp3
이번 글에서는 MP3 파일을 출력합니다.
따라서 기존 WAV 파일을 사용하는 구조가 아니라 mpg123을 이용해 MP3 파일을 재생합니다.
파일 이름은 코드 안의 sound_map과 일치해야 합니다.
예를 들어 sound_id가 warning이면 실제 파일은 다음 위치에 있어야 합니다.
sounds/warning.mp35. robot_audio_output 패키지 설정
1) package.xml
robot_audio_output/package.xml 파일을 다음과 같이 작성합니다.
<?xml version="1.0"?>
<package format="3">
  <name>robot_audio_output</name>
  <version>0.0.1</version>
  <description>ROS 2 audio output node for TTS and sound effects</description>

  <maintainer email="user@example.com">user</maintainer>
  <license>Apache-2.0</license>

  <exec_depend>rclpy</exec_depend>
  <exec_depend>robot_audio_interfaces</exec_depend>
  <exec_depend>ament_index_python</exec_depend>

  <export>
    <build_type>ament_python</build_type>
  </export>
</package>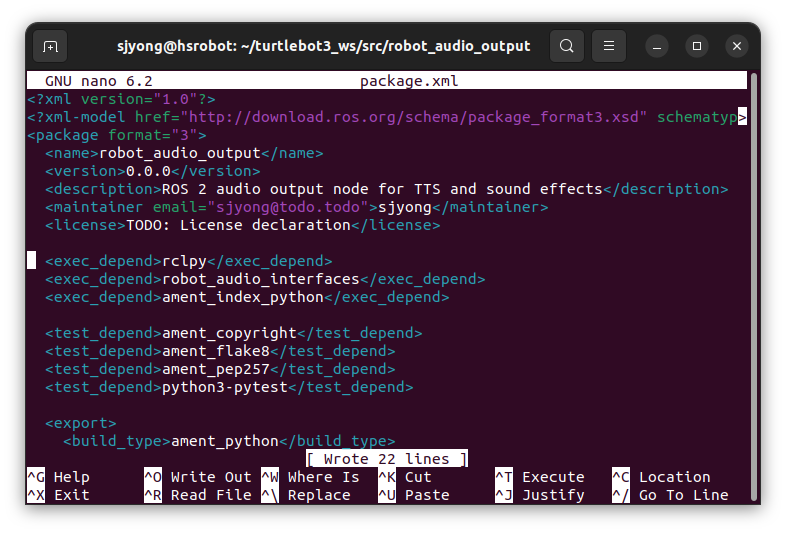
2) setup.py
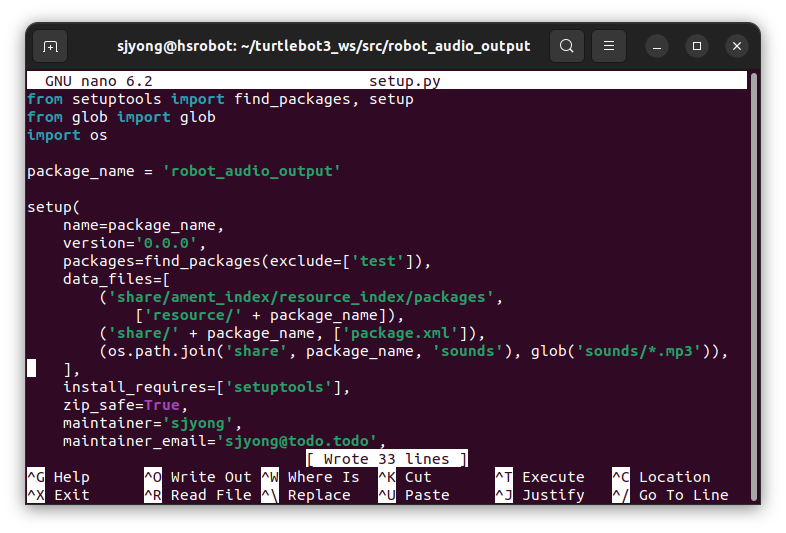
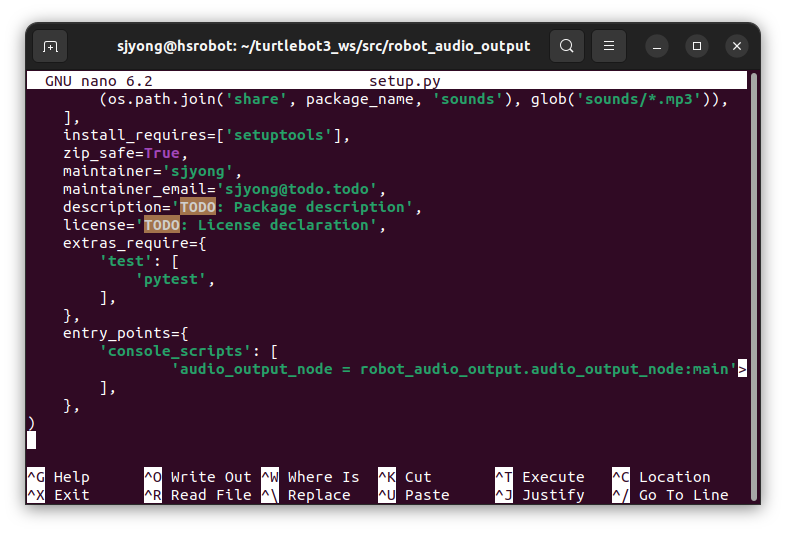
robot_audio_output/setup.py 파일을 다음과 같이 작성합니다.
from setuptools import setup
from glob import glob
import os

package_name = 'robot_audio_output'

setup(
    name=package_name,
    version='0.0.1',
    packages=[package_name],
    data_files=[
        ('share/ament_index/resource_index/packages',
         ['resource/' + package_name]),
        ('share/' + package_name, ['package.xml']),
        (os.path.join('share', package_name, 'sounds'), glob('sounds/*.mp3')),
    ],
    install_requires=['setuptools'],
    zip_safe=True,
    maintainer='user',
    maintainer_email='user@example.com',
    description='ROS 2 audio output node for TTS and sound effects',
    license='Apache-2.0',
    entry_points={
        'console_scripts': [
            'audio_output_node = robot_audio_output.audio_output_node:main',
        ],
    },
)
중요한 부분은 다음입니다.
(os.path.join('share', package_name, 'sounds'), glob('sounds/*.mp3')),이 설정을 넣어야 sounds 폴더의 wav 파일들이 빌드 후 설치 공간으로 복사됩니다.
즉, 노드가 실행될 때 패키지 내부의 효과음 파일을 찾을 수 있습니다.
기존 WAV 효과음을 함께 유지하고 싶다면 다음 줄도 추가할 수 있습니다.
(os.path.join('share', package_name, 'sounds'), glob('sounds/*.wav')),하지만 이번 글에서는 MP3 출력을 기준으로 진행합니다.
6. 음성 출력 노드 작성
다음 파일을 생성합니다.
touch robot_audio_output/robot_audio_output/audio_output_node.py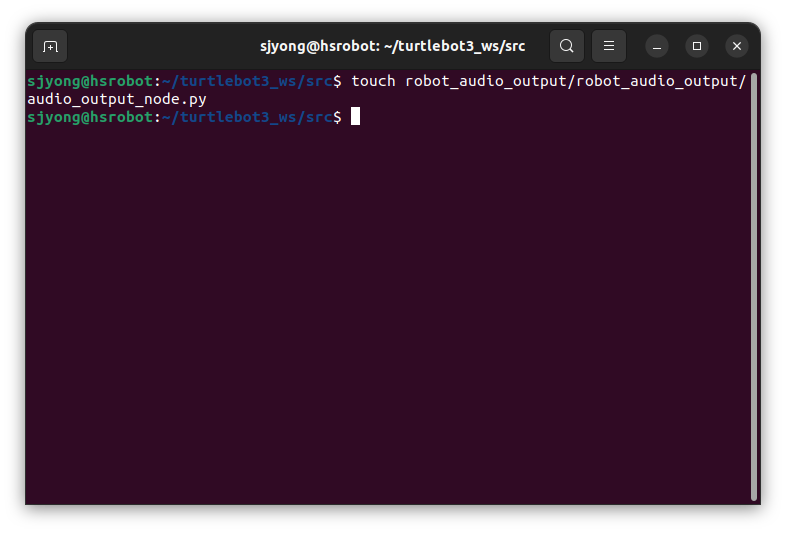
전체 코드는 다음과 같습니다.
#!/usr/bin/env python3

import os
import queue
import shutil
import subprocess
import threading
import tempfile

import rclpy
from rclpy.node import Node
from ament_index_python.packages import get_package_share_directory

from gtts import gTTS

from robot_audio_interfaces.msg import AudioCommand


class AudioOutputNode(Node):
    def __init__(self):
        super().__init__('audio_output_node')

        self.declare_parameter('topic_name', '/audio/command')
        self.declare_parameter('sound_dir', '')
        self.declare_parameter('tts_language', 'ko')
        self.declare_parameter('tts_slow', False)
        self.declare_parameter('enable_tts', True)
        self.declare_parameter('enable_effect', True)

        self.topic_name = self.get_parameter('topic_name').value
        self.tts_language = self.get_parameter('tts_language').value
        self.tts_slow = bool(self.get_parameter('tts_slow').value)
        self.enable_tts = bool(self.get_parameter('enable_tts').value)
        self.enable_effect = bool(self.get_parameter('enable_effect').value)

        sound_dir_param = self.get_parameter('sound_dir').value

        if sound_dir_param:
            self.sound_dir = sound_dir_param
        else:
            self.sound_dir = os.path.join(
                get_package_share_directory('robot_audio_output'),
                'sounds'
            )

        self.sound_map = {
            'start': 'start.mp3',
            'waypoint': 'waypoint.mp3',
            'goal': 'goal.mp3',
            'warning': 'warning.mp3',
            'error': 'error.mp3',
        }

        self.current_process = None
        self.process_lock = threading.Lock()

        self.audio_queue = queue.Queue()

        self.worker_thread = threading.Thread(
            target=self.audio_worker,
            daemon=True
        )
        self.worker_thread.start()

        self.subscription = self.create_subscription(
            AudioCommand,
            self.topic_name,
            self.audio_command_callback,
            10
        )

        self.get_logger().info('Audio output node started')
        self.get_logger().info(f'Subscribe topic: {self.topic_name}')
        self.get_logger().info(f'Sound directory: {self.sound_dir}')
        self.get_logger().info('TTS engine: gTTS')
        self.get_logger().info('Audio player: mpg123')

    def audio_command_callback(self, msg: AudioCommand):
        if msg.type == AudioCommand.TYPE_STOP:
            self.clear_queue()
            self.stop_audio()
            return

        self.audio_queue.put(msg)

    def clear_queue(self):
        try:
            while True:
                self.audio_queue.get_nowait()
        except queue.Empty:
            pass

    def audio_worker(self):
        while rclpy.ok():
            try:
                msg = self.audio_queue.get(timeout=0.1)
            except queue.Empty:
                continue

            try:
                self.process_audio_command(msg)
            except Exception as e:
                self.get_logger().error(f'Audio processing error: {e}')

    def process_audio_command(self, msg: AudioCommand):
        repeat = msg.repeat

        if repeat <= 0:
            repeat = 1

        for _ in range(repeat):
            if msg.type == AudioCommand.TYPE_TTS:
                self.play_tts(msg.text)

            elif msg.type == AudioCommand.TYPE_EFFECT:
                self.play_effect(msg.sound_id)

            elif msg.type == AudioCommand.TYPE_TTS_AND_EFFECT:
                self.play_effect(msg.sound_id)
                self.play_tts(msg.text)

            elif msg.type == AudioCommand.TYPE_STOP:
                self.stop_audio()

            else:
                self.get_logger().warn(f'Unknown audio command type: {msg.type}')

    def play_tts(self, text: str):
        if not self.enable_tts:
            return

        if not text:
            return

        if shutil.which('mpg123') is None:
            self.get_logger().error('mpg123 is not installed')
            return

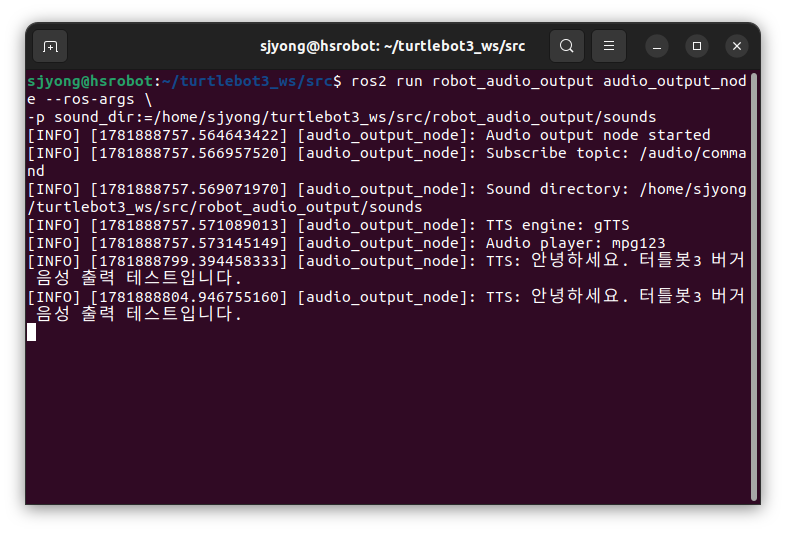
        self.get_logger().info(f'TTS: {text}')

        mp3_path = None

        try:
            with tempfile.NamedTemporaryFile(
                delete=False,
                suffix='.mp3'
            ) as temp_mp3:
                mp3_path = temp_mp3.name

            tts = gTTS(
                text=text,
                lang=self.tts_language,
                slow=self.tts_slow
            )

            tts.save(mp3_path)

            self.play_mp3_file(mp3_path)

        except Exception as e:
            self.get_logger().error(f'gTTS error: {e}')

        finally:
            if mp3_path and os.path.exists(mp3_path):
                try:
                    os.remove(mp3_path)
                except Exception as e:
                    self.get_logger().warn(f'Failed to remove temp mp3 file: {e}')

    def play_effect(self, sound_id: str):
        if not self.enable_effect:
            return

        if not sound_id:
            return

        filename = self.sound_map.get(sound_id)

        if filename is None:
            self.get_logger().warn(f'Unknown sound_id: {sound_id}')
            return

        sound_path = os.path.join(self.sound_dir, filename)

        if not os.path.exists(sound_path):
            self.get_logger().warn(f'Sound file not found: {sound_path}')
            return

        self.get_logger().info(f'Play effect: {sound_id}')

        self.play_mp3_file(sound_path)

    def play_mp3_file(self, mp3_path: str):
        if shutil.which('mpg123') is None:
            self.get_logger().error('mpg123 is not installed')
            return

        with self.process_lock:
            self.current_process = subprocess.Popen(
                ['mpg123', '-q', mp3_path],
                stdout=subprocess.DEVNULL,
                stderr=subprocess.DEVNULL
            )

        try:
            self.current_process.wait()
        finally:
            with self.process_lock:
                self.current_process = None

    def stop_audio(self):
        with self.process_lock:
            if self.current_process is not None:
                try:
                    self.current_process.terminate()
                    self.current_process.wait(timeout=1.0)
                except Exception:
                    try:
                        self.current_process.kill()
                    except Exception:
                        pass

                self.current_process = None

        subprocess.run(
            ['pkill', '-f', 'mpg123'],
            stdout=subprocess.DEVNULL,
            stderr=subprocess.DEVNULL
        )


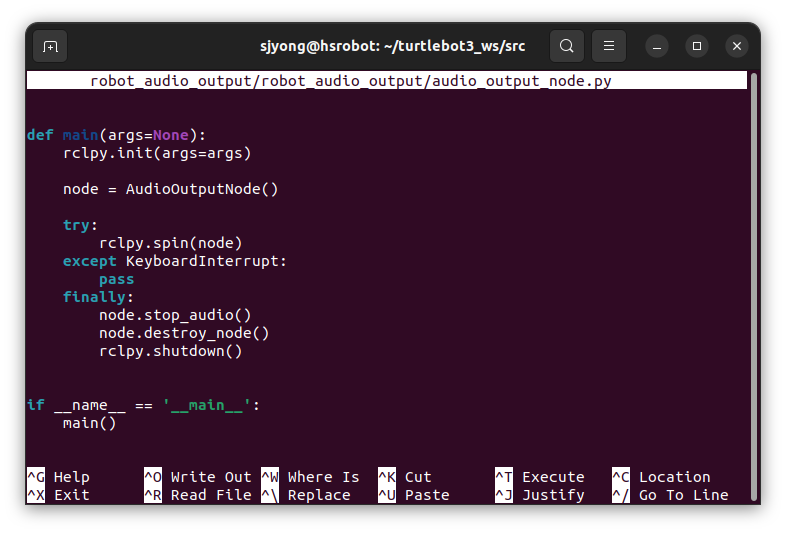
def main(args=None):
    rclpy.init(args=args)

    node = AudioOutputNode()

    try:
        rclpy.spin(node)
    except KeyboardInterrupt:
        pass
    finally:
        node.stop_audio()
        node.destroy_node()
        rclpy.shutdown()


if __name__ == '__main__':
    main()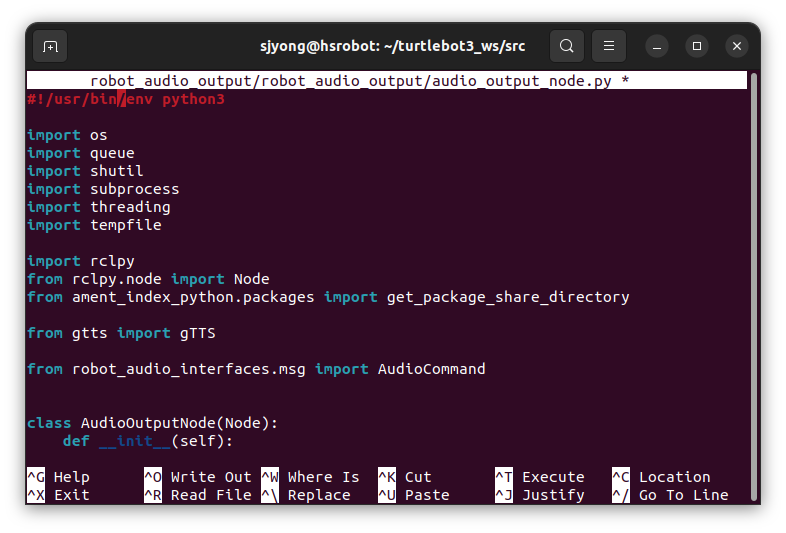
7. 음성 출력 노드 코드 설명
1) 파라미터 선언
self.declare_parameter('topic_name', '/audio/command')
self.declare_parameter('sound_dir', '')
self.declare_parameter('tts_language', 'ko')
self.declare_parameter('tts_slow', False)
self.declare_parameter('enable_tts', True)
self.declare_parameter('enable_effect', True)
이 노드는 실행 시 파라미터로 설정을 바꿀 수 있습니다.
| 파라미터 | 의미 |
topic_name | 구독할 음성 명령 토픽 이름 |
sound_dir | 효과음 MP3 파일 폴더 |
tts_language | gTTS 음성 언어 |
tts_slow | gTTS 느린 음성 출력 여부 |
enable_tts | TTS 사용 여부 |
enable_effect | 효과음 사용 여부 |
예를 들어 영어 음성으로 바꾸고 싶다면 다음과 같이 실행할 수 있습니다.
ros2 run robot_audio_output audio_output_node --ros-args -p tts_language:=en느린 음성으로 출력하고 싶다면 다음과 같이 실행할 수 있습니다.
ros2 run robot_audio_output audio_output_node --ros-args -p tts_slow:=true주의할 점은 gTTS는 기존 espeak-ng처럼 세밀한 속도 조절을 지원하지 않습니다.
그래서 실제 gTTS 속도 제어는 tts_slow 파라미터로 처리합니다.
2) 효과음 파일 매핑
self.sound_map = {
    'start': 'start.mp3',
    'waypoint': 'waypoint.mp3',
    'goal': 'goal.mp3',
    'warning': 'warning.mp3',
    'error': 'error.mp3',
}
토픽 메시지에서 sound_id가 start로 들어오면 start.mp3 파일을 재생합니다.
예를 들어 다음 메시지를 받으면,
type: TYPE_EFFECT
sound_id: start
노드는 내부적으로 다음 파일을 찾습니다.
sounds/start.mp3MP3 파일을 출력하기 위해 mpg123을 사용합니다.
따라서 효과음 파일은 .wav가 아니라 .mp3 형식으로 준비하는 것이 기본입니다.
3) 큐와 스레드를 사용하는 이유
self.audio_queue = queue.Queue()

self.worker_thread = threading.Thread(
    target=self.audio_worker,
    daemon=True
)
self.worker_thread.start()
음성 출력이나 효과음 재생은 시간이 걸립니다.
특히 gTTS는 텍스트를 MP3 파일로 생성한 뒤 재생하기 때문에 네트워크 상태에 따라 지연이 생길 수 있습니다.
만약 콜백 함수 안에서 바로 gTTS 변환이나 MP3 재생을 실행하면, ROS 2 토픽 콜백 처리가 막힐 수 있습니다.
그래서 콜백에서는 메시지를 큐에 넣기만 합니다.
def audio_command_callback(self, msg: AudioCommand):
    if msg.type == AudioCommand.TYPE_STOP:
        self.clear_queue()
        self.stop_audio()
        return

    self.audio_queue.put(msg)
실제 재생은 별도의 스레드에서 처리합니다.
def audio_worker(self):
    while rclpy.ok():
        try:
            msg = self.audio_queue.get(timeout=0.1)
        except queue.Empty:
            continue

        try:
            self.process_audio_command(msg)
        except Exception as e:
            self.get_logger().error(f'Audio processing error: {e}')
ROS 2 콜백은 가볍게 유지하는 것이 좋습니다.
4) TTS 출력
gTTS 방식은 텍스트를 바로 출력하지 않고, 먼저 MP3 파일로 생성한 뒤 재생합니다.
tts = gTTS(
    text=text,
    lang=self.tts_language,
    slow=self.tts_slow
)

tts.save(mp3_path)

self.play_mp3_file(mp3_path)
동작 순서는 다음과 같습니다.
ROS 2 토픽으로 AudioCommand 메시지 수신
                     |
TYPE_TTS이면 play_tts() 실행
                     |
gTTS가 입력 텍스트를 임시 MP3 음성 파일로 생성
                     |
생성된 임시 MP3 파일을 mpg123으로 재생
                     |
재생이 끝나면 임시 MP3 파일 삭제
gTTS는 Google TTS 서비스를 사용하므로 인터넷 연결이 필요합니다.
음질은 좋지만, 네트워크 상태에 따라 출력 지연이 발생할 수 있습니다.
5) 효과음 출력
MP3 효과음 출력은 mpg123을 사용합니다.
self.play_mp3_file(sound_path)실제 재생 함수는 다음과 같습니다.
def play_mp3_file(self, mp3_path: str):
    if shutil.which('mpg123') is None:
        self.get_logger().error('mpg123 is not installed')
        return

    with self.process_lock:
        self.current_process = subprocess.Popen(
            ['mpg123', '-q', mp3_path],
            stdout=subprocess.DEVNULL,
            stderr=subprocess.DEVNULL
        )

    try:
        self.current_process.wait()
    finally:
        with self.process_lock:
            self.current_process = None
먼저 다음 부분은 mpg123 프로그램이 설치되어 있는지 확인합니다.
if shutil.which('mpg123') is None:
    self.get_logger().error('mpg123 is not installed')
returnshutil.which('mpg123')는 리눅스 시스템에서 mpg123 실행 파일을 찾습니다.
만약 설치되어 있지 않으면 MP3 파일을 재생할 수 없기 때문에 에러 로그를 출력하고 함수를 종료합니다.
다음 부분은 실제 MP3 재생 프로세스를 실행합니다.
with self.process_lock:
    self.current_process = subprocess.Popen(
        ['mpg123', '-q', mp3_path],
        stdout=subprocess.DEVNULL,
        stderr=subprocess.DEVNULL
)subprocess.Popen()은 외부 프로그램을 실행할 때 사용합니다.
여기서는 다음 명령을 Python 코드에서 실행하는 것과 같습니다.
mpg123 -q 파일경로.mp3-q 옵션은 quiet 모드입니다.
즉, MP3 재생 중 불필요한 출력 메시지를 줄입니다.
stdout=subprocess.DEVNULL과 stderr=subprocess.DEVNULL은 mpg123 실행 중 발생하는 일반 출력과 에러 출력을 터미널에 표시하지 않도록 막는 역할을 합니다.
로봇이 동작하는 동안 오디오 재생 로그가 계속 출력되면 중요한 ROS 2 로그를 보기 어려워지기 때문에 이렇게 처리합니다.
여기서 self.current_process에 프로세스를 저장하는 이유가 중요합니다.
self.current_process = subprocess.Popen(...)현재 실행 중인 mpg123 프로세스를 기억해 두어야 나중에 TYPE_STOP 명령이 들어왔을 때 해당 프로세스를 종료할 수 있습니다.
즉, 다음과 같은 정지 명령을 처리하기 위한 구조입니다.
ros2 topic pub --once /audio/command robot_audio_interfaces/msg/AudioCommand \
"{type: 3, text: '', sound_id: '', volume: 1.0, repeat: 1}"
다음 부분은 MP3 재생이 끝날 때까지 기다립니다.
try:
self.current_process.wait()wait()를 사용하면 mpg123이 MP3 파일 재생을 끝낼 때까지 현재 작업 스레드가 대기합니다.
이 구조에서는 음성이 여러 개 동시에 겹쳐서 출력되지 않고, 큐에 들어온 순서대로 하나씩 재생됩니다.
예를 들어 다음 순서로 명령이 들어오면,
start.mp3 출력
"주행을 시작합니다" 음성 출력
waypoint.mp3 출력
"첫 번째 경유점에 도착했습니다" 음성 출력
각 오디오는 앞의 재생이 끝난 뒤 순서대로 실행됩니다.
마지막 부분은 재생이 끝난 뒤 현재 프로세스 정보를 비웁니다.
finally:
    with self.process_lock:
self.current_process = Nonefinally는 정상적으로 재생이 끝나도 실행되고, 중간에 예외가 발생해도 실행됩니다.
재생이 끝난 뒤 self.current_process를 None으로 바꿔야 현재 재생 중인 프로세스가 없다는 상태를 정확히 표현할 수 있습니다.
with self.process_lock:을 사용하는 이유는 재생 스레드와 정지 명령 콜백이 동시에 self.current_process에 접근할 수 있기 때문입니다.
예를 들어 MP3를 재생하는 중에 다른 토픽으로 STOP 명령이 들어올 수 있습니다.
이때 한쪽에서는 self.current_process를 실행 중인 프로세스로 설정하고, 다른 쪽에서는 그 프로세스를 종료하려고 합니다.
이런 상황에서 동시에 접근하면 상태가 꼬일 수 있기 때문에 process_lock으로 보호합니다.
효과음 파일은 sounds 폴더 안에 MP3 파일로 저장합니다.
예를 들어 sound_id가 warning이면 다음 파일을 재생합니다.
sounds/warning.mp3따라서 효과음 파일 이름은 sound_map에 등록된 이름과 실제 파일 이름이 일치해야 합니다.
예를 들어 sound_map에 다음과 같이 등록되어 있다면,
'warning': 'warning.mp3'실제 파일도 다음 위치에 있어야 합니다.
sounds/warning.mp36) 정지 명령
이번 구조에서는 TTS 출력과 효과음 출력 모두 MP3 재생 프로그램인 mpg123을 사용합니다.
def stop_audio(self):
    with self.process_lock:
        if self.current_process is not None:
            try:
                self.current_process.terminate()
                self.current_process.wait(timeout=1.0)
            except Exception:
                try:
                    self.current_process.kill()
                except Exception:
                    pass

            self.current_process = None

    subprocess.run(
        ['pkill', '-f', 'mpg123'],
        stdout=subprocess.DEVNULL,
        stderr=subprocess.DEVNULL
    )
TYPE_STOP 명령이 들어오면 현재 실행 중인 mpg123 프로세스를 종료합니다.
이 방식으로 gTTS가 생성한 임시 MP3 재생과 효과음 MP3 재생을 모두 정지할 수 있습니다.
또한 STOP 명령이 들어오면 대기 중인 큐도 비웁니다.
def clear_queue(self):
    try:
        while True:
            self.audio_queue.get_nowait()
    except queue.Empty:
        pass
이렇게 하면 이전에 쌓여 있던 음성 명령이 STOP 이후에 다시 재생되는 문제를 줄일 수 있습니다.
7) 빌드하기
이제 워크스페이스 루트로 이동한 뒤 빌드합니다.
cd ~/turtlebot3_ws
colcon build --symlink-install --packages-select robot_audio_output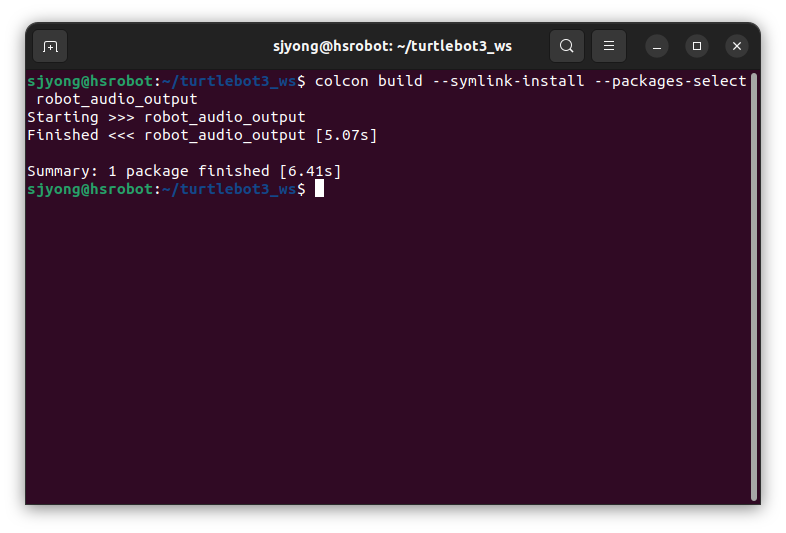
빌드가 끝나면 환경 설정을 적용합니다.
source install/setup.bash8) 음성 출력 노드 실행
터틀봇3 버거에서 다음 명령을 실행합니다.
cd ~/turtlebot3_ws
source install/setup.bash
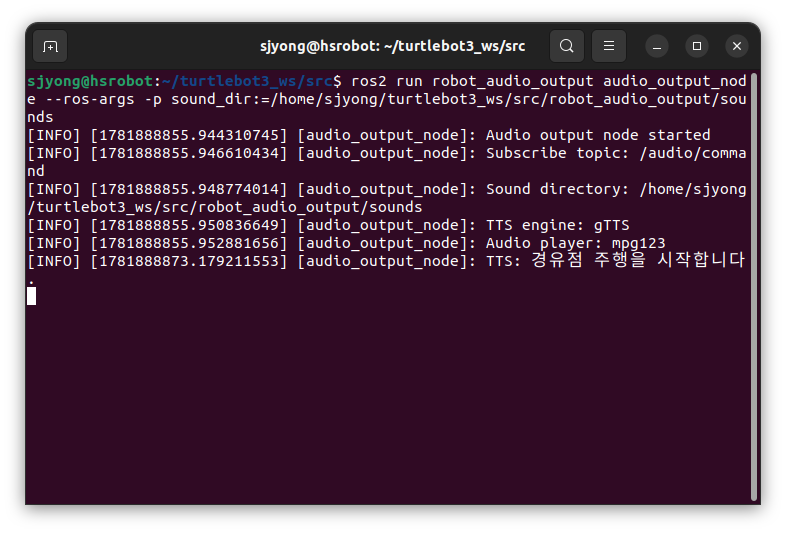
ros2 run robot_audio_output audio_output_node
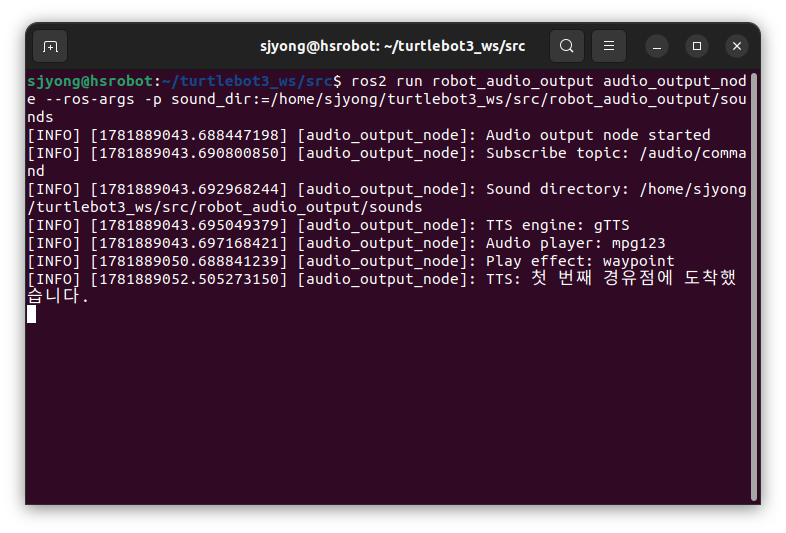
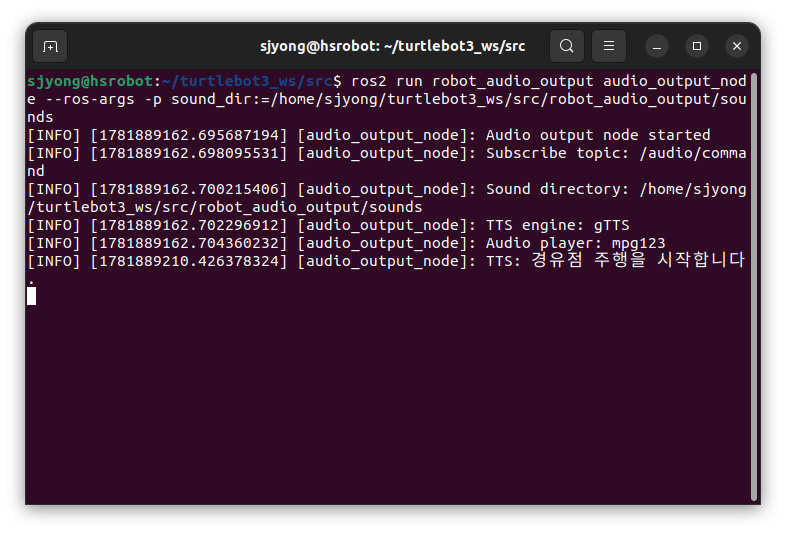
정상적으로 실행되면 다음과 비슷한 로그가 출력됩니다.
[INFO] [audio_output_node]: Audio output node started
[INFO] [audio_output_node]: Subscribe topic: /audio/command
[INFO] [audio_output_node]: Sound directory: /home/ubuntu/turtlebot3_ws/install/robot_audio_output/share/robot_audio_output/sounds
[INFO] [audio_output_node]: TTS engine: gTTS
[INFO] [audio_output_node]: Audio player: mpg123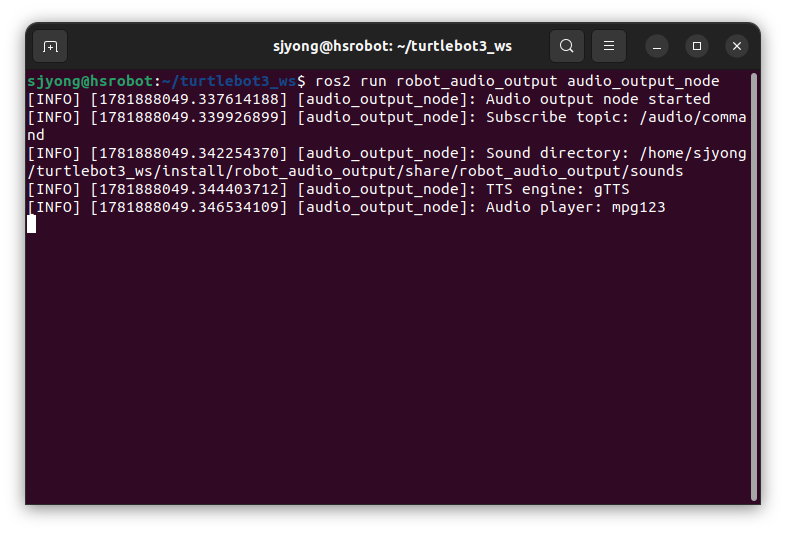
만약 효과음 폴더를 직접 지정하고 싶다면 다음과 같이 실행할 수 있습니다.
ros2 run robot_audio_output audio_output_node --ros-args \
-p sound_dir:=/home/sjyong/turtlebot3_ws/src/robot_audio_output/sounds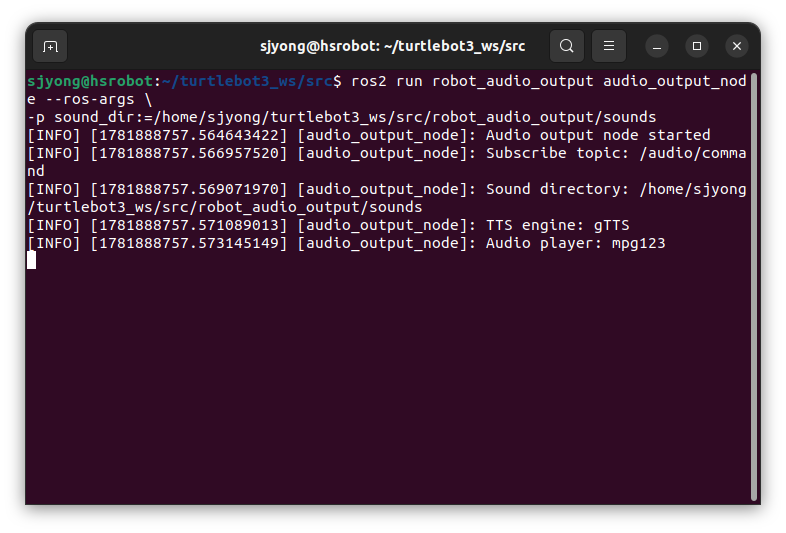
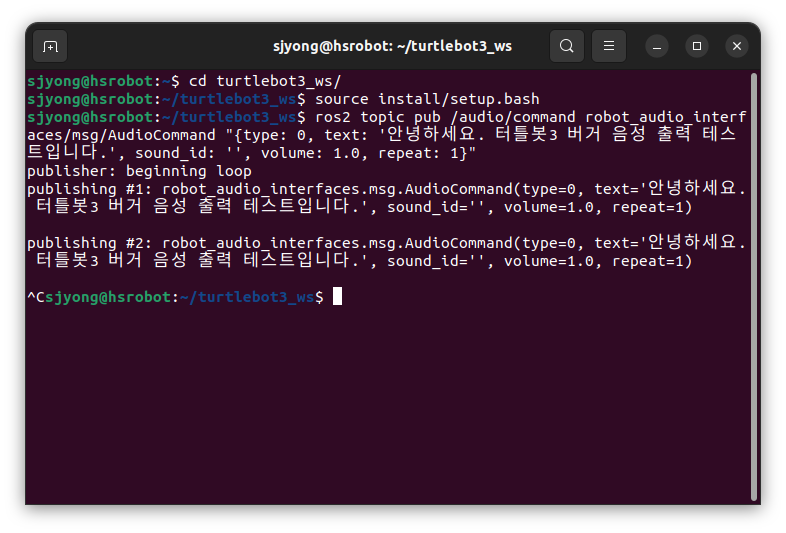
9) 토픽으로 음성 출력 테스트
다른 터미널에서 ssh로 TurtleBot3에 연결하여 다음 명령을 실행합니다.
cd ~/turtlebot3_ws
source install/setup.bash
한글 음성을 출력합니다.
ros2 topic pub /audio/command robot_audio_interfaces/msg/AudioCommand \
"{type: 0, text: '안녕하세요. 터틀봇3 버거 음성 출력 테스트입니다.', sound_id: '', volume: 1.0, repeat: 1}"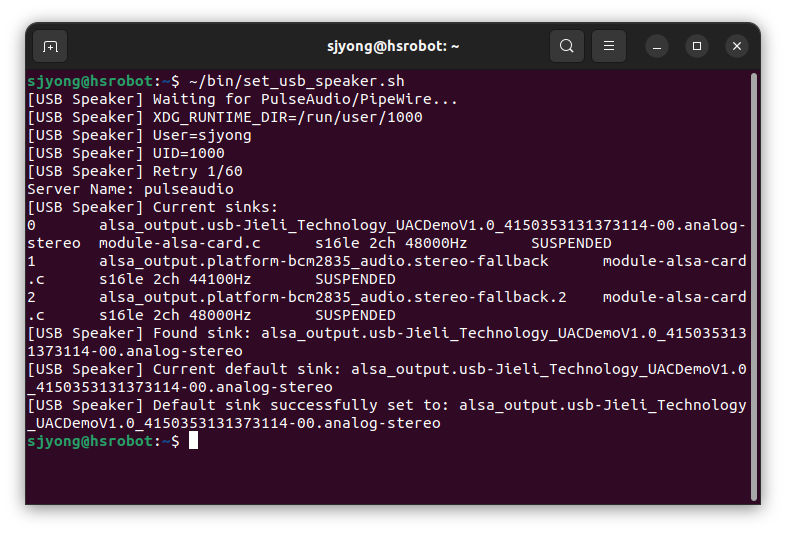
한 번만 발행하려면 --once 옵션을 붙여도 됩니다.
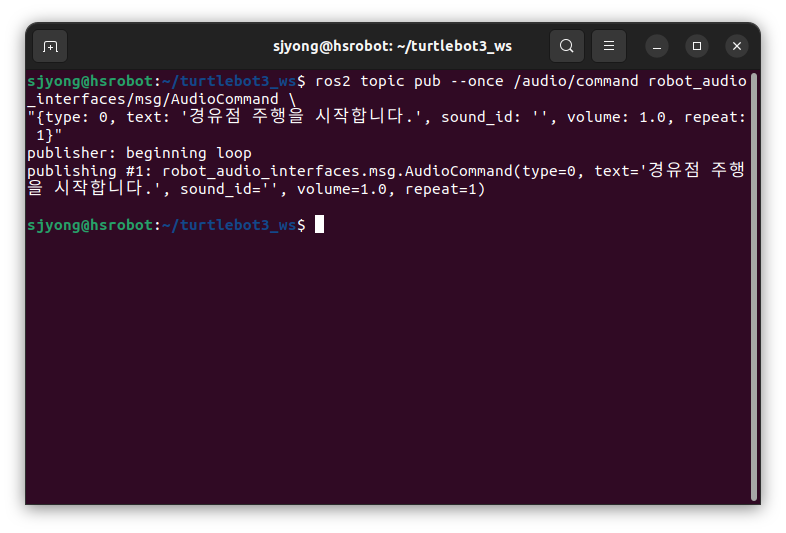
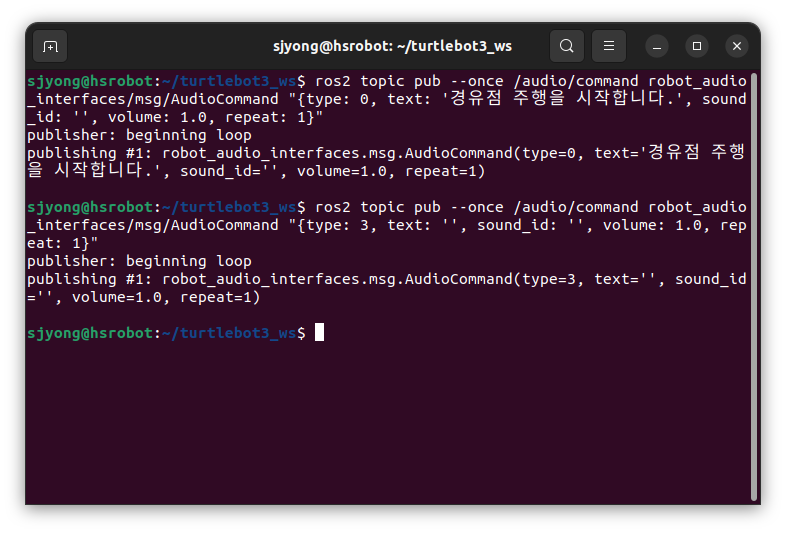
ros2 topic pub --once /audio/command robot_audio_interfaces/msg/AudioCommand \
"{type: 0, text: '경유점 주행을 시작합니다.', sound_id: '', volume: 1.0, repeat: 1}"
USB 스피커에서 음성이 출력되면 성공입니다.
10) 토픽으로 MP3 효과음 출력 테스트
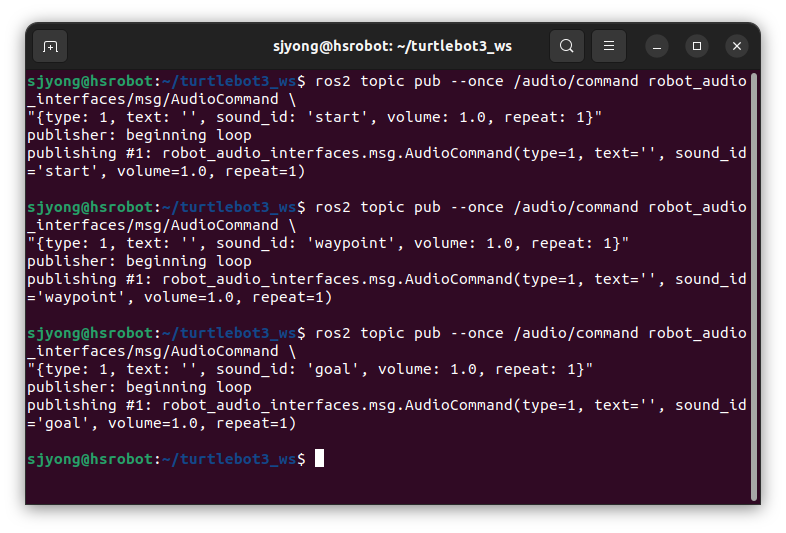
sounds/start.mp3 파일이 준비되어 있다고 가정합니다.
ros2 topic pub --once /audio/command robot_audio_interfaces/msg/AudioCommand \
"{type: 1, text: '', sound_id: 'start', volume: 1.0, repeat: 1}"
sounds/waypoint.mp3 파일을 출력하려면 다음과 같이 실행합니다.
ros2 topic pub --once /audio/command robot_audio_interfaces/msg/AudioCommand \
"{type: 1, text: '', sound_id: 'waypoint', volume: 1.0, repeat: 1}"
sounds/goal.mp3 파일을 출력하려면 다음과 같이 실행합니다.
ros2 topic pub --once /audio/command robot_audio_interfaces/msg/AudioCommand \
"{type: 1, text: '', sound_id: 'goal', volume: 1.0, repeat: 1}"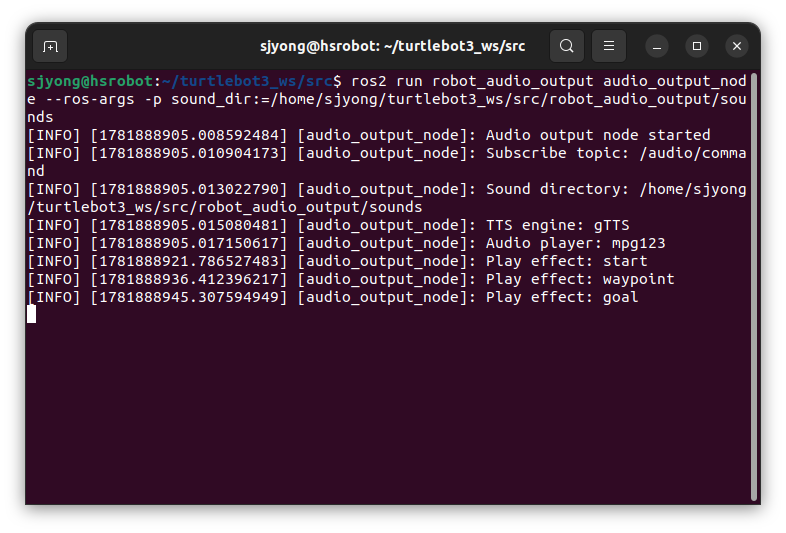
11) 효과음 출력 후 음성 출력 테스트
효과음을 먼저 출력하고 이어서 음성을 출력하려면 type을 2로 설정합니다.
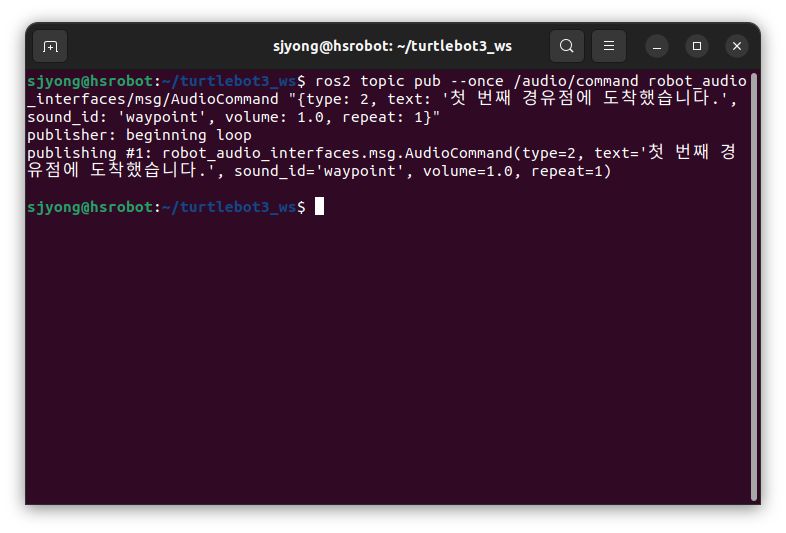
ros2 topic pub --once /audio/command robot_audio_interfaces/msg/AudioCommand \
"{type: 2, text: '첫 번째 경유점에 도착했습니다.', sound_id: 'waypoint', volume: 1.0, repeat: 1}"
이 명령을 실행하면 다음 순서로 동작합니다.
waypoint.mp3 <- 효과음 출력
첫 번째 경유점에 도착했습니다. <- 음성 출력
주행 로봇에서는 이런 방식이 실용적입니다.
단순 효과음만 울리는 것보다 로봇의 상태를 사람이 바로 이해할 수 있습니다.
예를 들어 다음과 같이 사용할 수 있습니다.
| 상황 | sound_id | text |
| 주행 시작 | start | 경유점 주행을 시작합니다. |
| 경유점 도착 | waypoint | 경유점에 도착했습니다. |
| 최종 목표 도착 | goal | 목표 지점에 도착했습니다. |
| 경고 상황 | warning | 장애물이 감지되었습니다. |
| 오류 상황 | error | 오류가 발생했습니다. 로봇을 확인해 주세요. |
12) 재생 중지 테스트
현재 재생 중인 MP3 음성이나 효과음을 정지하려면 다음 명령을 사용합니다.
ros2 topic pub --once /audio/command robot_audio_interfaces/msg/AudioCommand \
"{type: 3, text: '', sound_id: '', volume: 1.0, repeat: 1}"
TYPE_STOP 명령은 현재 실행 중인 mpg123 프로세스를 종료합니다.
긴 음성 안내를 출력하는 중에 긴급 상황이 발생했을 때 사용할 수 있습니다.
13) 16. 원격 PC에서 터틀봇3 버거로 토픽 발행하기
원격 PC에서 토픽을 발행하고, 터틀봇3 버거에서 음성을 출력하려면 두 장비가 같은 ROS 2 네트워크에 있어야 합니다.
가장 기본적으로 다음 항목을 확인합니다.
두 장비가 같은 네트워크에 연결되어 있어야 합니다.
ROS_DOMAIN_ID가 같아야 합니다.
터틀봇3 버거에서 audio_output_node가 실행 중이어야 합니다.
원격 PC에도 robot_audio_interfaces 패키지가 빌드되어 있어야 합니다.
먼저 원격 PC에 robot_audio_interfaces 패키지를 복사합니다.
cd turtlebot3_ws/src
mkdir robot_audio_interfaces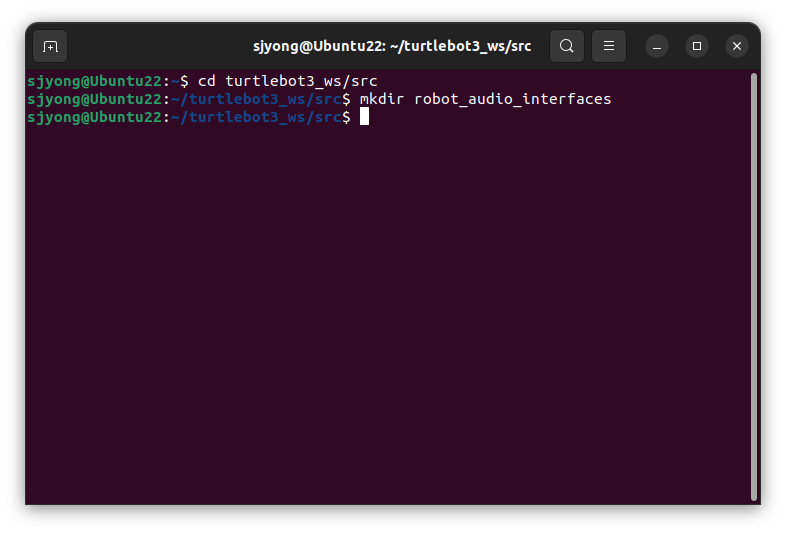
cd ~/turtlebot3_ws/src/robot_audio_interfaces/
scp -r * sjyong@192.168.200.25:/home/sjyong/turtlebot3_ws/src/robot_audio_interfaces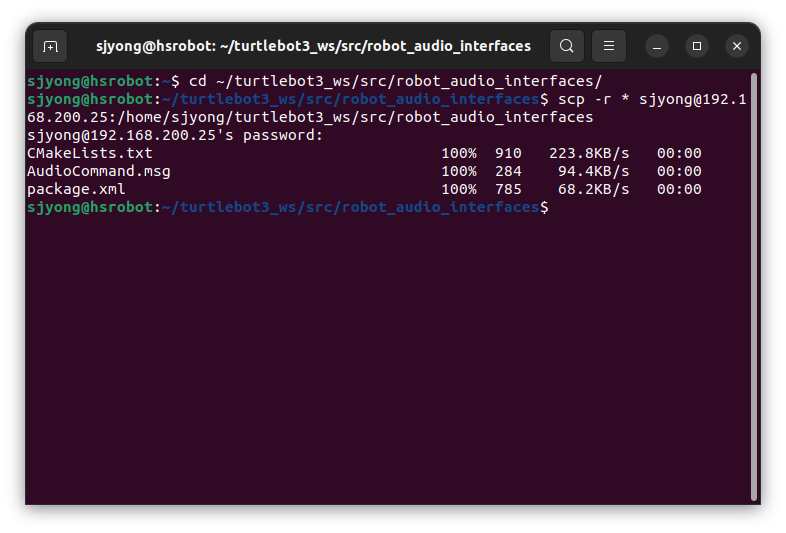
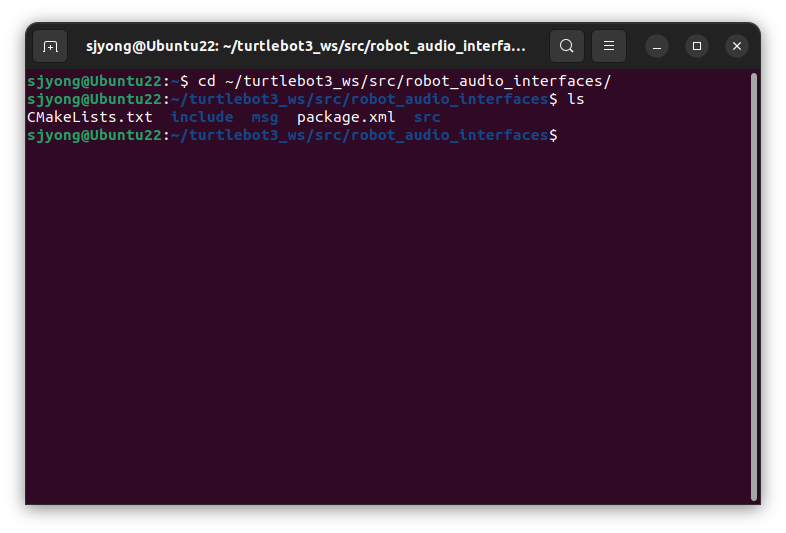
원격 PC에서 인터페이스를 빌드합니다.
colcon build --packages-select robot_audio_interfaces 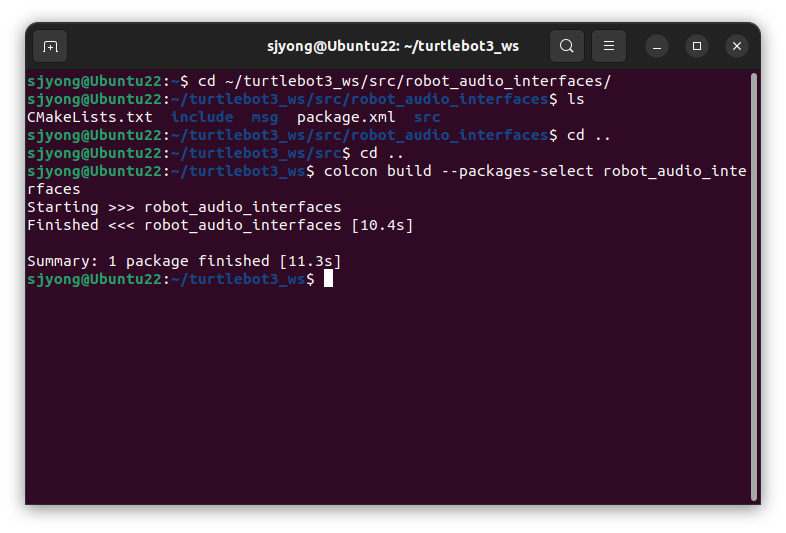
터틀봇3 버거에서는 노드를 실행합니다.
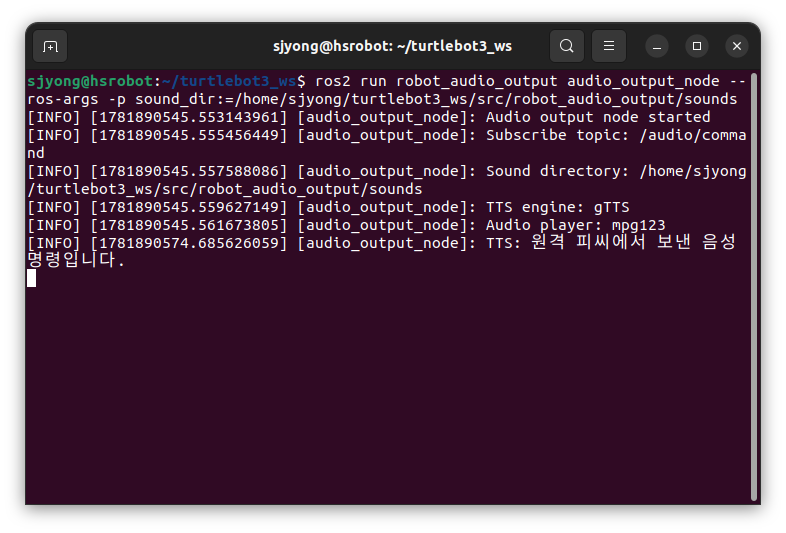
ros2 run robot_audio_output audio_output_node원격 PC에서는 토픽을 발행합니다.
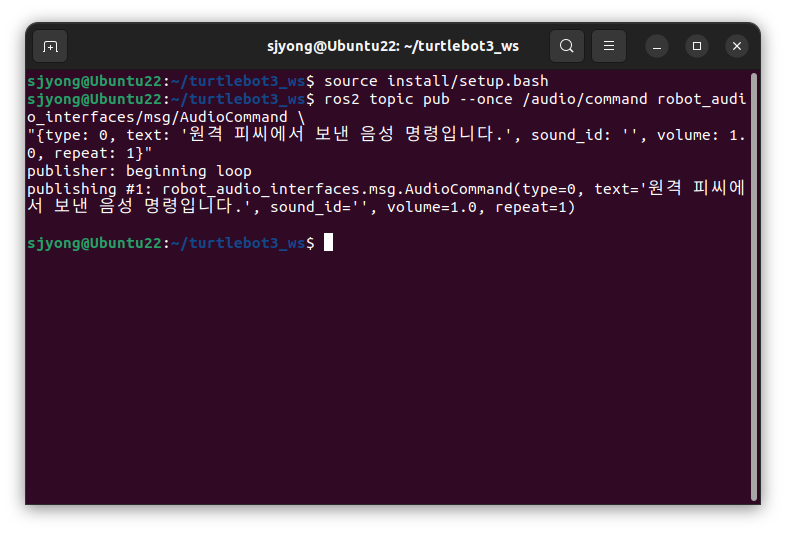
ros2 topic pub --once /audio/command robot_audio_interfaces/msg/AudioCommand \
"{type: 0, text: '원격 피씨에서 보낸 음성 명령입니다.', sound_id: '', volume: 1.0, repeat: 1}"
터틀봇3 버거의 USB 스피커에서 음성이 나오면 정상입니다.
8. 간단한 Python 발행 노드 예제
나중에 경유점 주행 노드에서 직접 토픽을 발행하려면 다음과 같은 Python 코드를 사용할 수 있습니다.
패키지는 예를 들어 simple_audio_command_publisher.py라고 가정합니다.
import rclpy
from rclpy.node import Node

from robot_audio_interfaces.msg import AudioCommand


class SimpleAudioCommandPublisher(Node):
    def __init__(self):
        super().__init__('simple_audio_command_publisher')

        self.audio_pub = self.create_publisher(
            AudioCommand,
            '/audio/command',
            10
        )

        self.timer = self.create_timer(2.0, self.timer_callback)
        self.sent = False

    def timer_callback(self):
        if self.sent:
            return

        msg = AudioCommand()
        msg.type = AudioCommand.TYPE_TTS_AND_EFFECT
        msg.text = '경유점 주행을 시작합니다.'
        msg.sound_id = 'start'
        msg.volume = 1.0
        msg.repeat = 1

        self.audio_pub.publish(msg)

        self.get_logger().info('Audio command published')

        self.sent = True


def main(args=None):
    rclpy.init(args=args)

    node = SimpleAudioCommandPublisher()

    try:
        rclpy.spin(node)
    except KeyboardInterrupt:
        pass
    finally:
        node.destroy_node()
        rclpy.shutdown()


if __name__ == '__main__':
    main()
setup.py의 entry_points에 아래의 한 줄을 추가합니다
'simple_audio_command_publisher = tb3_waypoint_nav.simple_audio_command_publisher:main', 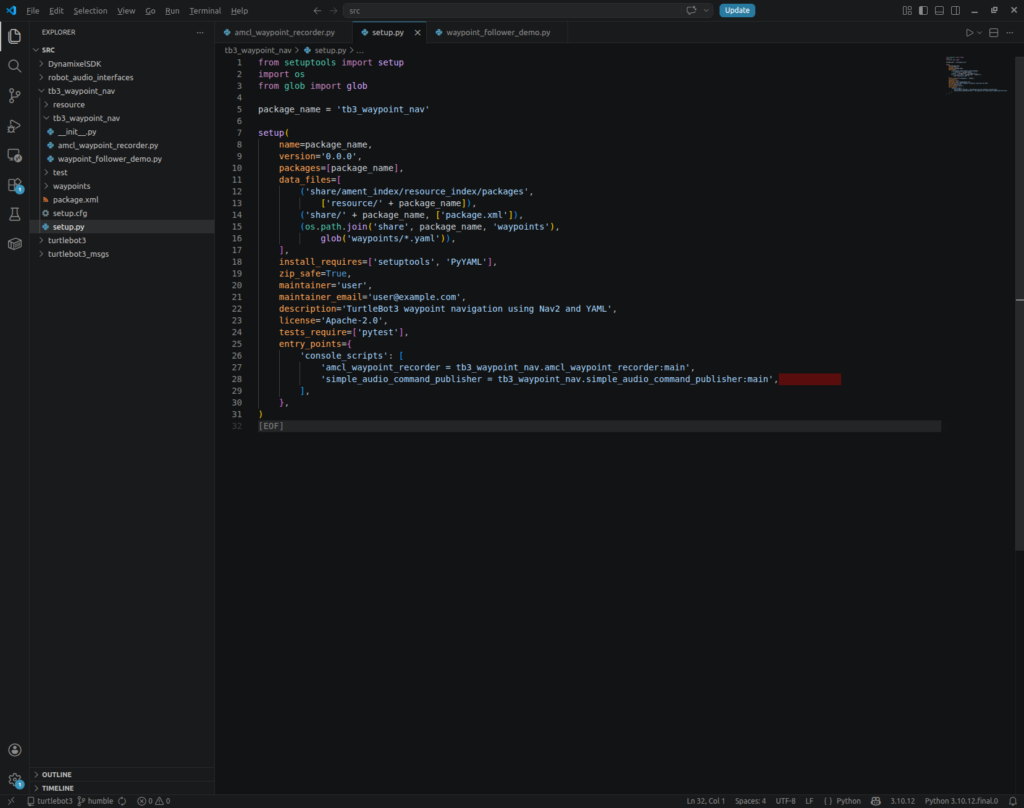
빌드를 수행하고 작업공간을 활성화 합니다.
colcon build --packages-select tb3_waypoint_nav
source install/setup.bash
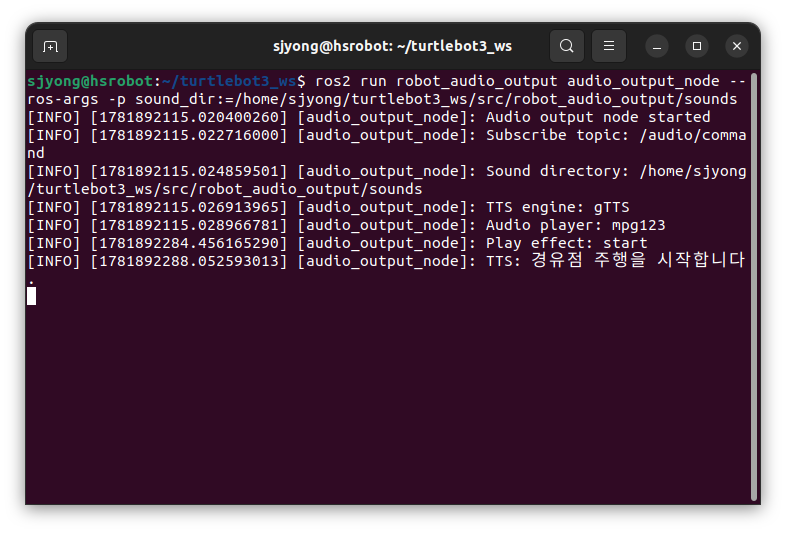
아래의명령을 실행합니다.
ros2 run tb3_waypoint_nav simple_audio_command_publisher
9. 경유점 주행 노드에 음성 출력 기능 추가
이제 원격 PC에서 실행되는 경유점 주행 알고리즘에 음성 명령 발행 기능을 추가합니다.
핵심은 Publisher를 하나 추가하는 것입니다.
from robot_audio_interfaces.msg import AudioCommand노드 내부에 Publisher를 생성합니다.
self.audio_pub = self.create_publisher(
    AudioCommand,
    '/audio/command',
    10
)
음성 출력용 함수도 추가합니다.
def publish_audio(self, text='', sound_id='', audio_type=AudioCommand.TYPE_TTS):
    msg = AudioCommand()
    msg.type = audio_type
    msg.text = text
    msg.sound_id = sound_id
    msg.volume = 1.0
    msg.repeat = 1
    self.audio_pub.publish(msg)
이제 주행 알고리즘에서는 다음처럼 간단하게 음성을 출력할 수 있습니다.
self.speak('경유점 주행을 시작합니다')효과음은 다음처럼 출력합니다.
self.play_effect('start')음성과 효과음을 함께 출력하려면 다음처럼 사용합니다.
self.speak_with_effect('모든 경유점 주행을 완료했습니다', 'goal')10. 수정된 경유점 주행 예제 코드
다음 파일을 수정합니다.
cd turtlebot3_ws/src/tb3_waypoint_nav/
touch tb3_waypoint_nav/simple_waypoint_follower.py
전체 코드는 다음과 같습니다.
#!/usr/bin/env python3

import math
import time

import rclpy
from rclpy.node import Node

from geometry_msgs.msg import PoseStamped
from nav2_simple_commander.robot_navigator import BasicNavigator, TaskResult

from robot_audio_interfaces.msg import AudioCommand


class SimpleWaypointFollower(Node):
    def __init__(self):
        super().__init__('simple_waypoint_follower')

        self.audio_pub = self.create_publisher(
            AudioCommand,
            '/audio/command',
            10
        )

        self.navigator = BasicNavigator()

        self.waypoints = [
            self.create_pose(1.0, 0.0, 0.0),
            self.create_pose(2.0, 0.0, 0.0),
            self.create_pose(2.0, 1.0, 1.57),
            self.create_pose(0.0, 1.0, 3.14),
        ]

        self.get_logger().info('Waypoint follower node initialized')

    def create_pose(self, x, y, yaw):
        pose = PoseStamped()
        pose.header.frame_id = 'map'
        pose.header.stamp = self.get_clock().now().to_msg()

        pose.pose.position.x = x
        pose.pose.position.y = y
        pose.pose.position.z = 0.0

        qz = math.sin(yaw / 2.0)
        qw = math.cos(yaw / 2.0)

        pose.pose.orientation.z = qz
        pose.pose.orientation.w = qw

        return pose

    def publish_audio(
        self,
        text='',
        sound_id='',
        audio_type=AudioCommand.TYPE_TTS
    ):
        msg = AudioCommand()
        msg.type = audio_type
        msg.text = text
        msg.sound_id = sound_id
        msg.volume = 1.0
        msg.repeat = 1

        self.audio_pub.publish(msg)

    def speak(self, text):
        self.publish_audio(
            text=text,
            sound_id='',
            audio_type=AudioCommand.TYPE_TTS
        )

    def play_effect(self, sound_id):
        self.publish_audio(
            text='',
            sound_id=sound_id,
            audio_type=AudioCommand.TYPE_EFFECT
        )

    def speak_with_effect(self, text, sound_id):
        self.publish_audio(
            text=text,
            sound_id=sound_id,
            audio_type=AudioCommand.TYPE_TTS_AND_EFFECT
        )

    def run(self):
        self.get_logger().info('Waiting for Nav2 to become active...')

        self.speak('내비게이션 시스템을 준비합니다')
        self.navigator.waitUntilNav2Active()

        self.get_logger().info('Nav2 is active')
        self.speak_with_effect('경유점 주행을 시작합니다', 'start')

        time.sleep(1.0)

        self.navigator.followWaypoints(self.waypoints)

        last_feedback_index = -1

        while not self.navigator.isTaskComplete():
            feedback = self.navigator.getFeedback()

            if feedback is not None:
                current_index = feedback.current_waypoint

                if current_index != last_feedback_index:
                    last_feedback_index = current_index

                    msg = f'{current_index + 1}번 경유점으로 이동 중입니다'
                    self.get_logger().info(msg)
                    self.speak(msg)

            time.sleep(0.5)

        result = self.navigator.getResult()

        if result == TaskResult.SUCCEEDED:
            self.get_logger().info('Waypoint mission succeeded')
            self.speak_with_effect('모든 경유점 주행을 완료했습니다', 'goal')

        elif result == TaskResult.CANCELED:
            self.get_logger().warn('Waypoint mission was canceled')
            self.speak_with_effect('경유점 주행이 취소되었습니다', 'warning')

        elif result == TaskResult.FAILED:
            self.get_logger().error('Waypoint mission failed')
            self.speak_with_effect('경유점 주행에 실패했습니다', 'error')

        else:
            self.get_logger().warn('Unknown waypoint result')
            self.speak_with_effect('알 수 없는 주행 결과입니다', 'warning')


def main(args=None):
    rclpy.init(args=args)

    node = SimpleWaypointFollower()

    try:
        node.run()
    except KeyboardInterrupt:
        node.get_logger().warn('Keyboard interrupt received')
        node.speak_with_effect('사용자에 의해 주행이 중지되었습니다', 'warning')
    finally:
        node.destroy_node()
        rclpy.shutdown()


if __name__ == '__main__':
    main()
1) 음성 명령 Publisher
self.audio_pub = self.create_publisher(
    AudioCommand,
    '/audio/command',
    10
)
이 Publisher가 음성 출력 노드로 명령을 보냅니다.
여기서 중요한 점은 이 코드가 실제 스피커를 직접 제어하지 않는다는 것입니다.
단지 /audio/command 토픽으로 메시지만 보냅니다.
2) 음성 출력 함수
def speak(self, text):
    self.publish_audio(
        text=text,
        sound_id='',
        audio_type=AudioCommand.TYPE_TTS
    )
텍스트만 음성으로 출력합니다.
예:
self.speak('내비게이션 시스템을 준비합니다')3) 효과음 출력 함수
def play_effect(self, sound_id):
    self.publish_audio(
        text='',
        sound_id=sound_id,
        audio_type=AudioCommand.TYPE_EFFECT
    )
효과음만 출력합니다.
예:
self.play_effect('warning')4) 음성 + 효과음 출력 함수
def speak_with_effect(self, text, sound_id):
    self.publish_audio(
        text=text,
        sound_id=sound_id,
        audio_type=AudioCommand.TYPE_TTS_AND_EFFECT
    )
효과음 출력 후 음성을 출력합니다.
예:
self.speak_with_effect('경유점 주행을 시작합니다', 'start')11. 주행 상태별 음성 출력
1) Nav2 준비 중
self.speak('내비게이션 시스템을 준비합니다')
self.navigator.waitUntilNav2Active()
Nav2가 활성화되기 전 사용자에게 준비 중임을 알려줍니다.
2) 경유점 주행 시작
self.speak_with_effect('경유점 주행을 시작합니다', 'start')주행 시작 시 start.wav 효과음과 함께 안내 음성을 출력합니다.
3) 경유점 이동 중
msg = f'{current_index + 1}번 경유점으로 이동 중입니다'
self.get_logger().info(msg)
self.speak(msg)
Nav2의 feedback 값이 바뀔 때마다 현재 몇 번째 경유점으로 이동 중인지 알려줍니다.
4) 주행 성공
self.speak_with_effect('모든 경유점 주행을 완료했습니다', 'goal')모든 경유점 주행이 성공하면 goal.wav 효과음과 완료 음성을 출력합니다.
5) 주행 취소
self.speak_with_effect('경유점 주행이 취소되었습니다', 'warning')주행이 취소되면 경고 효과음과 취소 안내 음성을 출력합니다.
6) 주행 실패
self.speak_with_effect('경유점 주행에 실패했습니다', 'error')주행 실패 시 에러 효과음과 실패 음성을 출력합니다.
12. waypoint_follower_demo 의존성 추가
기존 waypoint_follower_demo/package.xml에 다음 의존성을 추가합니다.
<exec_depend>robot_audio_interfaces</exec_depend>전체 예시는 다음과 같습니다.
<package format="3">
  <name>waypoint_follower_demo</name>
  <version>0.0.1</version>
  <description>Simple waypoint follower with audio output</description>

  <maintainer email="user@example.com">user</maintainer>
  <license>Apache-2.0</license>

  <depend>rclpy</depend>
  <depend>geometry_msgs</depend>
  <depend>nav2_simple_commander</depend>
  <depend>PyYAML</depend>
  <depend>robot_audio_interfaces</depend>

  <export>
    <build_type>ament_python</build_type>
  </export>
</package>
그리고 setup.py에 실행 파일이 등록되어 있어야 합니다.
entry_points={
    'console_scripts': [
        'simple_waypoint_follower = tb3_waypoint_nav.simple_waypoint_follower:main',
    ],
},
13. 빌드하기
작업 공간 루트로 이동합니다.
cd ~/turtlebot3_ws빌드합니다.
colcon build --symlink-install
source install/setup.bash
14. 실행 순서
실제 시스템에서는 터틀봇3와 원격 PC가 같은 ROS 2 네트워크에 있어야 합니다.
일반적인 실행 구조는 다음과 같습니다.
| 장치 | 실행 노드 |
| 터틀봇3 | robot_audio_output audio_output_node |
| 원격 PC | waypoint_follower_demo simple_waypoint_follower |
1) 터틀봇3에서 음성 출력 노드 실행
터틀봇3 터미널에서 실행합니다.
source ~/ros2_ws/install/setup.bash
ros2 run robot_audio_output audio_output_node
정상 실행되면 다음과 비슷한 로그가 출력됩니다.
Audio output node started
Subscribe topic: /audio/command
Sound directory: /home/sjyong/ros2_ws/install/robot_audio_output/share/robot_audio_output/sounds
2) 원격 PC에서 경유점 주행 노드 실행
원격 PC 터미널에서 실행합니다.
source ~/ros2_ws/install/setup.bash
ros2 run waypoint_follower_demo simple_waypoint_follower
경유점 주행이 시작되면 원격 PC의 노드가 /audio/command 토픽을 발행하고, 터틀봇3의 스피커에서 음성이 출력됩니다.
15. 수동 테스트(정리)
주행 노드를 실행하기 전에 음성 출력 노드만 먼저 테스트하는 것이 좋습니다.
1) 음성 출력 테스트
ros2 topic pub --once /audio/command robot_audio_interfaces/msg/AudioCommand \
"{type: 0, text: '음성 출력 테스트입니다', sound_id: '', volume: 1.0, repeat: 1}"
스피커에서 “음성 출력 테스트입니다”가 출력되어야 합니다.
2) 효과음 출력 테스트
ros2 topic pub --once /audio/command robot_audio_interfaces/msg/AudioCommand \
"{type: 1, text: '', sound_id: 'start', volume: 1.0, repeat: 1}"
sounds/start.wav 파일이 재생되어야 합니다.
3) 음성 + 효과음 출력 테스트
ros2 topic pub --once /audio/command robot_audio_interfaces/msg/AudioCommand \
"{type: 2, text: '경유점에 도착했습니다', sound_id: 'waypoint', volume: 1.0, repeat: 1}"waypoint.wav가 먼저 재생되고, 이어서 음성이 출력됩니다.
4) 정지 명령 테스트
ros2 topic pub --once /audio/command robot_audio_interfaces/msg/AudioCommand \
"{type: 3, text: '', sound_id: '', volume: 1.0, repeat: 1}"
현재 재생 중인 TTS 또는 효과음이 중지됩니다.
16. 음성출력 응용(팀별 작업)
이번 구조는 단순하지만 확장성이 좋습니다.
예를 들어 다음 기능을 추가할 수 있습니다.
1) 배터리 상태 음성 안내
배터리가 부족할 때 다음과 같이 출력할 수 있습니다.
self.speak_with_effect('배터리가 부족합니다. 충전이 필요합니다', 'warning')배터리 상태 인터페이스를 추가합니다.
from sensor_msgs.msg import BatteryState배터리 토픽을 구독하는 코드를 init에 추가합니다.
self.create_subscription(
            BatteryState,
            "/battery_state",
            self.battery_state_callback,
            10
        )
필요한 변수를 추가합니다.
        self.bat_soc = 0.0
        self.voltage = 0.0
        self.current_time = 0
        self.prev_time = 0
배터리 구독 콜백함수를 작성합니다.
def battery_state_callback(self, msg):
        self.bat_soc = msg.percentage
        self.voltage = msg.voltage
ROS를 호출하는 spin() 함수를 반목문 시작 위치에서 실행합니다.
rclpy.spin_once(self, timeout_sec=0.0)30초마다 배터리 잔량을 TTS로 출력하는 소스를 추가합니다.
   self.prev_time = time.time()


            self.current_time = time.time()
            if self.current_time - self.prev_time > 30.0:
                batinfo_msg = f'배터리 전압은 {int(self.voltage)}볼트이고, 충전량은 {int(self.bat_soc)} 퍼센트 입니다'
                #batinfo_msg = f'배터리 충전량은 {int(self.bat_soc)} 퍼센트 입니다'
                self.get_logger().info(batinfo_msg)
                self.speak(batinfo_msg)
                self.prev_time = self.current_time
2) 장애물 감지 안내
장애물 감지 노드에서 /audio/command 토픽을 발행하면 됩니다.
self.speak('전방에 장애물이 있습니다')3) 경유점 도착 효과음
현재 예제는 “몇 번째 경유점으로 이동 중”이라는 안내를 출력합니다.
추가로 경유점 도착 시점에 waypoint.mp3 효과음을 출력하도록 확장할 수 있습니다.