1. 강의 목표
이번 실습에서는 모바일로봇 주행 알고리즘을 테스트하기 위한 3가지 Gazebo World를 직접 만듭니다.
- 장애물 World
랜덤 또는 규칙적인 장애물 배치를 통해 LiDAR 감지, 회피, local planner 테스트에 사용합니다. - Corridor World
좁은 복도, ㄱ자 코너, 병목 구간을 만들어 벽 추종, 경로 추종, AMCL/Nav2 테스트에 사용합니다. - Warehouse World
선반, 통로, 적재 구역을 배치해 물류형 AMR, AGV, 모바일로봇 경로계획 실습에 사용합니다.
2. Gazebo World 제작 기본 개념
Gazebo World는 크게 다음 요소로 구성됩니다.
world
 ├── light         : 조명
 ├── physics       : 물리 엔진 설정
 ├── scene         : 배경과 렌더링 환경
 ├── model         : 벽, 장애물, 선반, 바닥
 │    └── link
 │         ├── visual     : 화면에 보이는 형상
 │         └── collision  : 실제 충돌 판정 형상
 └── plugin        : Gazebo 시스템 플러그인
SDF에서 <visual>은 화면에 표시되는 형상이고, <collision>은 물리 충돌에 사용되는 형상입니다.
두 형상을 동일하게 만들 수도 있지만, 복잡한 mesh 모델에서는 충돌 계산량을 줄이기 위해 단순한 box 형태의 collision을 사용하는 것이 일반적입니다.
이번 실습에서는 이해하기 쉽도록 모든 구조물을 box geometry로 제작합니다.
벽, 장애물, 선반, 기둥을 모두 직육면체로 표현하기 때문에 별도의 mesh 파일 없이 바로 실행할 수 있고 충돌 판정도 단순합니다.
3. ROS 2 Humble과 Gazebo Fortress 실습 환경
1) 실습 기준
이 강의는 다음 환경을 기준으로 합니다.
OS             : Ubuntu 22.04 LTS
ROS 2          : Humble Hawksbill
Simulator      : Gazebo Fortress
Simulator 종류 : Gazebo Sim
직접 실행      : ign gazebo
ROS 2 실행     : ros2 launch ros_gz_sim gz_sim.launch.py
Bridge         : ros_gz_bridge
ROS 2 Humble과 Gazebo Fortress는 공식적으로 조합된 환경입니다. 공식 Gazebo 문서에서도 Humble과 Fortress를 권장 조합으로 분류하며, 기본 ros_gz 패키지를 설치하면 Humble에 맞는 Gazebo 라이브러리가 설치된다고 설명합니다.
Gazebo Fortress는 예전 명칭인 Ignition Gazebo 시기에 출시되었기 때문에 다음 명령을 사용합니다.
ign gazeboGarden 이후의 Gazebo에서는 다음 명령을 사용합니다.
gz sim두 명령은 서로 다른 세대의 Gazebo Sim 명령 체계입니다.
2) Gazebo Fortress와 ros_gz 설치
ROS 2 Humble이 설치되어 있다는 것을 전제로 합니다.
먼저 ROS 2 환경을 불러옵니다.
source /opt/ros/humble/setup.bashGazebo Fortress와 ROS 2 연동 패키지를 설치합니다. 이미 설치되어 있으면 아래의 과정을 생략합니다.
sudo apt update
sudo apt install -y ros-humble-ros-gz
공식 Gazebo 설치 문서에서도 ROS 배포판에 맞는 기본 Gazebo 조합을 설치할 때 다음 형식의 패키지를 사용하도록 안내합니다. Humble에서는 ros-humble-ros-gz가 해당 패키지입니다.
설치되는 주요 패키지는 다음과 같습니다.
ros_gz_sim
ros_gz_bridge
ros_gz_image
ros_gz_interfaces
3) 설치 확인
ROS 2 환경을 불러옵니다.
source /opt/ros/humble/setup.bashGazebo Fortress 버전을 확인합니다.
ign gazebo --versions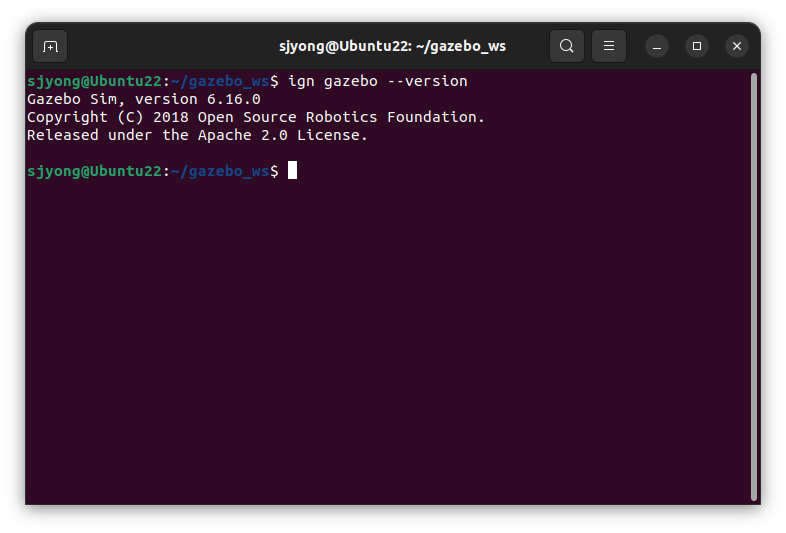
ROS 2 연동 패키지를 확인합니다.
ros2 pkg list | grep ros_gz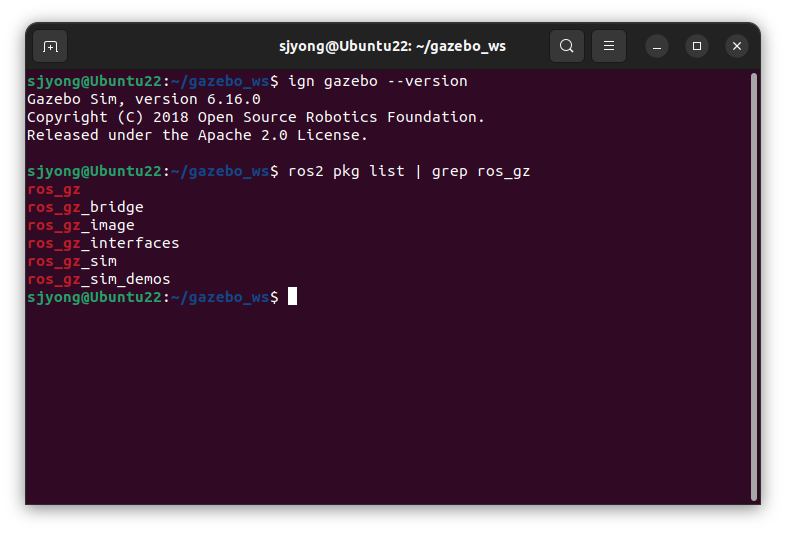
다음 패키지가 검색되면 정상입니다.
ros_gz
ros_gz_bridge
ros_gz_image
ros_gz_interfaces
ros_gz_sim
4) Gazebo Sim 단독 실행 확인
Gazebo Fortress의 기본 예제 World를 실행합니다.
ign gazebo -r -v 4 shapes.sdf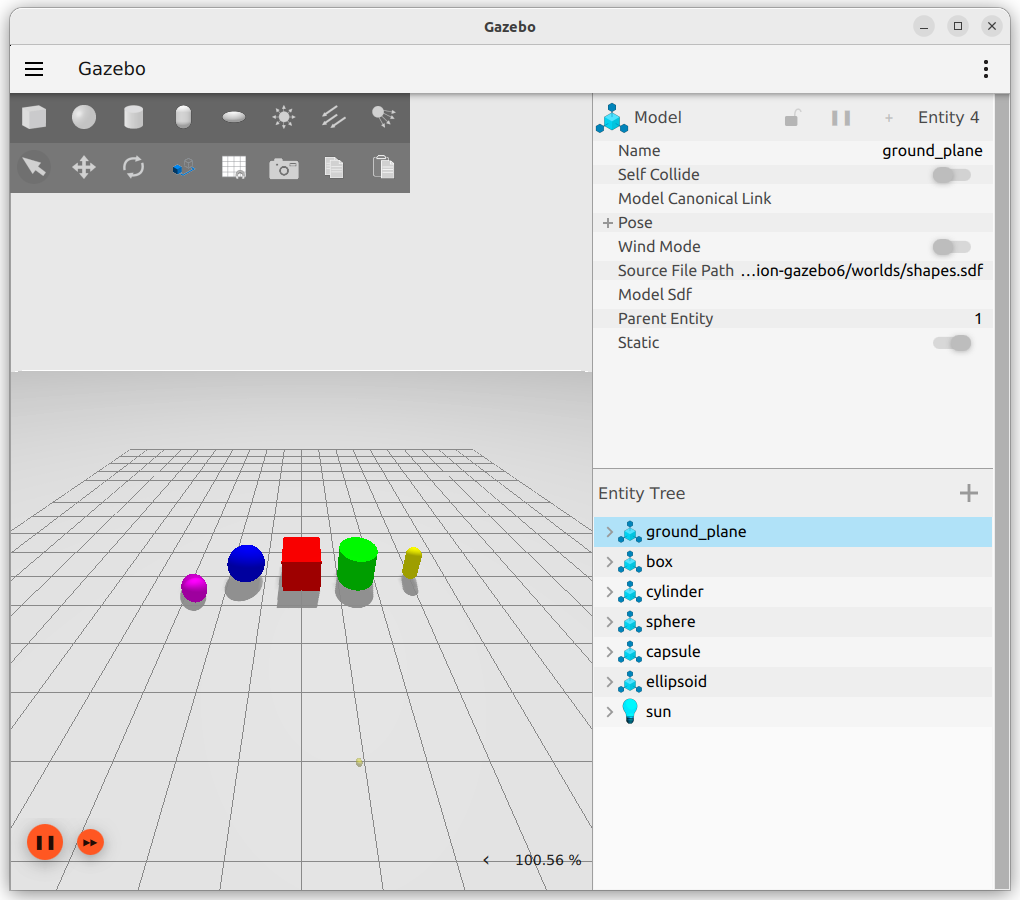
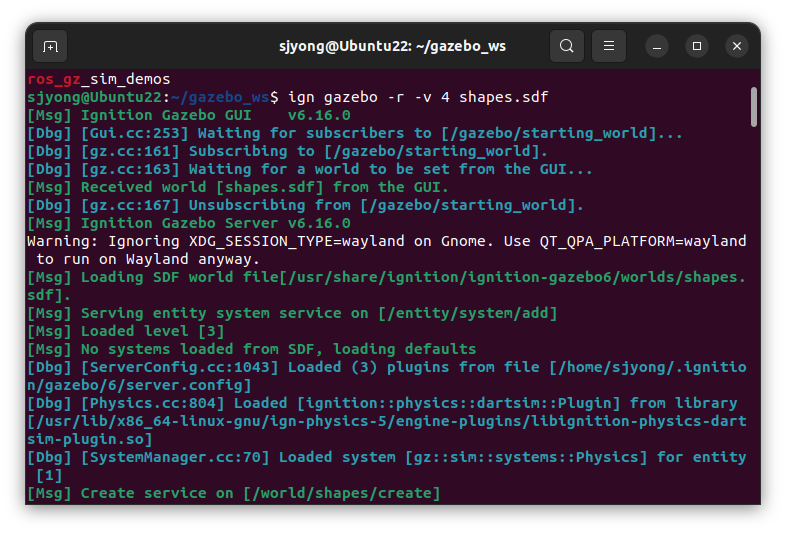
옵션의 의미는 다음과 같습니다.
-r    : 시뮬레이션을 실행 상태로 시작
-v 4  : 상세 로그 출력
명령 이름은 ign gazebo이지만 실행되는 시뮬레이터는 Gazebo Sim입니다. Fortress 공식 문서의 실행 예제도 ign gazebo 명령을 사용합니다.
5) ROS 2 launch로 Gazebo Sim 실행 확인
ROS 2에서는 ros_gz_sim 패키지가 제공하는 launch 파일을 사용할 수 있습니다.
source /opt/ros/humble/setup.bash

ros2 launch ros_gz_sim gz_sim.launch.py \
gz_args:="-r -v 4 shapes.sdf"gz_sim.launch.py라는 파일 이름 때문에 gz sim 명령이 실행된다고 오해하면 안 됩니다.
Gazebo Fortress에서는 이 launch 파일이 내부적으로 ign gazebo에 인수를 전달합니다. 공식 마이그레이션 문서에서도 gz_args가 Fortress에서는 ign gazebo로 전달된다고 설명합니다.
6) ROS 2와 Gazebo 연결 확인
Gazebo Transport 토픽과 ROS 2 토픽은 ros_gz_bridge를 통해 연결합니다.
먼저 터미널 1에서 Gazebo Sim을 실행합니다.
source /opt/ros/humble/setup.bash

ros2 launch ros_gz_sim gz_sim.launch.py \
  gz_args:="-r -v 4 shapes.sdf"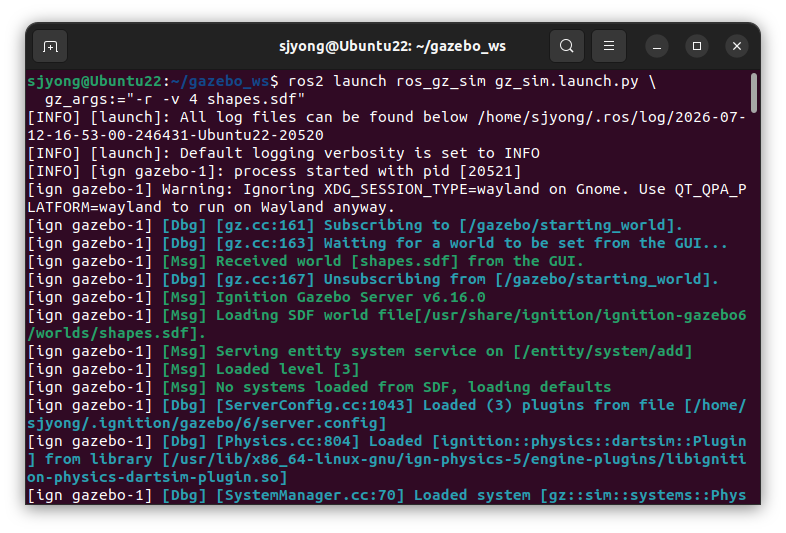
터미널 2에서 /clock 브리지를 실행합니다.
source /opt/ros/humble/setup.bash

ros2 run ros_gz_bridge parameter_bridge \
  '/clock@rosgraph_msgs/msg/Clock[ignition.msgs.Clock'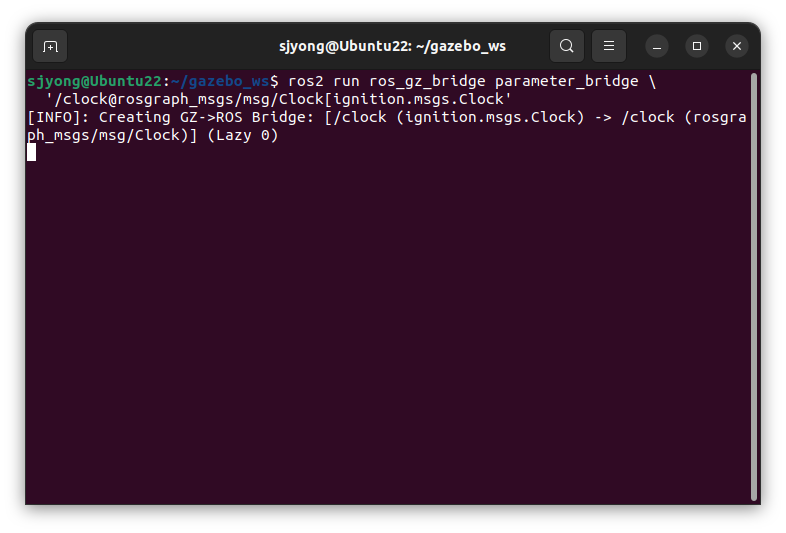
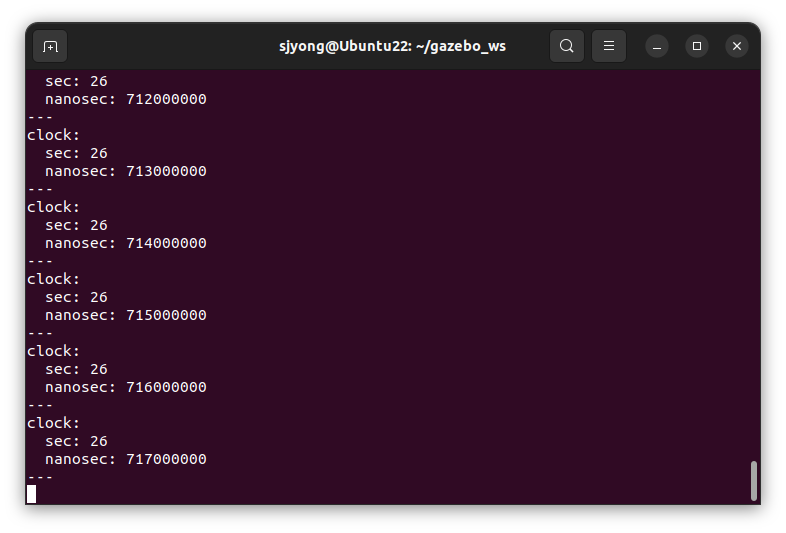
터미널 3에서 ROS 2 토픽을 확인합니다.
source /opt/ros/humble/setup.bash

ros2 topic echo /clock
브리지 표현에서 [ 기호는 Gazebo에서 ROS 2 방향으로 메시지를 전달한다는 의미입니다.
4. ROS 2 패키지 만들기
월드 파일을 저장할 ROS 2 패키지를 만듭니다.
cd ~/gazebo_ws/src

ros2 pkg create mobile_robot_worlds --build-type ament_cmake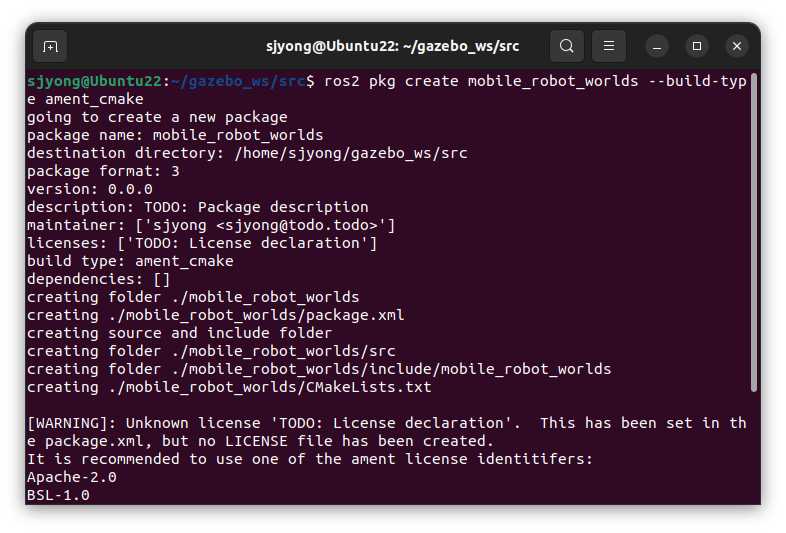
패키지 내부에 worlds와 launch 폴더를 만듭니다.
cd ~/gazebo_ws/src/mobile_robot_worlds

mkdir -p worlds launch
최종 폴더 구조는 다음과 같습니다.
mobile_robot_worlds/
 ├── CMakeLists.txt
 ├── package.xml
 ├── launch/
 │    └── gz_world.launch.py
 └── worlds/
      ├── obstacle_world.sdf
      ├── corridor_world.sdf
      └── warehouse_world.sdf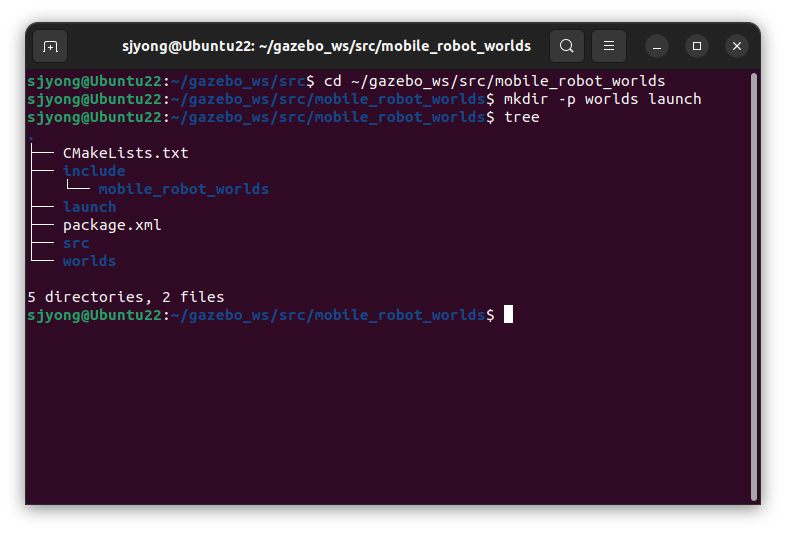
5. CMakeLists.txt 수정
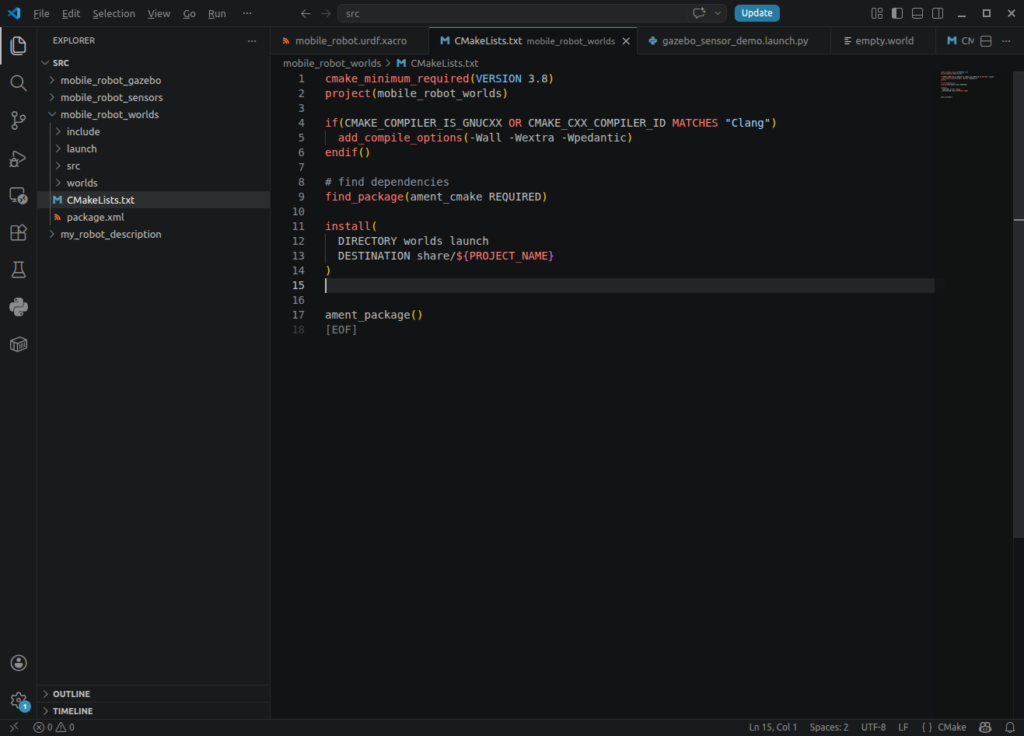
CMakeLists.txt 파일을 다음과 같이 작성합니다.
cmake_minimum_required(VERSION 3.8)
project(mobile_robot_worlds)

find_package(ament_cmake REQUIRED)

install(
  DIRECTORY worlds launch
  DESTINATION share/${PROJECT_NAME}
)

ament_package()
install() 항목이 없으면 빌드 후 install 경로에 worlds와 launch 폴더가 복사되지 않습니다.
6. package.xml 수정
package.xml 파일을 다음과 같이 작성합니다.
<?xml version="1.0"?>
<package format="3">
  <name>mobile_robot_worlds</name>
  <version>0.0.1</version>

  <description>
    Gazebo Fortress worlds for ROS 2 Humble mobile robot lecture
  </description>

  <maintainer email="user@example.com">user</maintainer>
  <license>Apache-2.0</license>

  <buildtool_depend>ament_cmake</buildtool_depend>

  <exec_depend>launch</exec_depend>
  <exec_depend>launch_ros</exec_depend>
  <exec_depend>ros_gz_sim</exec_depend>
  <exec_depend>ros_gz_bridge</exec_depend>

  <export>
    <build_type>ament_cmake</build_type>
  </export>
</package>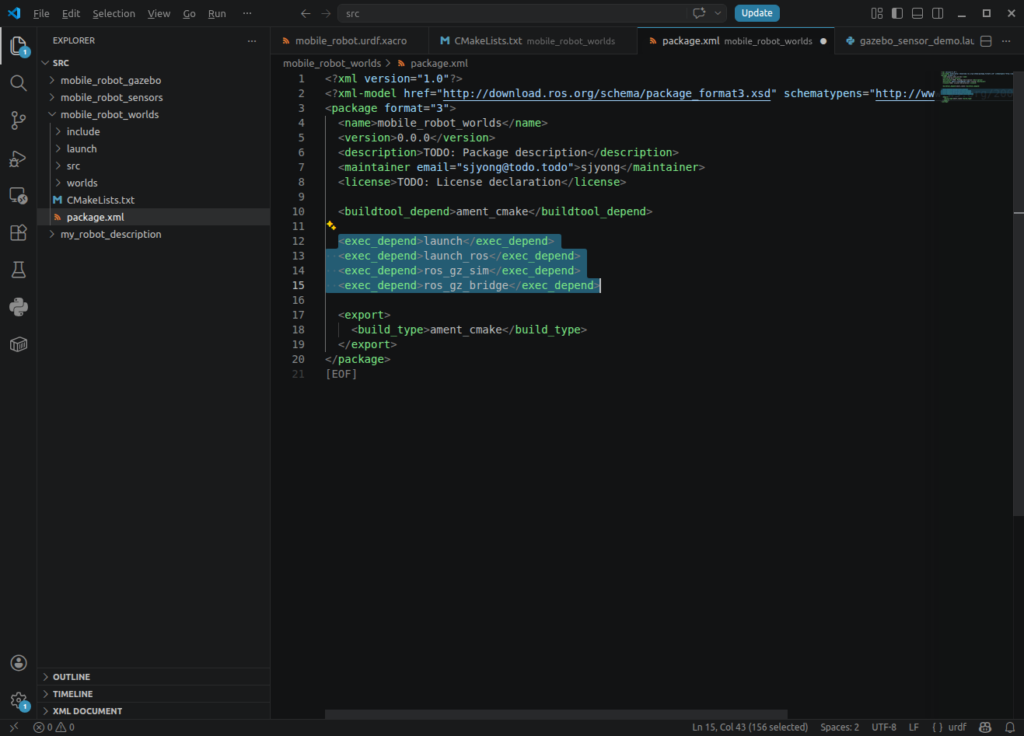
다음 항목이 빠지면 ROS 2가 패키지의 빌드 형식을 정상적으로 인식하지 못할 수 있습니다.
<export>
  <build_type>ament_cmake</build_type>
</export>
7. Gazebo Sim을 실행하는 공통 Launch 파일 만들기
launch/gz_world.launch.py 파일을 만듭니다.
touch launch/gz_world.launch.py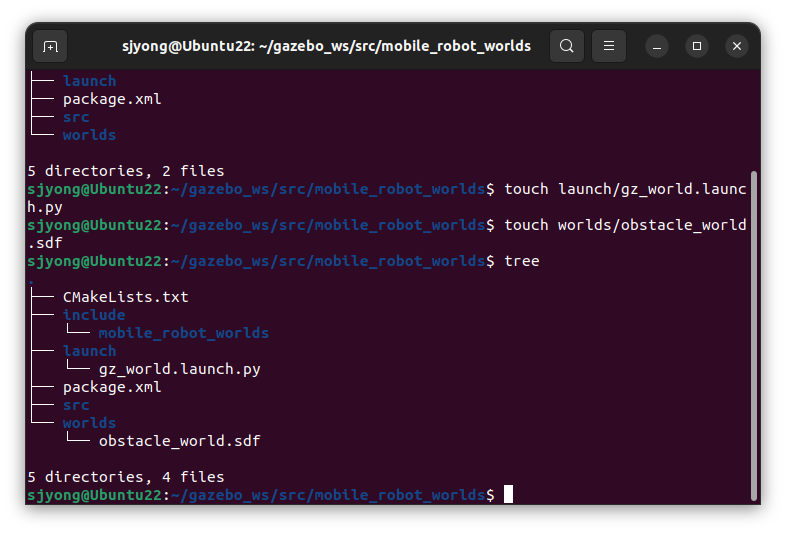
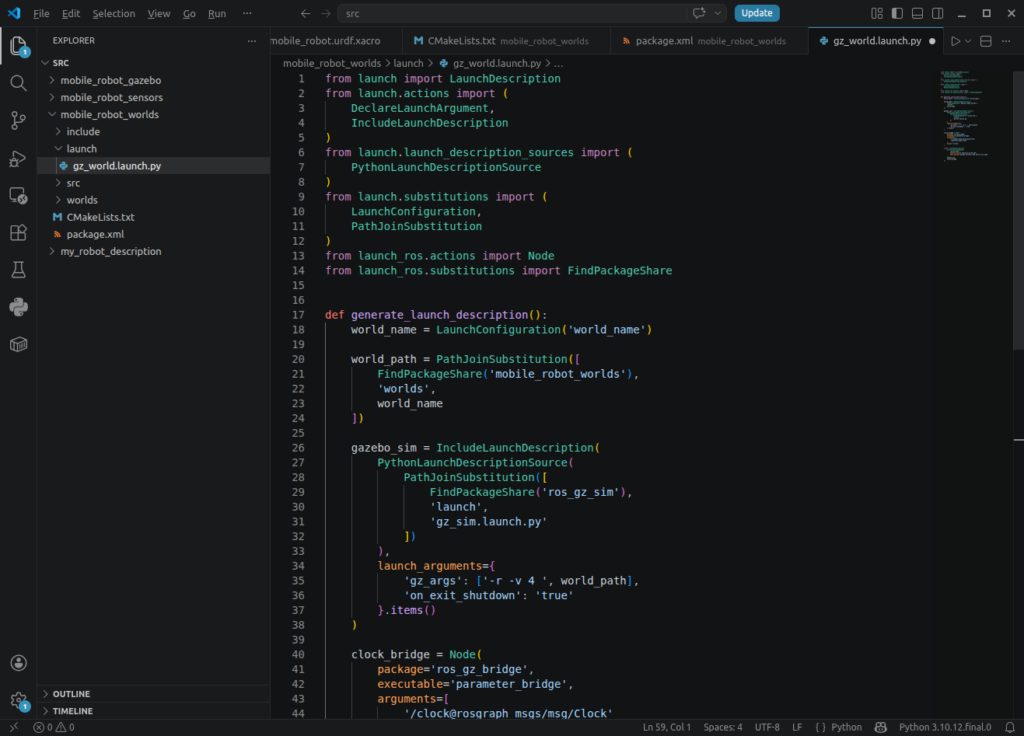
이 launch 파일은 ros_gz_sim의 gz_sim.launch.py를 포함하고 /clock 브리지도 함께 실행합니다.
from launch import LaunchDescription
from launch.actions import (
    DeclareLaunchArgument,
    IncludeLaunchDescription
)
from launch.launch_description_sources import (
    PythonLaunchDescriptionSource
)
from launch.substitutions import (
    LaunchConfiguration,
    PathJoinSubstitution
)
from launch_ros.actions import Node
from launch_ros.substitutions import FindPackageShare


def generate_launch_description():
    world_name = LaunchConfiguration('world_name')

    world_path = PathJoinSubstitution([
        FindPackageShare('mobile_robot_worlds'),
        'worlds',
        world_name
    ])

    gazebo_sim = IncludeLaunchDescription(
        PythonLaunchDescriptionSource(
            PathJoinSubstitution([
                FindPackageShare('ros_gz_sim'),
                'launch',
                'gz_sim.launch.py'
            ])
        ),
        launch_arguments={
            'gz_args': ['-r -v 4 ', world_path],
            'on_exit_shutdown': 'true'
        }.items()
    )

    clock_bridge = Node(
        package='ros_gz_bridge',
        executable='parameter_bridge',
        arguments=[
            '/clock@rosgraph_msgs/msg/Clock'
            '[ignition.msgs.Clock'
        ],
        output='screen'
    )

    return LaunchDescription([
        DeclareLaunchArgument(
            'world_name',
            default_value='obstacle_world.sdf',
            description='Gazebo Fortress SDF world file name'
        ),
        gazebo_sim,
        clock_bridge
    ])
1) Launch 관련 모듈 불러오기
from launch import LaunchDescription
from launch.actions import (
    DeclareLaunchArgument,
    IncludeLaunchDescription
)DeclareLaunchArgument는 사용자가 실행 명령에서 값을 전달할 수 있도록 Launch 인자를 선언합니다.
IncludeLaunchDescription은 다른 Python Launch 파일을 현재 Launch 파일에 포함할 때 사용합니다.
from launch.launch_description_sources import (
    PythonLaunchDescriptionSource
)PythonLaunchDescriptionSource는 Python으로 작성된 다른 Launch 파일을 불러오는 데 사용합니다.
from launch.substitutions import (
    LaunchConfiguration,
    PathJoinSubstitution
)LaunchConfiguration은 Launch 인자로 전달된 값을 실행 시점에 가져옵니다.
PathJoinSubstitution은 패키지 경로, 폴더 이름, 파일 이름을 안전하게 결합해 전체 경로를 만듭니다.
from launch_ros.actions import Node
from launch_ros.substitutions import FindPackageShareNode는 ROS 2 노드를 실행합니다.
FindPackageShare는 설치된 ROS 2 패키지의 share 디렉터리 경로를 찾습니다.
2) 월드 파일 이름 가져오기
world_name = LaunchConfiguration('world_name')world_name은 Launch 실행 시 전달되는 월드 파일 이름입니다.
기본값은 코드 아래쪽에서 다음과 같이 설정됩니다.
default_value='obstacle_world.sdf'따라서 별도의 인자를 지정하지 않으면 obstacle_world.sdf 파일이 실행됩니다.
3) 월드 파일 경로 생성
world_path = PathJoinSubstitution([
    FindPackageShare('mobile_robot_worlds'),
    'worlds',
    world_name
])
이 코드는 mobile_robot_worlds 패키지 안에 있는 월드 파일의 전체 경로를 생성합니다.
패키지 구조는 다음과 같은 형태를 가정합니다.
mobile_robot_worlds/
├── launch/
│   └── gazebo_world.launch.py
├── worlds/
│   └── obstacle_world.sdf
├── CMakeLists.txt
└── package.xml
최종적으로 생성되는 경로는 다음과 비슷합니다.
install/mobile_robot_worlds/share/mobile_robot_worlds/worlds/obstacle_world.sdf절대 경로를 직접 작성하지 않기 때문에 다른 컴퓨터나 ROS 2 작업공간에서도 재사용하기 쉽습니다.
4) Gazebo Sim 실행
gazebo_sim = IncludeLaunchDescription(
    PythonLaunchDescriptionSource(
        PathJoinSubstitution([
            FindPackageShare('ros_gz_sim'),
            'launch',
            'gz_sim.launch.py'
        ])
    ),
    launch_arguments={
        'gz_args': ['-r -v 4 ', world_path],
        'on_exit_shutdown': 'true'
    }.items()
)
ros_gz_sim 패키지에 포함된 gz_sim.launch.py를 실행합니다.
이 Launch 파일은 Gazebo Sim 서버와 GUI를 시작하는 역할을 합니다.
5) Gazebo 실행 인자
'gz_args': ['-r -v 4 ', world_path]Gazebo Sim에 전달되는 실행 옵션입니다.
-r 옵션은 시뮬레이션을 일시 정지 상태가 아닌 실행 상태로 시작합니다.
-v 4는 Gazebo의 로그 출력 수준을 높여 상세 정보를 터미널에 출력합니다.
마지막의 world_path는 실행할 SDF 월드 파일 경로입니다.
실제로는 다음과 비슷한 명령이 실행됩니다.
gz sim -r -v 4 obstacle_world.sdf6) Gazebo 종료 시 Launch 종료
'on_exit_shutdown': 'true'Gazebo Sim 창이나 프로세스가 종료되면 전체 ROS 2 Launch 시스템도 함께 종료되도록 설정합니다.
이 옵션이 없으면 Gazebo를 종료한 뒤에도 Clock Bridge 같은 일부 노드가 계속 실행될 수 있습니다.
7) Gazebo 시간과 ROS 2 시간 연결
clock_bridge = Node(
    package='ros_gz_bridge',
    executable='parameter_bridge',
    arguments=[
        '/clock@rosgraph_msgs/msg/Clock'
        '[ignition.msgs.Clock'
    ],
    output='screen'
)
ros_gz_bridge 패키지의 parameter_bridge 노드를 실행해 Gazebo 메시지와 ROS 2 메시지를 변환합니다.
여기서는 Gazebo의 시뮬레이션 시간을 ROS 2의 /clock 토픽으로 전달합니다.
Gazebo Clock
      ↓
ros_gz_bridge
      ↓
ROS 2 /clock
ROS 2 메시지 형식은 다음과 같습니다.
rosgraph_msgs/msg/ClockGazebo Fortress 환경에서는 Gazebo 메시지 형식으로 다음 타입을 사용합니다.
ignition.msgs.ClockPython에서는 서로 붙어 있는 문자열 리터럴이 자동으로 하나로 합쳐집니다.
따라서 다음 두 문자열은:
'/clock@rosgraph_msgs/msg/Clock'
'[ignition.msgs.Clock'
실제로 하나의 인자로 처리됩니다.
/clock@rosgraph_msgs/msg/Clock[ignition.msgs.Clock[ 기호는 Gazebo에서 ROS 2 방향으로 단방향 브리지를 구성한다는 의미입니다.
즉, Gazebo가 생성한 시간을 ROS 2가 받아 사용하는 구조입니다.
8) Clock Bridge가 필요한 이유
Gazebo 시뮬레이션에서는 컴퓨터의 실제 시간 대신 시뮬레이션 시간을 사용하는 경우가 많습니다.
ROS 2 노드에서 다음 파라미터를 설정하면 /clock 토픽을 기준으로 동작합니다.
{'use_sim_time': True}예를 들어 robot_state_publisher, RViz2, Nav2, SLAM 노드에서 시뮬레이션 시간을 사용하려면 Clock Bridge가 필요합니다.
Clock Bridge가 정상적으로 동작하는지는 다음 명령으로 확인할 수 있습니다.
ros2 topic echo /clock토픽 발행 주기는 다음 명령으로 확인할 수 있습니다.
ros2 topic hz /clock9) Launch 인자 선언
DeclareLaunchArgument(
    'world_name',
    default_value='obstacle_world.sdf',
    description='Gazebo Fortress SDF world file name'
)world_name이라는 Launch 인자를 선언합니다.
기본값은 obstacle_world.sdf이며, 사용자가 실행 명령에서 다른 파일 이름을 전달할 수 있습니다.
기본 월드를 실행하려면 다음 명령을 사용합니다.
ros2 launch mobile_robot_worlds gazebo_world.launch.py다른 월드 파일을 실행하려면 다음과 같이 인자를 전달합니다.
ros2 launch mobile_robot_worlds gazebo_world.launch.py \
world_name:=empty_world.sdf
지정한 파일은 반드시 다음 폴더 안에 존재해야 합니다.
mobile_robot_worlds/worlds/10) LaunchDescription 구성
return LaunchDescription([
    DeclareLaunchArgument(
        'world_name',
        default_value='obstacle_world.sdf',
        description='Gazebo Fortress SDF world file name'
    ),
    gazebo_sim,
    clock_bridge
])
최종적으로 세 가지 항목을 Launch 시스템에 등록합니다.
첫 번째는 world_name Launch 인자 선언입니다.
두 번째는 Gazebo Sim 실행입니다.
세 번째는 /clock 토픽을 위한 ROS-Gazebo Bridge 실행입니다.
빌드 후 다음 명령으로 실행합니다.
cd ~/gazebo_ws

source /opt/ros/humble/setup.bash
source install/setup.bash

ros2 launch mobile_robot_worlds gz_world.launch.py \
  world_name:=obstacle_world.sdf
Gazebo Fortress를 직접 실행하려면 다음 명령을 사용합니다.
ign gazebo -r -v 4 \
  $(ros2 pkg prefix --share mobile_robot_worlds)/worlds/obstacle_world.sdf
8. SDF 기본 템플릿
세 개의 World는 다음 구조를 기본으로 사용합니다.
<?xml version="1.0" ?>
<sdf version="1.9">
  <world name="mobile_robot_world">

    <plugin
      filename="ignition-gazebo-physics-system"
      name="ignition::gazebo::systems::Physics"/>

    <plugin
      filename="ignition-gazebo-user-commands-system"
      name="ignition::gazebo::systems::UserCommands"/>

    <plugin
      filename="ignition-gazebo-scene-broadcaster-system"
      name="ignition::gazebo::systems::SceneBroadcaster"/>

    <plugin
      filename="ignition-gazebo-sensors-system"
      name="ignition::gazebo::systems::Sensors">
      <render_engine>ogre2</render_engine>
    </plugin>

    <light type="directional" name="sun">
      <cast_shadows>true</cast_shadows>
      <pose>0 0 10 0 0 0</pose>
      <diffuse>0.8 0.8 0.8 1</diffuse>
      <specular>0.2 0.2 0.2 1</specular>
      <direction>-0.5 0.1 -0.9</direction>
    </light>

    <model name="ground_plane">
      <static>true</static>

      <link name="link">
        <collision name="collision">
          <geometry>
            <plane>
              <normal>0 0 1</normal>
              <size>40 40</size>
            </plane>
          </geometry>
        </collision>

        <visual name="visual">
          <geometry>
            <plane>
              <normal>0 0 1</normal>
              <size>40 40</size>
            </plane>
          </geometry>

          <material>
            <ambient>0.55 0.55 0.55 1</ambient>
            <diffuse>0.55 0.55 0.55 1</diffuse>
          </material>
        </visual>
      </link>
    </model>

  </world>
</sdf>
핵심 요소는 다음과 같습니다.
<static>true</static> : 움직이지 않는 구조물
<visual>              : 화면에 보이는 형상
<collision> : 물리 충돌 판정 형상<visual>만 있고 <collision>이 없으면 벽이나 장애물은 화면에 보이지만 로봇이 통과할 수 있습니다.
9. 장애물 World 제작
1) 장애물 World의 목적
장애물 World는 다음 실습에 적합합니다.
LiDAR 감지 확인
장애물 회피 알고리즘 테스트
Nav2 local planner 테스트
costmap inflation 확인
로봇 반경과 장애물 간격의 관계 이해
모바일로봇은 실제 환경에서 책상 다리, 박스, 기둥, 사람, 벽 모서리와 같은 다양한 장애물을 만납니다.
따라서 단순한 평지보다 장애물이 포함된 환경에서 테스트해야 합니다.
2) 장애물 배치 설계
이번 예제는 다음과 같이 구성합니다.
전체 크기 : 20m × 20m
바닥      : 40m × 40m
장애물    : box 8개
외곽 벽   : 4개
상단 구조는 다음과 같습니다.
+--------------------------------+
|                                |
|    [ ]        [ ]       [ ]    |
|                                |
|         [ ]          [ ]       |
|                                |
| [ ]              [ ]           |
|                                |
|        [ ]              [ ]    |
|                                |
+--------------------------------+
3) obstacle_world.sdf
worlds/obstacle_world.sdf 파일을 만듭니다.
touch worlds/obstacle_world.sdf <?xml version="1.0" ?>
<sdf version="1.9">
<world name="obstacle_world">
<plugin
filename="ignition-gazebo-physics-system"
name="ignition::gazebo::systems::Physics"/>
<plugin
filename="ignition-gazebo-user-commands-system"
name="ignition::gazebo::systems::UserCommands"/>
<plugin
filename="ignition-gazebo-scene-broadcaster-system"
name="ignition::gazebo::systems::SceneBroadcaster"/>
<plugin
filename="ignition-gazebo-sensors-system"
name="ignition::gazebo::systems::Sensors">
<render_engine>ogre2</render_engine>
</plugin>
<light type="directional" name="sun">
<cast_shadows>true</cast_shadows>
<pose>0 0 10 0 0 0</pose>
<diffuse>0.8 0.8 0.8 1</diffuse>
<specular>0.2 0.2 0.2 1</specular>
<direction>-0.5 0.1 -0.9</direction>
</light>
<model name="ground_plane">
<static>true</static>
<link name="link">
<collision name="collision">
<geometry>
<plane>
<normal>0 0 1</normal>
<size>40 40</size>
</plane>
</geometry>
</collision>
<visual name="visual">
<geometry>
<plane>
<normal>0 0 1</normal>
<size>40 40</size>
</plane>
</geometry>
<material>
<ambient>0.55 0.55 0.55 1</ambient>
<diffuse>0.55 0.55 0.55 1</diffuse>
</material>
</visual>
</link>
</model>
<model name="wall_north">
<static>true</static>
<pose>0 10 1 0 0 0</pose>
<link name="link">
<collision name="collision">
<geometry>
<box><size>20 0.2 2</size></box>
</geometry>
</collision>
<visual name="visual">
<geometry>
<box><size>20 0.2 2</size></box>
</geometry>
<material>
<diffuse>0.8 0.8 0.8 1</diffuse>
</material>
</visual>
</link>
</model>
<model name="wall_south">
<static>true</static>
<pose>0 -10 1 0 0 0</pose>
<link name="link">
<collision name="collision">
<geometry>
<box><size>20 0.2 2</size></box>
</geometry>
</collision>
<visual name="visual">
<geometry>
<box><size>20 0.2 2</size></box>
</geometry>
<material>
<diffuse>0.8 0.8 0.8 1</diffuse>
</material>
</visual>
</link>
</model>
<model name="wall_east">
<static>true</static>
<pose>10 0 1 0 0 0</pose>
<link name="link">
<collision name="collision">
<geometry>
<box><size>0.2 20 2</size></box>
</geometry>
</collision>
<visual name="visual">
<geometry>
<box><size>0.2 20 2</size></box>
</geometry>
<material>
<diffuse>0.8 0.8 0.8 1</diffuse>
</material>
</visual>
</link>
</model>
<model name="wall_west">
<static>true</static>
<pose>-10 0 1 0 0 0</pose>
<link name="link">
<collision name="collision">
<geometry>
<box><size>0.2 20 2</size></box>
</geometry>
</collision>
<visual name="visual">
<geometry>
<box><size>0.2 20 2</size></box>
</geometry>
<material>
<diffuse>0.8 0.8 0.8 1</diffuse>
</material>
</visual>
</link>
</model>
<model name="box_obstacle_01">
<static>true</static>
<pose>-6 5 0.5 0 0 0</pose>
<link name="link">
<collision name="collision">
<geometry>
<box><size>1.0 1.0 1.0</size></box>
</geometry>
</collision>
<visual name="visual">
<geometry>
<box><size>1.0 1.0 1.0</size></box>
</geometry>
<material>
<diffuse>0.8 0.2 0.2 1</diffuse>
</material>
</visual>
</link>
</model>
<model name="box_obstacle_02">
<static>true</static>
<pose>-1 6 0.5 0 0 0</pose>
<link name="link">
<collision name="collision">
<geometry>
<box><size>1.2 0.8 1.0</size></box>
</geometry>
</collision>
<visual name="visual">
<geometry>
<box><size>1.2 0.8 1.0</size></box>
</geometry>
<material>
<diffuse>0.2 0.4 0.8 1</diffuse>
</material>
</visual>
</link>
</model>
<model name="box_obstacle_03">
<static>true</static>
<pose>5 6 0.5 0 0 0</pose>
<link name="link">
<collision name="collision">
<geometry>
<box><size>1.0 1.5 1.0</size></box>
</geometry>
</collision>
<visual name="visual">
<geometry>
<box><size>1.0 1.5 1.0</size></box>
</geometry>
<material>
<diffuse>0.2 0.7 0.2 1</diffuse>
</material>
</visual>
</link>
</model>
<model name="box_obstacle_04">
<static>true</static>
<pose>-4 1.5 0.5 0 0 0</pose>
<link name="link">
<collision name="collision">
<geometry>
<box><size>1.5 1.0 1.0</size></box>
</geometry>
</collision>
<visual name="visual">
<geometry>
<box><size>1.5 1.0 1.0</size></box>
</geometry>
<material>
<diffuse>0.7 0.5 0.2 1</diffuse>
</material>
</visual>
</link>
</model>
<model name="box_obstacle_05">
<static>true</static>
<pose>3 2 0.5 0 0 0</pose>
<link name="link">
<collision name="collision">
<geometry>
<box><size>1.0 1.0 1.0</size></box>
</geometry>
</collision>
<visual name="visual">
<geometry>
<box><size>1.0 1.0 1.0</size></box>
</geometry>
<material>
<diffuse>0.6 0.2 0.8 1</diffuse>
</material>
</visual>
</link>
</model>
<model name="box_obstacle_06">
<static>true</static>
<pose>-7 -2 0.5 0 0 0</pose>
<link name="link">
<collision name="collision">
<geometry>
<box><size>1.0 1.4 1.0</size></box>
</geometry>
</collision>
<visual name="visual">
<geometry>
<box><size>1.0 1.4 1.0</size></box>
</geometry>
<material>
<diffuse>0.2 0.8 0.8 1</diffuse>
</material>
</visual>
</link>
</model>
<model name="box_obstacle_07">
<static>true</static>
<pose>1 -3 0.5 0 0 0</pose>
<link name="link">
<collision name="collision">
<geometry>
<box><size>1.3 1.3 1.0</size></box>
</geometry>
</collision>
<visual name="visual">
<geometry>
<box><size>1.3 1.3 1.0</size></box>
</geometry>
<material>
<diffuse>0.9 0.4 0.1 1</diffuse>
</material>
</visual>
</link>
</model>
<model name="box_obstacle_08">
<static>true</static>
<pose>6 -4 0.5 0 0 0</pose>
<link name="link">
<collision name="collision">
<geometry>
<box><size>1.0 1.0 1.0</size></box>
</geometry>
</collision>
<visual name="visual">
<geometry>
<box><size>1.0 1.0 1.0</size></box>
</geometry>
<material>
<diffuse>0.5 0.5 0.9 1</diffuse>
</material>
</visual>
</link>
</model>
</world>
</sdf>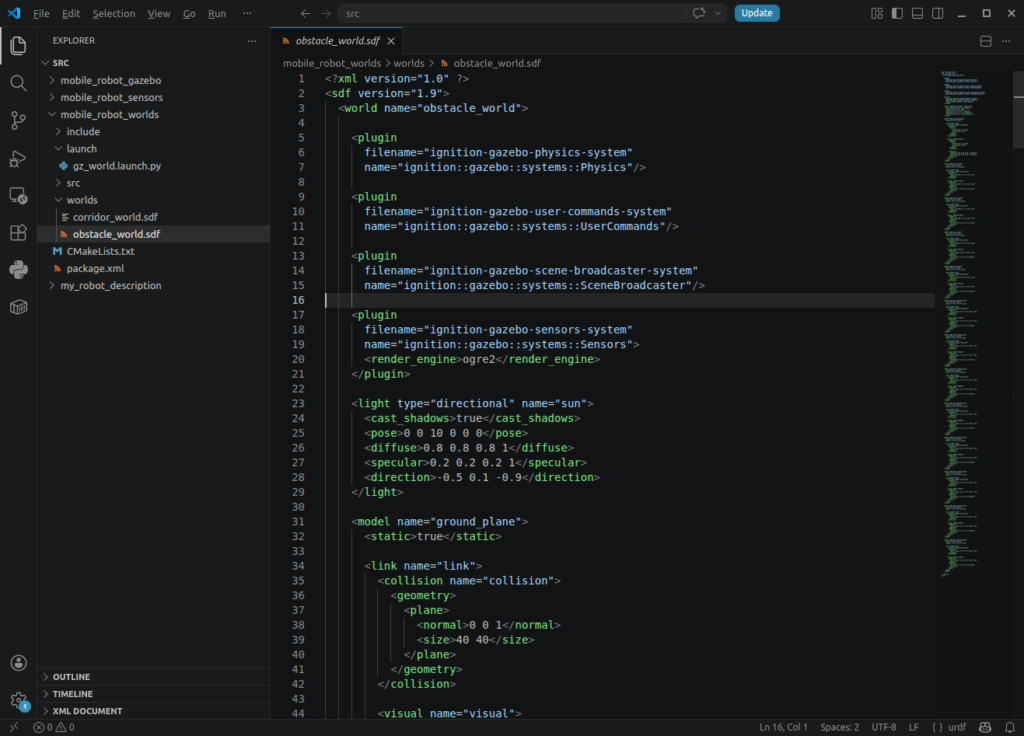
4) 소스 설명
전체 World 구성
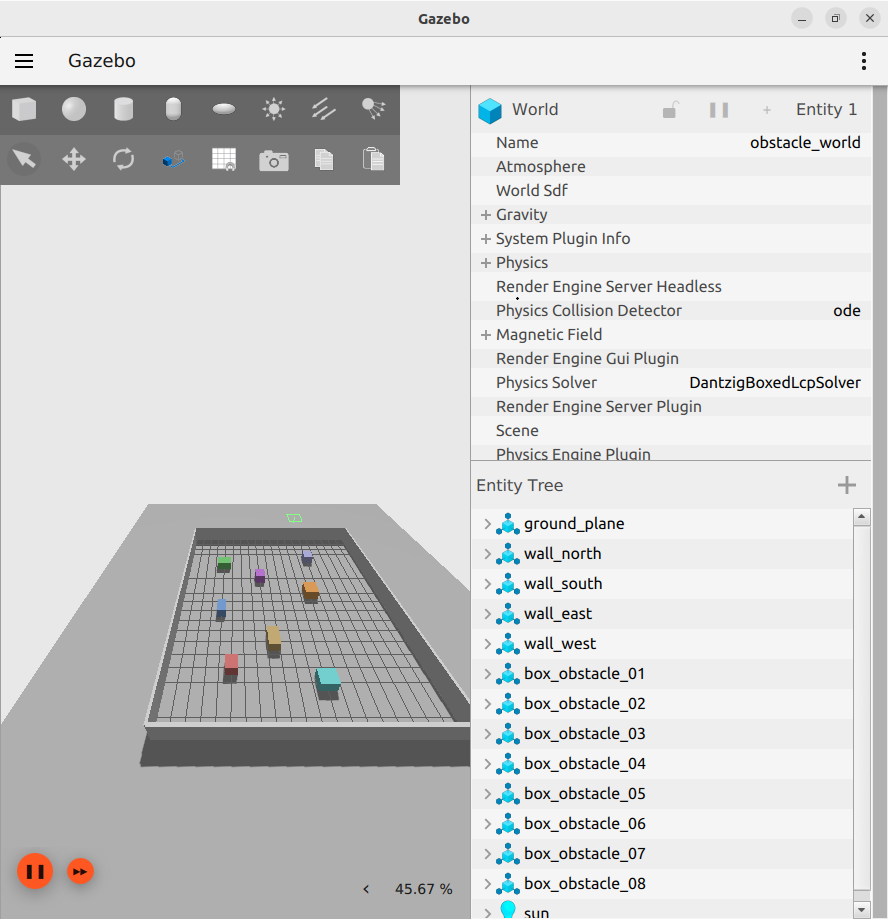
이번 장애물 World는 다음과 같이 구성됩니다.
World 이름 : obstacle_world
바닥 크기  : 40m × 40m
실습 영역  : 약 20m × 20m
외곽 벽    : 4개
장애물      : 8개
벽 높이    : 2m
장애물 높이: 1m
World를 위에서 보면 대략 다음과 같은 형태입니다.
                      북쪽 벽
          +--------------------------+
          |                                |
          |   [01]       [02]    [03]   |
          |                                |
          |        [04]        [05]      |
서쪽 벽 |                               | 동쪽 벽
          |  [06]        [07]            |
          |                      [08]     |
          |                                |
          +--------------------------+
                      남쪽 벽
외곽 벽의 중심 좌표는 다음과 같습니다.
북쪽 벽 : x = 0,   y = 10
남쪽 벽 : x = 0,   y = -10
동쪽 벽 : x = 10,  y = 0
서쪽 벽 : x = -10, y = 0
SDF 파일의 기본 구조
SDF 파일은 XML 형식으로 작성합니다.
<?xml version="1.0" ?>
<sdf version="1.9">
  <world name="obstacle_world">

    ...

  </world>
</sdf>
각 항목의 의미는 다음과 같습니다.
<?xml version="1.0" ?>
XML 문서임을 선언합니다.

<sdf version="1.9">
사용하는 SDF 문법 버전을 지정합니다.

<world name="obstacle_world">
Gazebo에 생성할 World의 이름을 지정합니다.
하나의 SDF 파일에는 여러 모델이 포함될 수 있습니다.
이번 예제에는 다음 모델이 들어 있습니다.
ground_plane
wall_north
wall_south
wall_east
wall_west
box_obstacle_01
box_obstacle_02
box_obstacle_03
box_obstacle_04
box_obstacle_05
box_obstacle_06
box_obstacle_07
box_obstacle_08
Gazebo Fortress 시스템 플러그인
World 상단에는 Gazebo Fortress가 시뮬레이션을 실행하는 데 필요한 시스템 플러그인이 등록되어 있습니다.
– Physics 시스템
<plugin
  filename="ignition-gazebo-physics-system"
  name="ignition::gazebo::systems::Physics"/>
Physics 시스템은 다음 기능을 담당합니다.
중력 계산
충돌 판정
물체의 움직임 계산
힘과 토크 계산
관절 동작 계산
이번 World의 벽과 장애물은 모두 <static>true</static>으로 설정되어 있으므로 움직이지 않습니다.
하지만 추후 모바일로봇을 추가하면 Physics 시스템이 바퀴의 움직임, 충돌, 마찰 등을 계산합니다.
– UserCommands 시스템
<plugin
  filename="ignition-gazebo-user-commands-system"
  name="ignition::gazebo::systems::UserCommands"/>
UserCommands 시스템은 실행 중인 Gazebo World에서 다음 작업을 지원합니다.
모델 추가
모델 삭제
모델 위치 변경
엔티티 제어
Gazebo GUI 명령 처리
ROS 2에서 로봇을 spawn하거나 Gazebo GUI에서 모델을 조작하려면 이 시스템이 필요합니다.
– SceneBroadcaster 시스템
<plugin
  filename="ignition-gazebo-scene-broadcaster-system"
  name="ignition::gazebo::systems::SceneBroadcaster"/>
SceneBroadcaster 시스템은 Gazebo 서버의 World 정보를 GUI로 전달합니다.
이 시스템이 없으면 시뮬레이션 서버는 실행되더라도 Gazebo GUI에서 모델이나 장면이 정상적으로 표시되지 않을 수 있습니다.
Sensors 시스템
<plugin
  filename="ignition-gazebo-sensors-system"
  name="ignition::gazebo::systems::Sensors">
  <render_engine>ogre2</render_engine>
</plugin>
Sensors 시스템은 카메라, depth camera, GPU LiDAR 같은 렌더링 기반 센서를 처리합니다.
<render_engine>ogre2</render_engine>이 설정은 렌더링 엔진으로 OGRE2를 사용한다는 의미입니다.
현재 World에는 센서 모델이 직접 포함되어 있지 않지만, 이후 LiDAR나 카메라가 포함된 모바일로봇을 추가할 수 있으므로 미리 등록해 둔 것입니다.
조명 설정
World에는 방향성 조명 하나가 포함되어 있습니다.
<light type="directional" name="sun">
  <cast_shadows>true</cast_shadows>
  <pose>0 0 10 0 0 0</pose>
  <diffuse>0.8 0.8 0.8 1</diffuse>
  <specular>0.2 0.2 0.2 1</specular>
  <direction>-0.5 0.1 -0.9</direction>
</light>
– 조명 종류
<light type="directional" name="sun">directional 조명은 태양광과 비슷하게 일정한 방향으로 빛을 비춥니다.
– 그림자 설정
<cast_shadows>true</cast_shadows>모델이 바닥과 다른 물체에 그림자를 만들도록 설정합니다.
조명 위치
<pose>0 0 10 0 0 0</pose>pose는 다음 순서로 작성합니다.
x y z roll pitch yaw따라서 현재 조명의 위치와 회전은 다음과 같습니다.
x     : 0
y     : 0
z     : 10m
roll  : 0
pitch : 0
yaw   : 0
방향성 조명에서는 위치보다 <direction> 값이 더 중요합니다.
빛의 방향
<direction>-0.5 0.1 -0.9</direction>빛이 x 음의 방향, y 양의 방향, z 음의 방향으로 비춰진다는 의미입니다.
z 값이 음수이므로 위쪽에서 바닥 방향으로 빛이 내려옵니다.
바닥 모델
바닥 모델의 이름은 ground_plane입니다.
<model name="ground_plane">
<static>true</static><static>true</static>은 모델이 물리 계산에 의해 움직이지 않는다는 의미입니다.
바닥, 벽, 건물, 고정 장애물은 일반적으로 static 모델로 설정합니다.
– 바닥 collision
<collision name="collision">
  <geometry>
    <plane>
      <normal>0 0 1</normal>
      <size>40 40</size>
    </plane>
  </geometry>
</collision>
바닥 충돌 영역의 크기는 40m × 40m입니다.
<normal>0 0 1</normal>평면의 법선 방향이 z축 양의 방향이라는 의미입니다.
<size>40 40</size>바닥의 x, y 방향 크기를 지정합니다.
– 바닥 visual
<visual name="visual">
  <geometry>
    <plane>
      <normal>0 0 1</normal>
      <size>40 40</size>
    </plane>
  </geometry>
</visual>
화면에 표시되는 바닥 크기도 collision과 동일하게 40m × 40m입니다.
– 바닥 색상
<material>
  <ambient>0.55 0.55 0.55 1</ambient>
  <diffuse>0.55 0.55 0.55 1</diffuse>
</material>
색상은 RGBA 순서로 지정합니다.
R : Red
G : Green
B : Blue
A : Alpha
각 값의 범위는 일반적으로 0.0부터 1.0까지입니다.
0.55 0.55 0.55 1R, G, B 값이 같으므로 회색으로 표시됩니다.
Alpha 값이 1이므로 완전히 불투명합니다.
외곽 벽 구성
실습 공간은 네 개의 벽으로 둘러싸여 있습니다.
– 북쪽 벽
<model name="wall_north">
  <static>true</static>
  <pose>0 10 1 0 0 0</pose>
북쪽 벽의 중심 위치는 다음과 같습니다.
x : 0
y : 10
z : 1
벽 크기는 다음과 같습니다.
<box>
  <size>20 0.2 2</size>
</box><size>는 다음 순서입니다.
x 크기, y 크기, z 크기따라서 북쪽 벽의 크기는 다음과 같습니다.
길이   : 20m
두께   : 0.2m
높이   : 2m
벽 높이가 2m이고 pose의 z가 1m인 이유는 box의 pose가 중심을 기준으로 하기 때문입니다.
z 위치 = 높이 ÷ 2
       = 2 ÷ 2
       = 1m
– 남쪽 벽
<pose>0 -10 1 0 0 0</pose>남쪽 벽은 북쪽 벽과 크기가 같고 y 좌표만 -10m입니다.
– 동쪽 벽
<pose>10 0 1 0 0 0</pose>동쪽 벽의 크기는 다음과 같습니다.
<box>
  <size>0.2 20 2</size>
</box>
x 방향은 0.2m로 얇고 y 방향은 20m로 깁니다.
– 서쪽 벽
<pose>-10 0 1 0 0 0</pose>서쪽 벽은 동쪽 벽과 크기가 같고 x 좌표만 -10m입니다.
visual과 collision의 차이
모든 벽과 장애물에는 visual과 collision이 함께 들어 있습니다.
<collision name="collision">
  <geometry>
    <box>
      <size>1 1 1</size>
    </box>
  </geometry>
</collision>

<visual name="visual">
  <geometry>
    <box>
      <size>1 1 1</size>
    </box>
  </geometry>
</visual>
각 항목의 역할은 다음과 같습니다.
visual
Gazebo 화면에 표시되는 모양

collision
로봇이나 다른 물체와 충돌하는 물리 영역visual만 있고 collision이 없다면 장애물은 화면에 보이지만 로봇이 그대로 통과합니다.
반대로 collision만 있고 visual이 없다면 화면에는 보이지 않지만 로봇은 보이지 않는 물체와 충돌합니다.
장애물 위치와 크기
World 내부에는 총 8개의 장애물이 배치되어 있습니다.
– 장애물 1
<model name="box_obstacle_01">
  <static>true</static>
  <pose>-6 5 0.5 0 0 0</pose>
크기는 다음과 같습니다.
<size>1.0 1.0 1.0</size>정리하면 다음과 같습니다.
위치 : x=-6, y=5
크기 : 1.0m × 1.0m × 1.0m
색상 : 빨간색
높이가 1m이므로 z 위치는 0.5m입니다.
– 장애물 2
<pose>-1 6 0.5 0 0 0</pose>
<size>1.2 0.8 1.0</size>
위치 : x=-1, y=6
크기 : 1.2m × 0.8m × 1.0m
색상 : 파란색x 방향으로 조금 더 긴 직사각형 장애물입니다.
– 장애물 3
<pose>5 6 0.5 0 0 0</pose>
<size>1.0 1.5 1.0</size>
위치 : x=5, y=6
크기 : 1.0m × 1.5m × 1.0m
색상 : 초록색y 방향으로 긴 장애물입니다.
– 장애물 4
<pose>-4 1.5 0.5 0 0 0</pose>
<size>1.5 1.0 1.0</size>
위치 : x=-4, y=1.5
크기 : 1.5m × 1.0m × 1.0m
색상 : 갈색 또는 주황색– 장애물 5
<pose>3 2 0.5 0 0 0</pose>
<size>1.0 1.0 1.0</size>
위치 : x=3, y=2
크기 : 1.0m × 1.0m × 1.0m
색상 : 보라색– 장애물 6
<pose>-7 -2 0.5 0 0 0</pose>
<size>1.0 1.4 1.0</size>
위치 : x=-7, y=-2
크기 : 1.0m × 1.4m × 1.0m
색상 : 청록색– 장애물 7
<pose>1 -3 0.5 0 0 0</pose>
<size>1.3 1.3 1.0</size>
위치 : x=1, y=-3
크기 : 1.3m × 1.3m × 1.0m
색상 : 주황색– 장애물 8
<pose>6 -4 0.5 0 0 0</pose>
<size>1.0 1.0 1.0</size>
위치 : x=6, y=-4
크기 : 1.0m × 1.0m × 1.0m
색상 : 연한 파란색 또는 보라색장애물 정보 정리
전체 장애물 정보를 표로 정리하면 다음과 같습니다.
| 장애물 | x | y | 크기 x | 크기 y | 높이 |
|---|---|---|---|---|---|
| obstacle_01 | -6 | 5 | 1.0 | 1.0 | 1.0 |
| obstacle_02 | -1 | 6 | 1.2 | 0.8 | 1.0 |
| obstacle_03 | 5 | 6 | 1.0 | 1.5 | 1.0 |
| obstacle_04 | -4 | 1.5 | 1.5 | 1.0 | 1.0 |
| obstacle_05 | 3 | 2 | 1.0 | 1.0 | 1.0 |
| obstacle_06 | -7 | -2 | 1.0 | 1.4 | 1.0 |
| obstacle_07 | 1 | -3 | 1.3 | 1.3 | 1.0 |
| obstacle_08 | 6 | -4 | 1.0 | 1.0 | 1.0 |
현재 배치는 일정한 격자 형태가 아니라 약간 불규칙하게 구성되어 있습니다.
이와 같은 배치는 로봇이 단순 직선 경로만 생성하지 않고 장애물 사이를 돌아가도록 만드는 데 유리합니다.
pose의 의미
SDF에서 pose는 다음 순서로 작성합니다.
x y z roll pitch yaw예를 들어 다음 pose를 살펴보겠습니다.
<pose>-6 5 0.5 0 0 0</pose>의미는 다음과 같습니다.
x     : -6m
y     : 5m
z     : 0.5m
roll  : 0rad
pitch : 0rad
yaw   : 0rad
현재 모든 장애물은 회전값이 0이므로 x축과 y축에 나란하게 배치됩니다.
장애물을 회전하려면 마지막 yaw 값을 변경하면 됩니다.
예를 들어 장애물을 약 45도 회전하려면 다음과 같이 설정할 수 있습니다.
<pose>-6 5 0.5 0 0 0.785</pose>0.785rad ≒ 45도material 색상 설정
장애물마다 서로 다른 색상을 사용하고 있습니다.
예를 들어 첫 번째 장애물의 색상은 다음과 같습니다.
<material>
  <diffuse>0.8 0.2 0.2 1</diffuse>
</material>
RGBA로 해석하면 다음과 같습니다.
R : 0.8
G : 0.2
B : 0.2
A : 1.0
Red 값이 높으므로 빨간색 계열로 표시됩니다.
색상 차이는 물리 동작에는 영향을 주지 않지만 강의 중 장애물을 구분하기 쉽다는 장점이 있습니다.
4) 실행
패키지를 빌드합니다.
cd ~/gazebo_ws

colcon build --packages-select mobile_robot_worlds

source install/setup.bash
ROS 2 launch로 실행합니다.
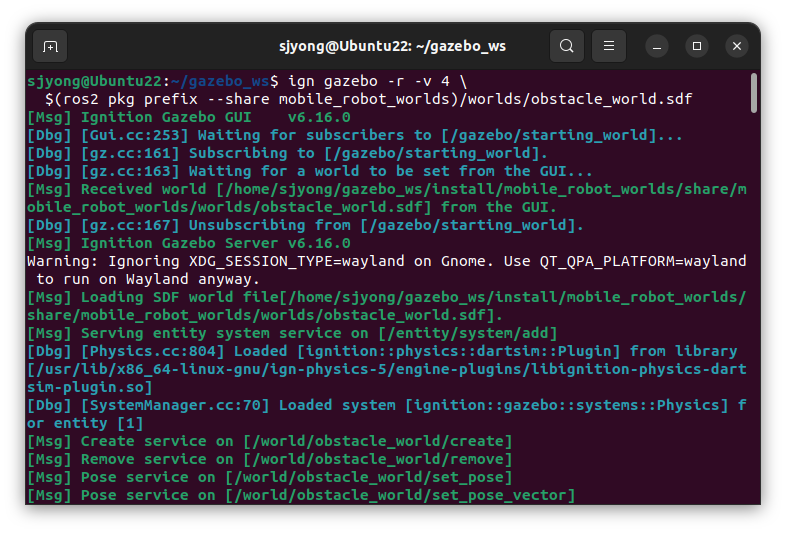
ros2 launch mobile_robot_worlds gz_world.launch.py world_name:=obstacle_world.sdf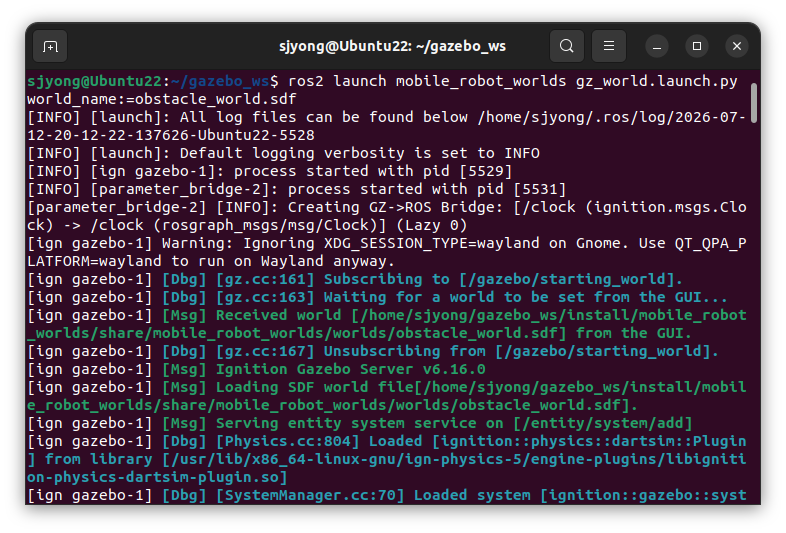
Gazebo Fortress를 직접 실행합니다.
ign gazebo -r -v 4 \
  $(ros2 pkg prefix --share mobile_robot_worlds)/worlds/obstacle_world.sdf