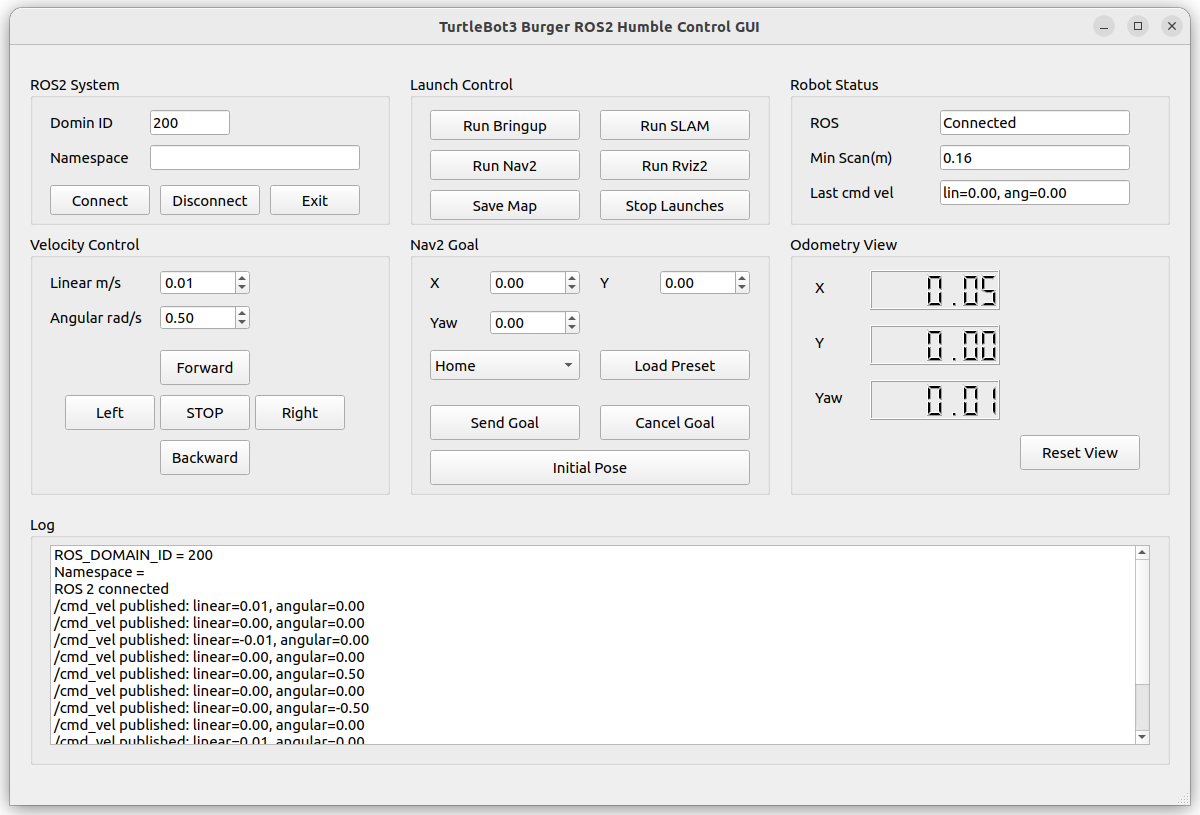
11. ROS 2 Node 클래스 추가하기
이제 Python 코드에 ROS 2 노드를 추가합니다.
먼저 필요한 ROS 2 모듈을 import합니다.
Python 파일 상단에 다음을 추가합니다.
import rclpy
from rclpy.node import Node
from geometry_msgs.msg import Twist
그리고 MainWindow 클래스 위에 ROS 2 노드 클래스를 추가합니다.
class TurtleBot3GuiNode(Node):
    def __init__(self, namespace=''):
        super().__init__('turtlebot3_burger_gui')

        namespace = namespace.strip()

        # 사용자가 "empty", "none", "/" 등을 넣으면 namespace 없음으로 처리
        if namespace.lower() in ['', 'empty', 'none', '/']:
            namespace = ''

        # 앞뒤 slash 정리
        namespace = namespace.strip('/')

        if namespace:
            cmd_topic = f'/{namespace}/cmd_vel'
        else:
            cmd_topic = '/cmd_vel'

        self.cmd_pub = self.create_publisher(
            Twist,
            cmd_topic,
            10
        )

    def publish_cmd(self, linear, angular):
        msg = Twist()
        msg.linear.x = float(linear)
        msg.angular.z = float(angular)
        self.cmd_pub.publish(msg)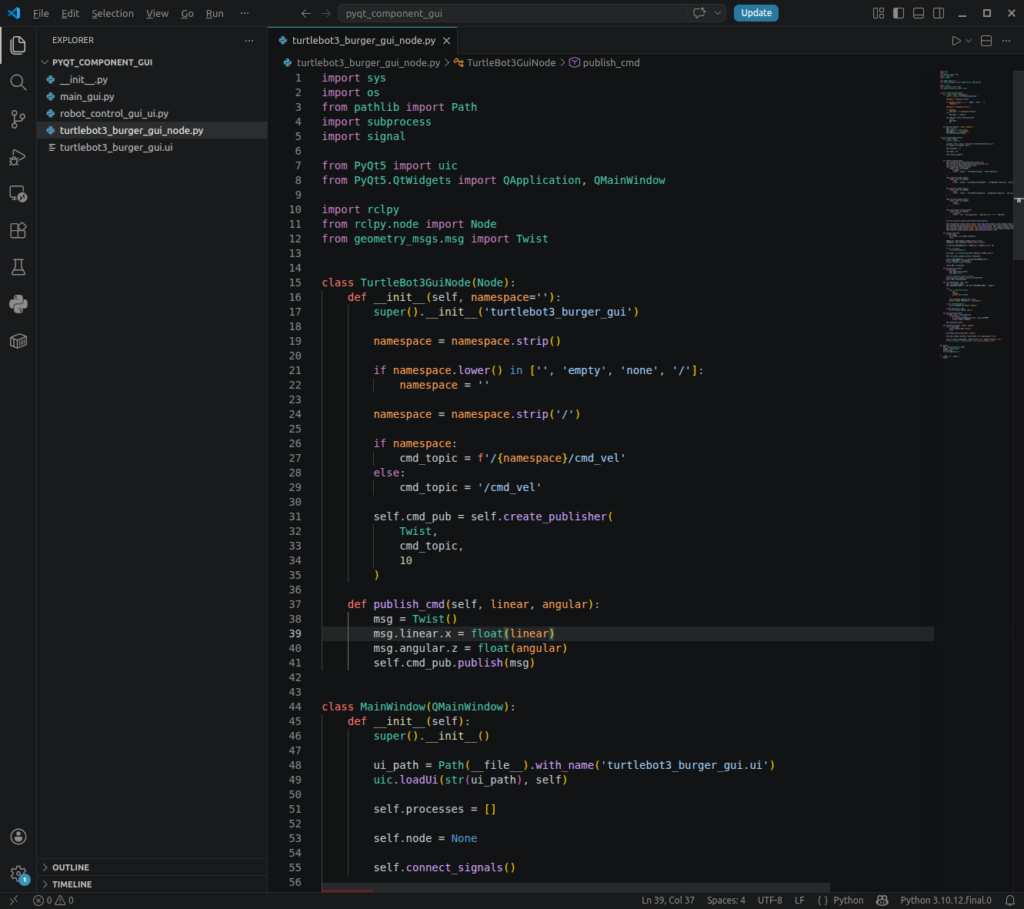
이 클래스는 ROS 2 노드입니다.
핵심은 다음입니다.
self.cmd_pub = self.create_publisher(Twist, self.topic('/cmd_vel'), 10)이 코드가 /cmd_vel 토픽 publisher를 만듭니다.
Namespace를 입력하면 /tb3/cmd_vel 같은 토픽으로 바꿔서 발행할 수 있습니다.
12. Connect 버튼으로 ROS 2 노드 생성하기
이제 MainWindow에서 ROS 2 노드를 생성합니다.
__init__()에 다음 변수를 추가합니다.
self.node = None전체 구조는 다음처럼 됩니다.
class MainWindow(QMainWindow):
    def __init__(self):
        super().__init__()

        ui_path = Path(__file__).with_name('turtlebot3_burger_gui.ui')
        uic.loadUi(str(ui_path), self)

        self.node = None

        self.connect_signals()
connect_ros() 함수를 다음처럼 수정합니다.
def connect_ros(self):
    if self.node:
        print('ROS 2 is already connected')
        return

    domain_id = self.domain_lineEdit.text().strip()
    os.environ['ROS_DOMAIN_ID'] = domain_id if domain_id else '30'

    if not rclpy.ok():
        rclpy.init(args=None)

    self.node = TurtleBot3GuiNode(self.namespace_lineEdit.text())

    self.ros_status_lineEdit.setText('Connected')

    print('ROS 2 connected')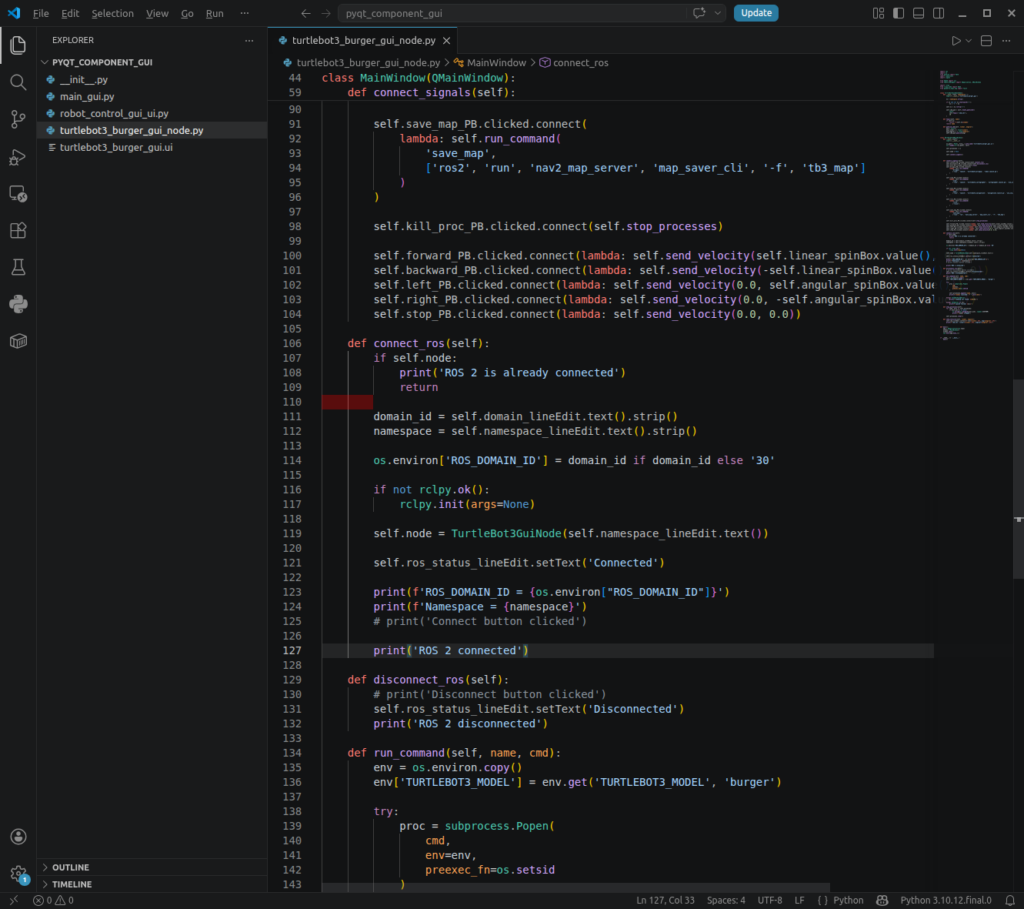
disconnect_ros() 함수도 수정합니다.
def disconnect_ros(self):
    if self.node:
        self.node.destroy_node()
        self.node = None

    self.ros_status_lineEdit.setText('Disconnected')

    print('ROS 2 disconnected')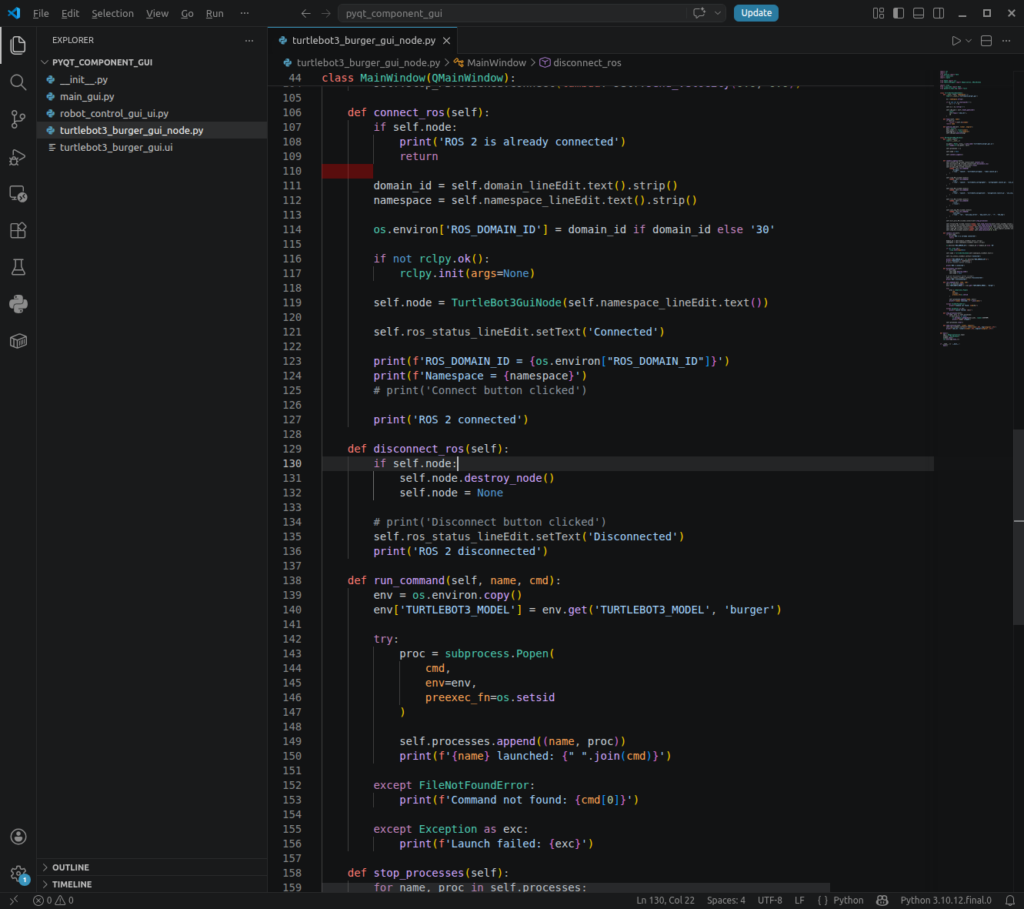
이제 send_velocity() 함수를 실제 ROS 2 발행 함수로 변경합니다.
def send_velocity(self, linear, angular):
    if not self.node:
        print('Connect ROS 2 first')
        return

    self.node.publish_cmd(linear, angular)
    self.cmd_lineEdit.setText(f'lin={linear:.2f}, ang={angular:.2f}')

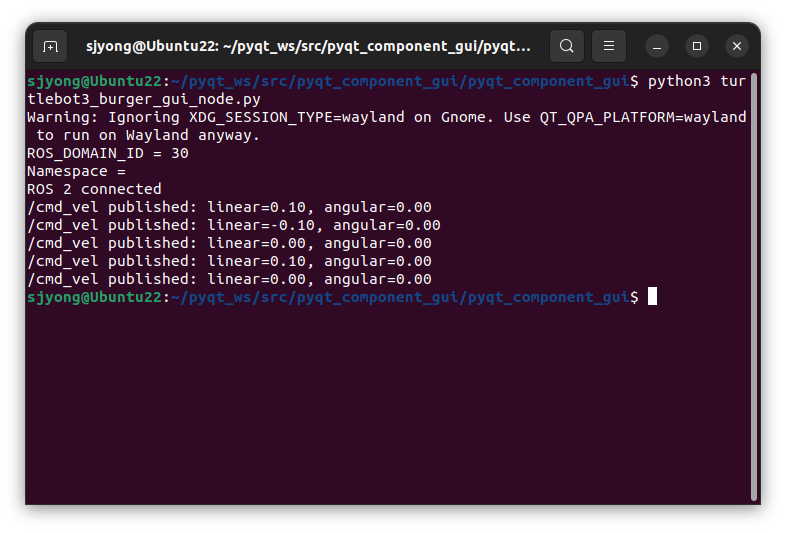
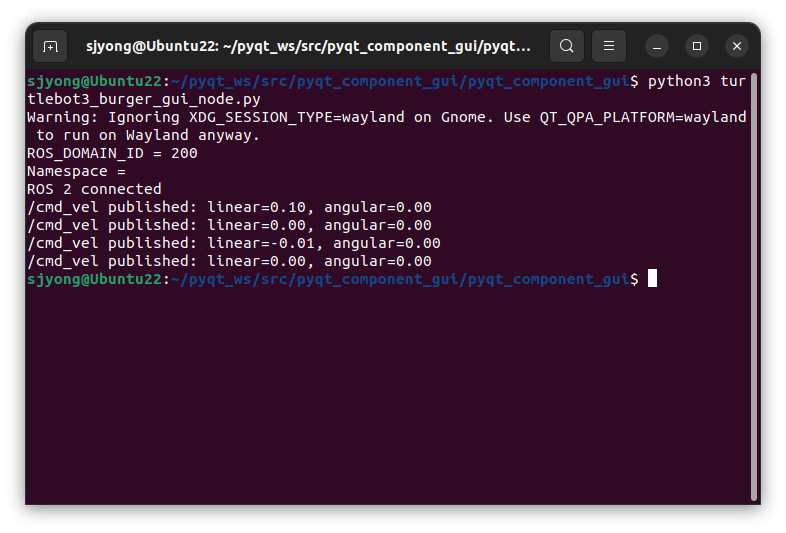
    print(f'/cmd_vel published: linear={linear:.2f}, angular={angular:.2f}')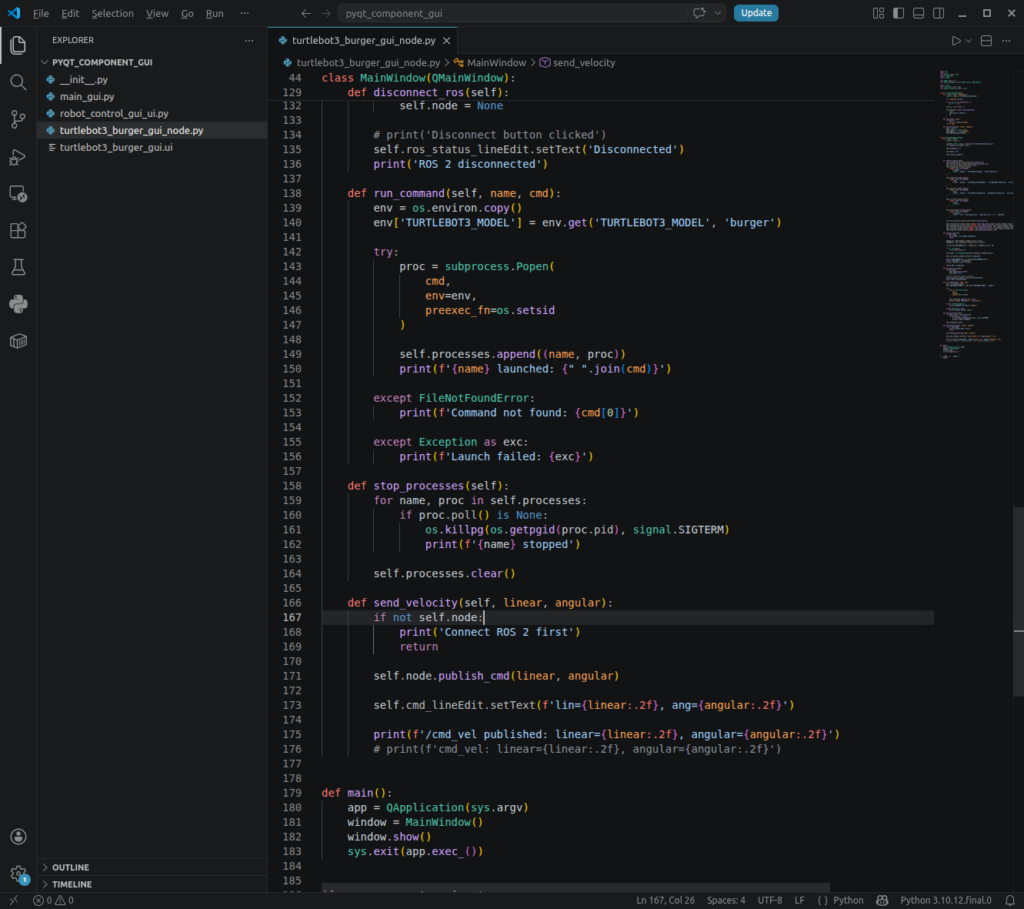
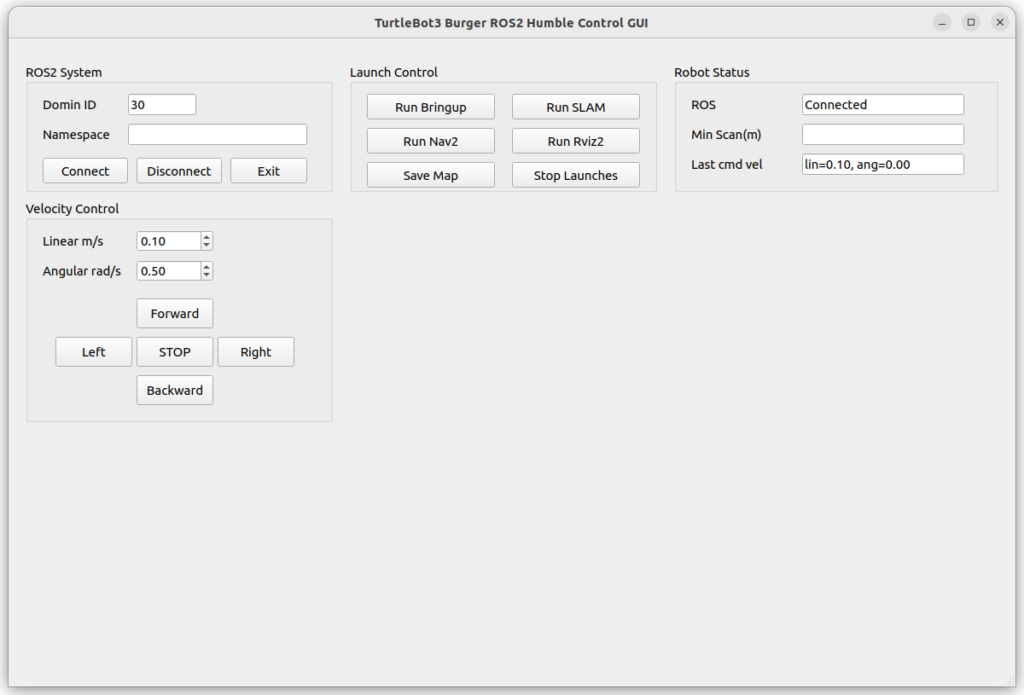
여기까지 작성하면 버튼을 누를 때 /cmd_vel 메시지를 발행할 수 있습니다.
하지만 아직 중요한 문제가 하나 있습니다.
ROS 2는 rclpy.spin_once()를 계속 호출해야 callback과 내부 처리가 정상적으로 돌아갑니다.
PyQt는 자체 이벤트 루프를 사용하고, ROS 2도 자체 spin 처리가 필요합니다.
그래서 PyQt에서는 QTimer를 사용해서 주기적으로 rclpy.spin_once()를 호출하는 구조를 사용합니다.
13. QTimer로 ROS 2 spin 처리하기
상단 import에 QTimer를 추가합니다.
from PyQt5.QtCore import QTimer__init__()에 타이머를 추가합니다.
self.ros_timer = QTimer(self)
self.ros_timer.timeout.connect(self.spin_ros_once)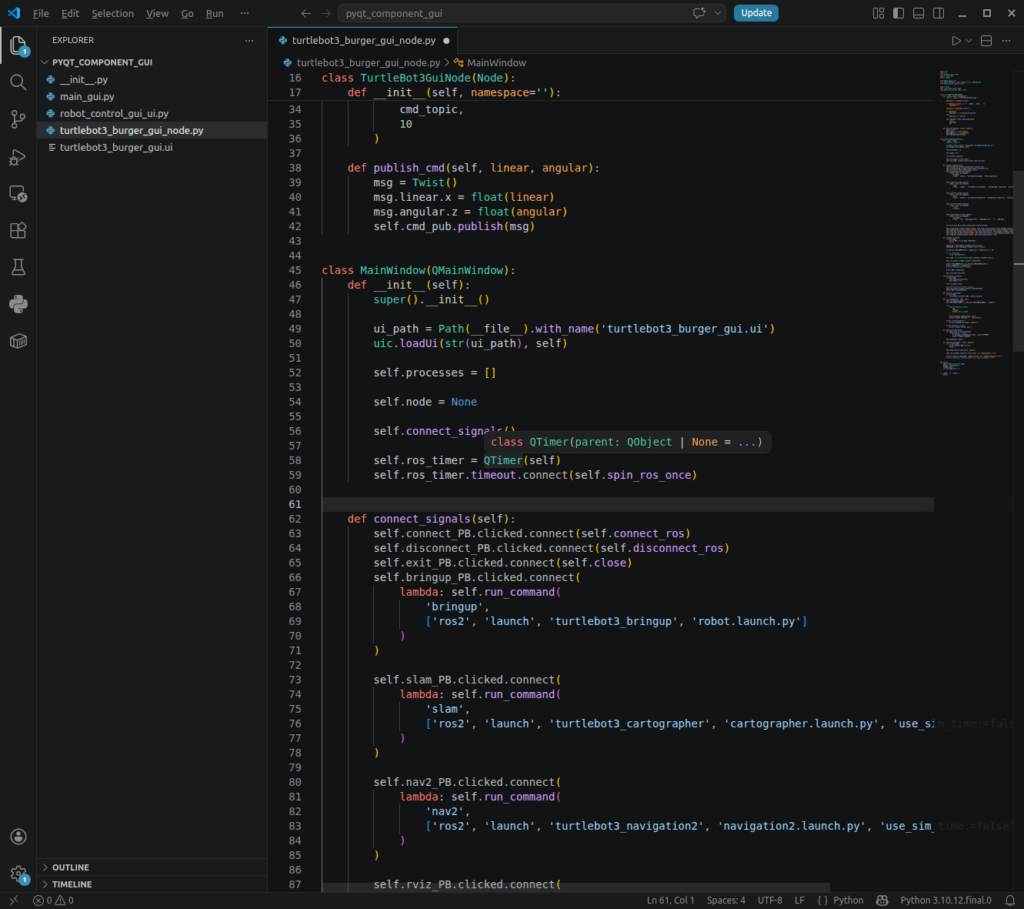
connect_ros()에서 ROS 2 연결 후 타이머를 시작합니다.
self.ros_timer.start(20)disconnect_ros()에서 타이머를 멈춥니다.
self.ros_timer.stop()그리고 spin_ros_once() 함수를 추가합니다.
def spin_ros_once(self):
    if self.node:
        rclpy.spin_once(self.node, timeout_sec=0.0)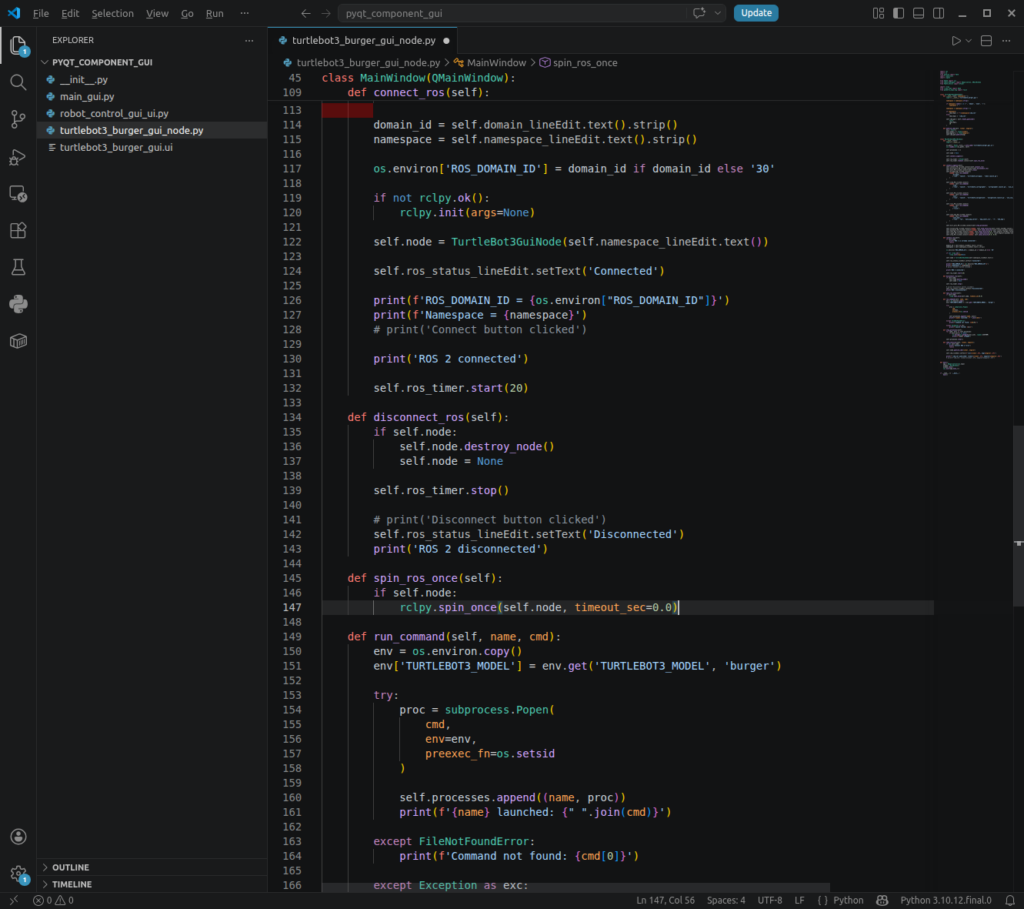
정리하면 관련 함수는 다음과 같습니다.
def connect_ros(self):
    if self.node:
        print('ROS 2 is already connected')
        return

    domain_id = self.domain_lineEdit.text().strip()
    os.environ['ROS_DOMAIN_ID'] = domain_id if domain_id else '30'

    if not rclpy.ok():
        rclpy.init(args=None)

    self.node = TurtleBot3GuiNode(self.namespace_lineEdit.text())

    self.ros_status_lineEdit.setText('Connected')
    self.ros_timer.start(20)

    print('ROS 2 connected')

def disconnect_ros(self):
    if self.node:
        self.node.destroy_node()
        self.node = None

    self.ros_timer.stop()
    self.ros_status_lineEdit.setText('Disconnected')

    print('ROS 2 disconnected')

def spin_ros_once(self):
    if self.node:
        rclpy.spin_once(self.node, timeout_sec=0.0)
이제 TurtleBot3 Burger가 켜져 있고 bringup이 실행 중이면 GUI에서 /cmd_vel을 발행할 수 있습니다.
테스트 전에 터미널에서 bringup을 실행합니다.
source /opt/ros/humble/setup.bash
export TURTLEBOT3_MODEL=burger
ros2 launch turtlebot3_bringup robot.launch.py
다른 터미널에서 GUI를 실행합니다.
source /opt/ros/humble/setup.bash
export TURTLEBOT3_MODEL=burger
python3 turtlebot3_burger_gui_node.py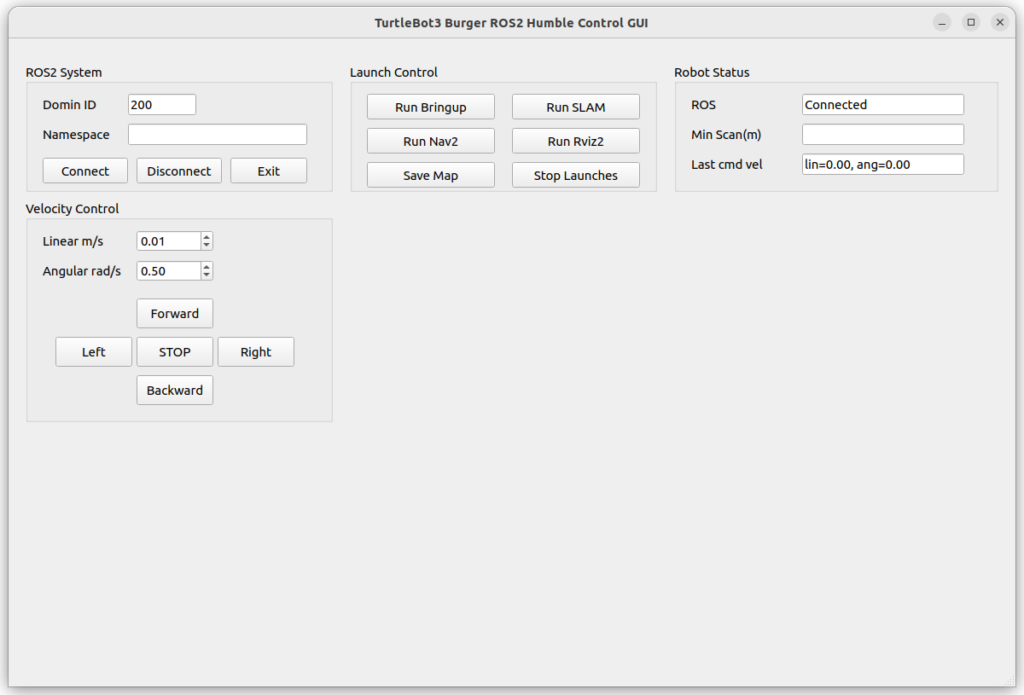
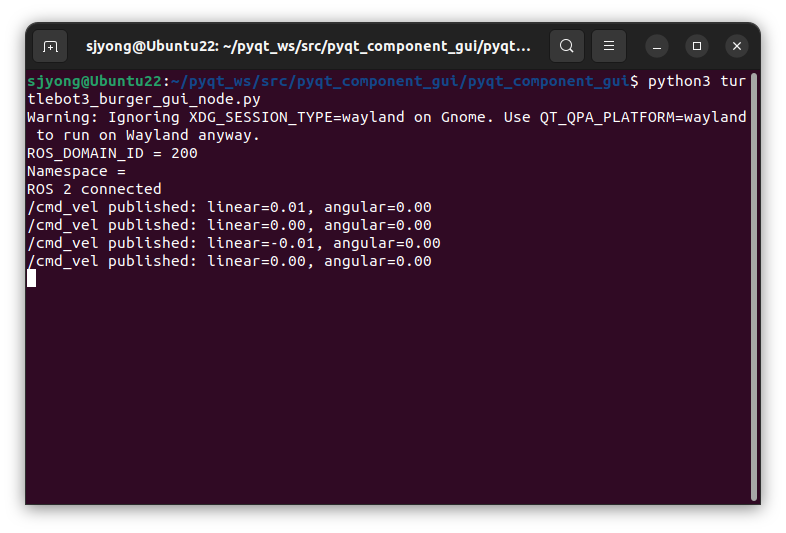
GUI에서 순서대로 실행합니다.
Connect클릭Forward클릭- 로봇이 전진하는지 확인
STOP클릭
실제 로봇으로 실습할 때는 반드시 바퀴가 바닥에서 뜬 상태로 먼저 테스트하는 것이 안전합니다.
14. Nav2 Goal 영역 만들기
이번에는 Nav2 목표 좌표를 입력하는 영역을 만듭니다.
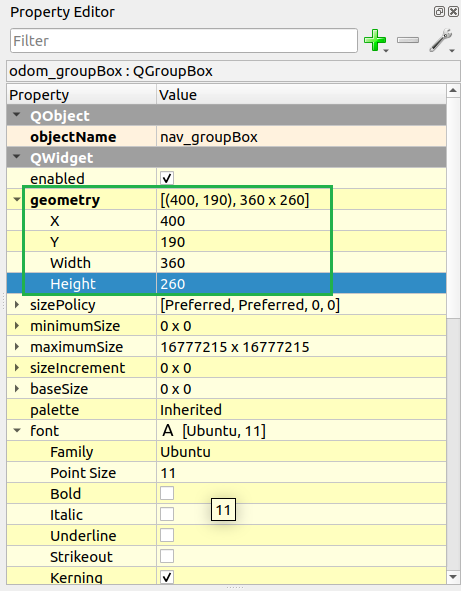
Qt Designer에서 Group Box를 추가합니다.
objectName: nav_groupBox
title: Nav2 Goal
geometry:
  x: 400
  y: 190
  width: 360
  height: 260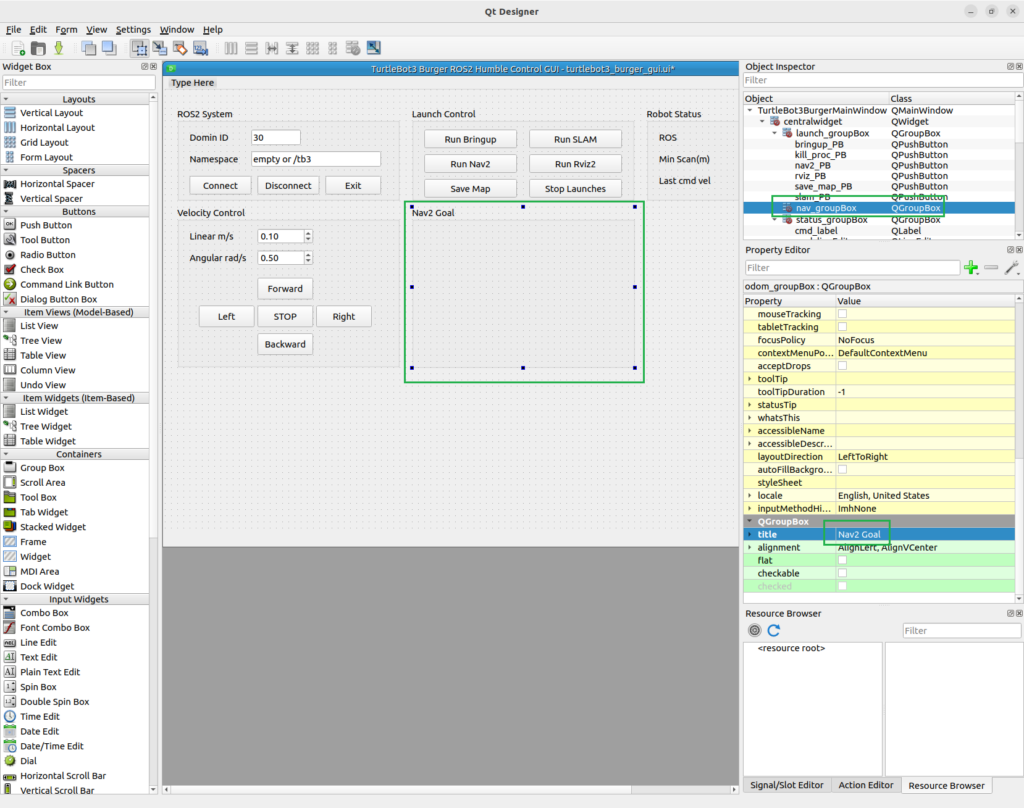
목표 X 입력 Label을 추가합니다.
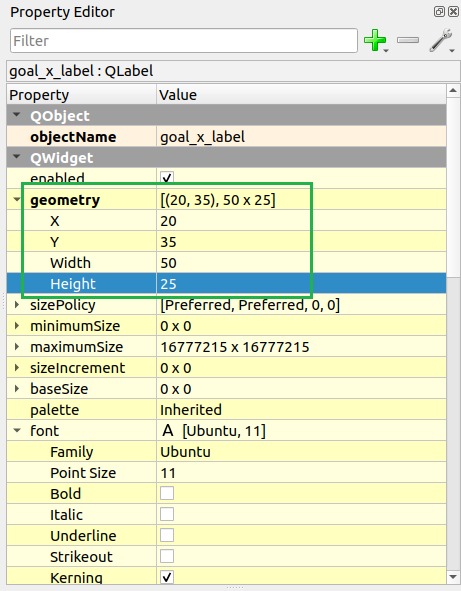
class: QLabel
objectName: goal_x_label
text: X
geometry:
  x: 20
  y: 35
  width: 50
  height: 25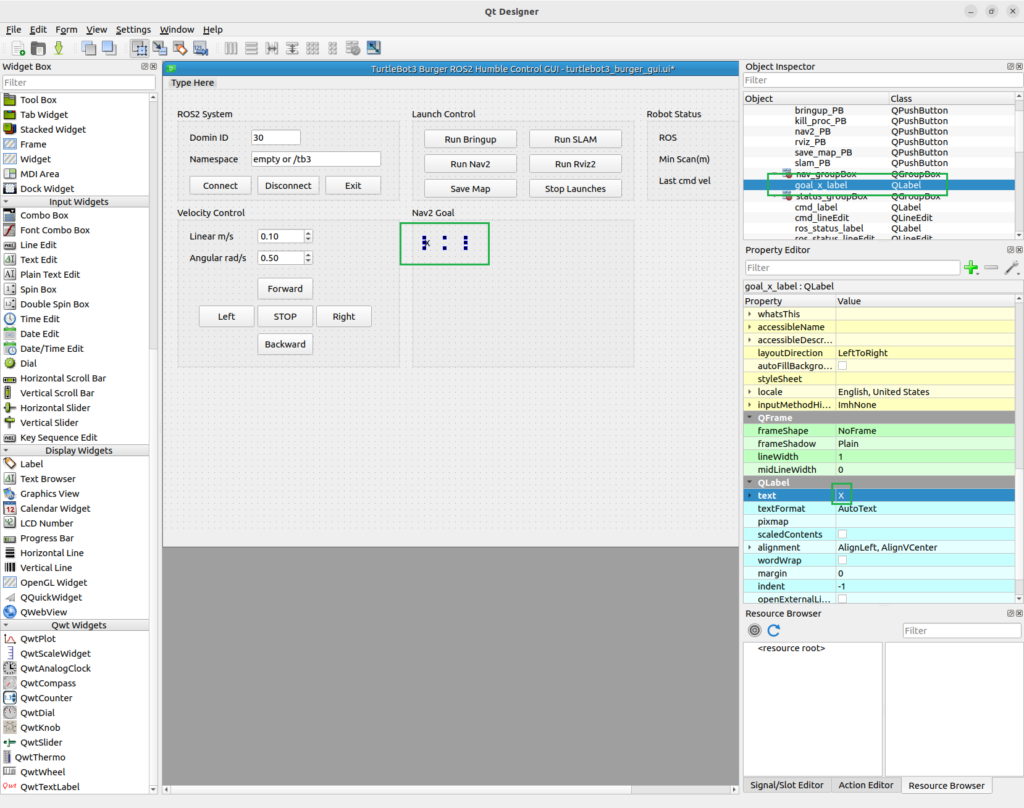
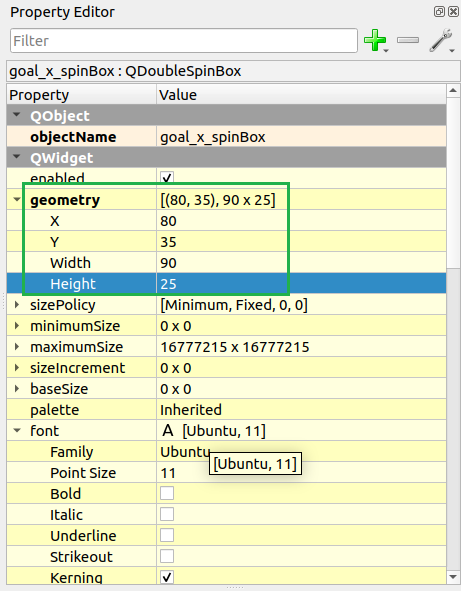
목표 X 입력 SpinBox를 추가합니다.
class: QDoubleSpinBox
objectName: goal_x_spinBox
minimum: -20.00
maximum: 20.00
decimals: 2
geometry:
  x: 80
  y: 35
  width: 90
  height: 25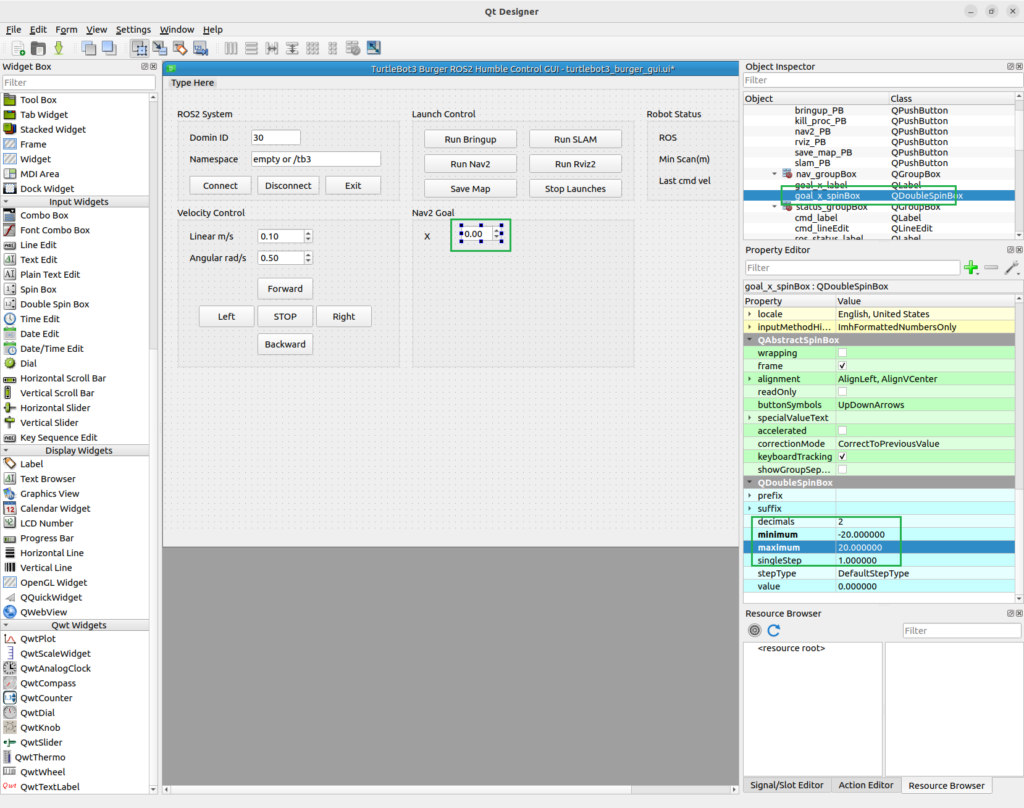
목표 Y 입력 Label을 추가합니다.
class: QLabel
objectName: goal_y_label
text: Y
geometry:
  x: 190
  y: 35
  width: 50
  height: 25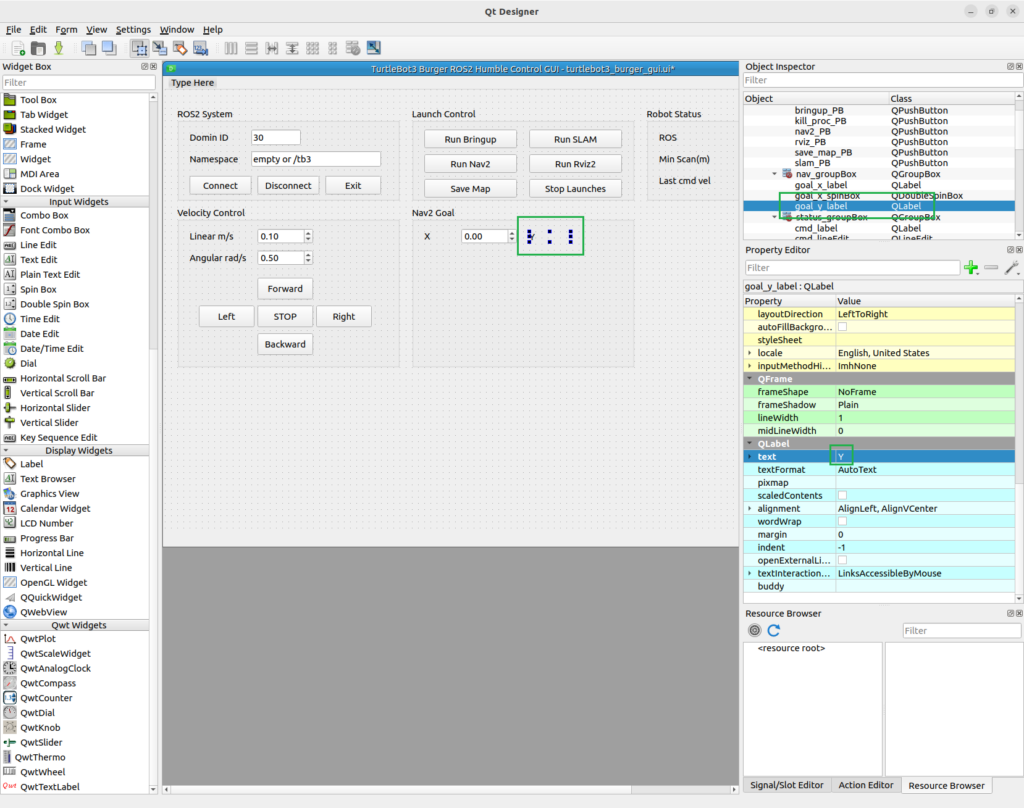
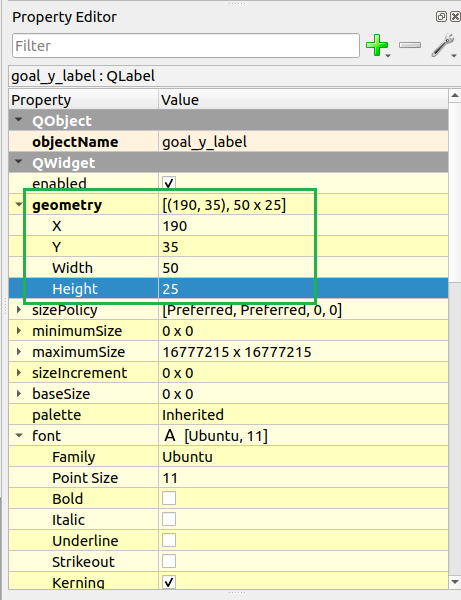
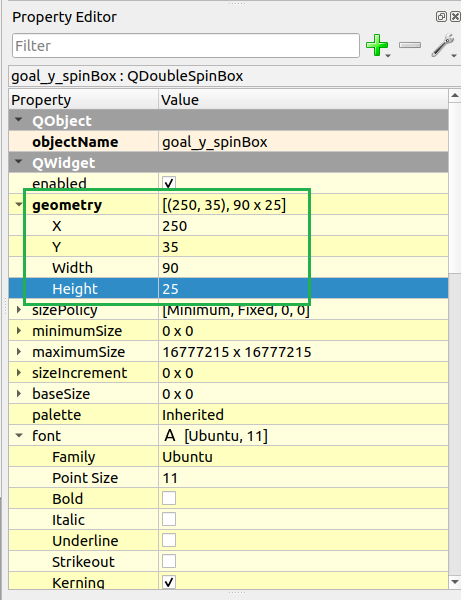
목표 Y 입력 SpinBox를 추가합니다.
class: QDoubleSpinBox
objectName: goal_y_spinBox
minimum: -20.00
maximum: 20.00
decimals: 2
geometry:
  x: 250
  y: 35
  width: 90
  height: 25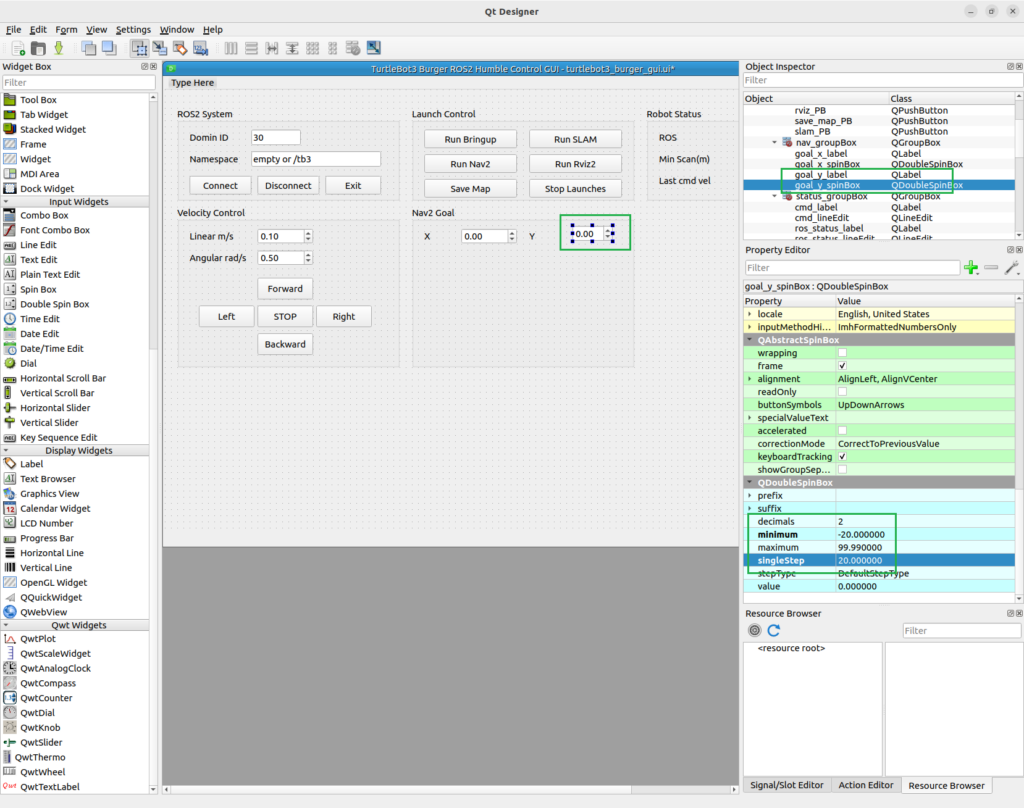
Yaw 입력 Label을 추가합니다.
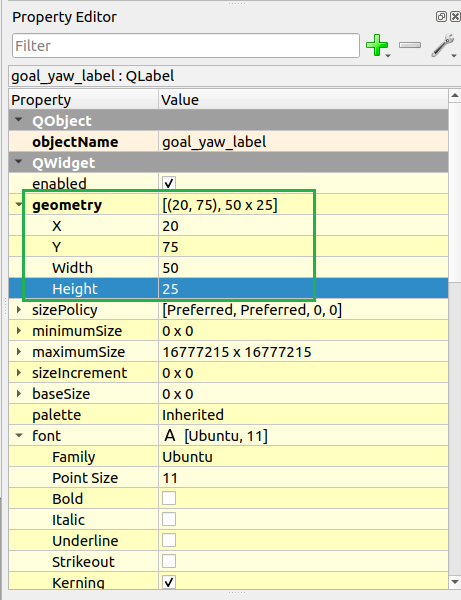
class: QLabel
objectName: goal_yaw_label
text: Yaw
geometry:
  x: 20
  y: 75
  width: 50
  height: 25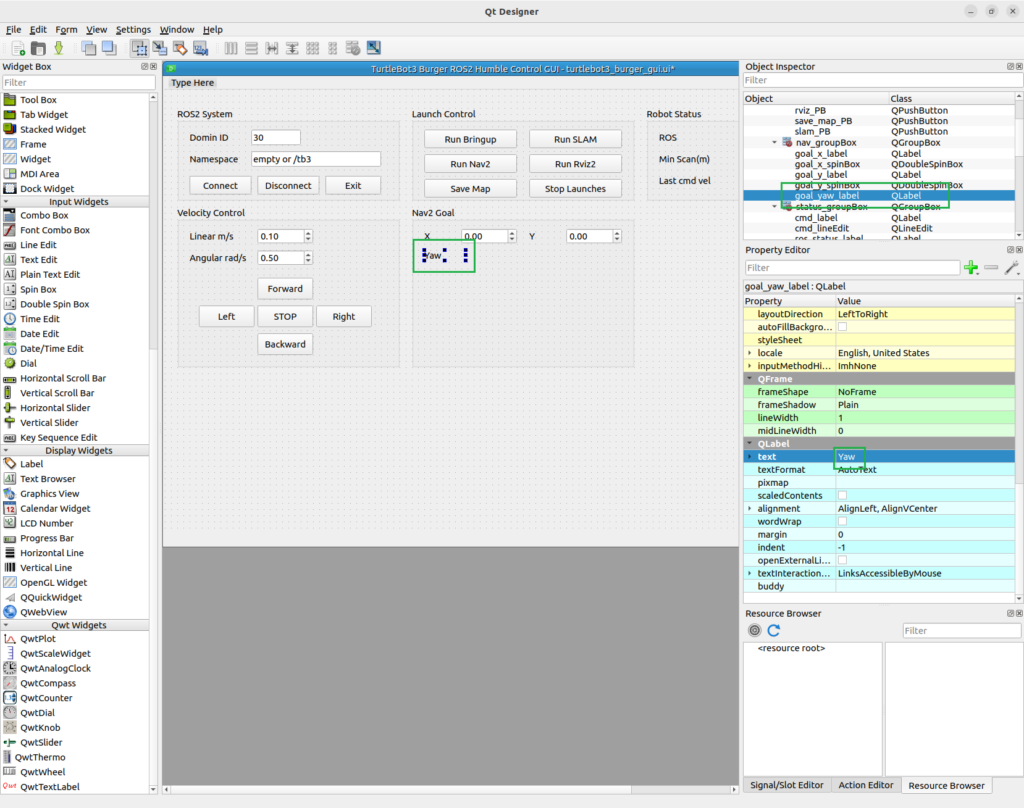
Yaw 입력 SpinBox를 추가합니다.
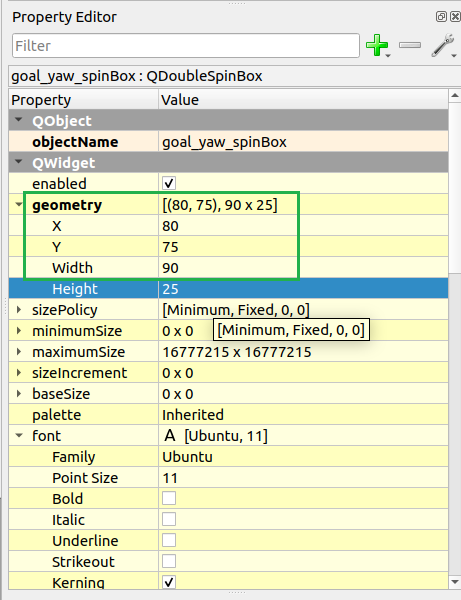
class: QDoubleSpinBox
objectName: goal_yaw_spinBox
minimum: -3.14
maximum: 3.14
decimals: 2
singleStep: 0.10
geometry:
  x: 80
  y: 75
  width: 90
  height: 25
Preset ComboBox를 추가합니다.
class: QComboBox
objectName: preset_goal_CB
geometry:
  x: 20
  y: 115
  width: 150
  height: 30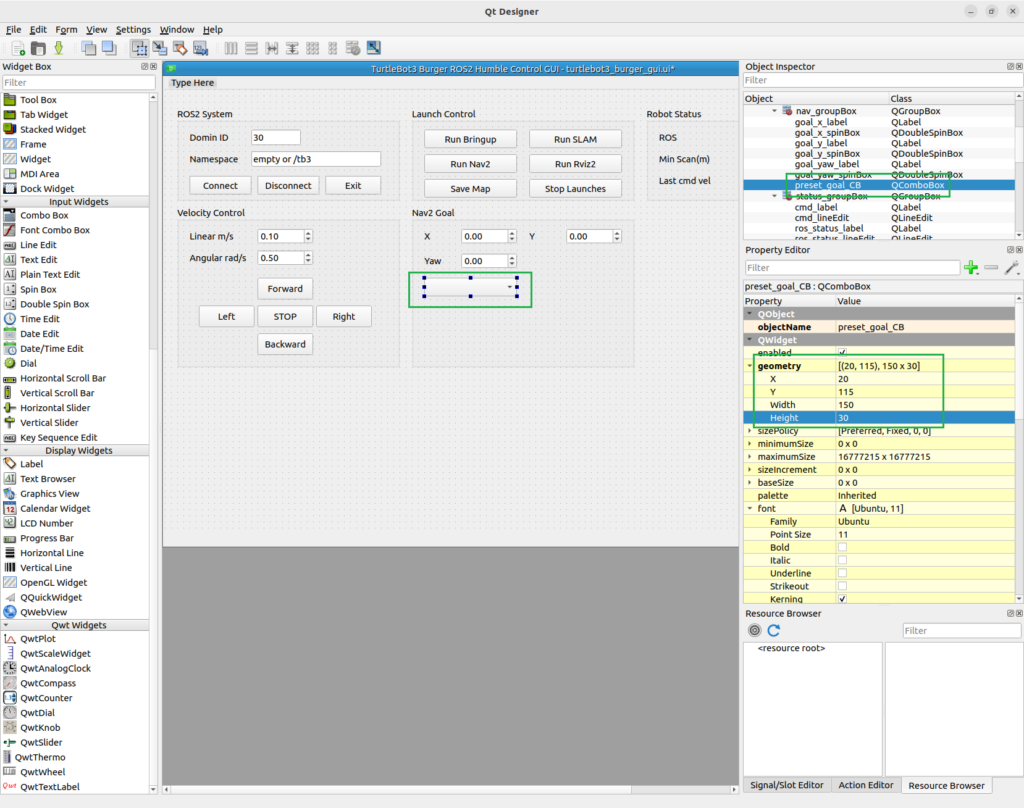
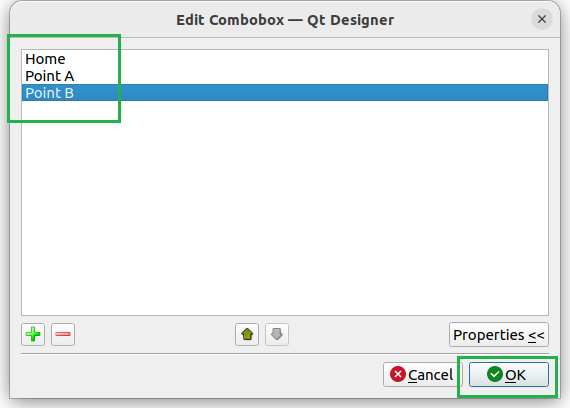
ComboBox에는 다음 항목을 추가합니다.
Home
Point A
Point B
Designer에서 ComboBox 항목을 추가하는 방법은 다음과 같습니다.
preset_goal_CB클릭- 콤보박승[서 마우스 오른쪽을 클릭하면 나타나는 메뉴에서 Edit Items를 선택합니다.
- ‘+’ 버튼 클릭
Home,Point A,Point B추가- OK 클릭
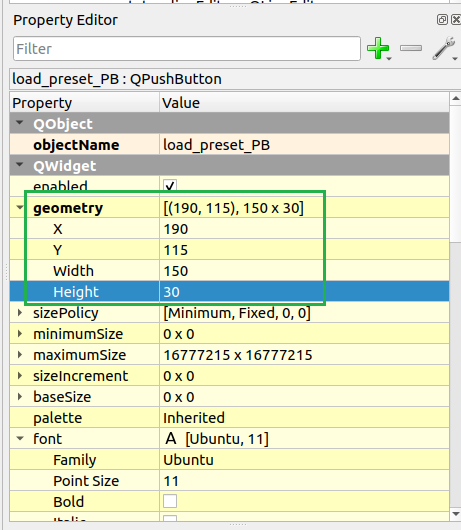
Preset 불러오기 버튼을 추가합니다.
class: QPushButton
objectName: load_preset_PB
text: Load Preset
geometry:
  x: 190
  y: 115
  width: 150
  height: 30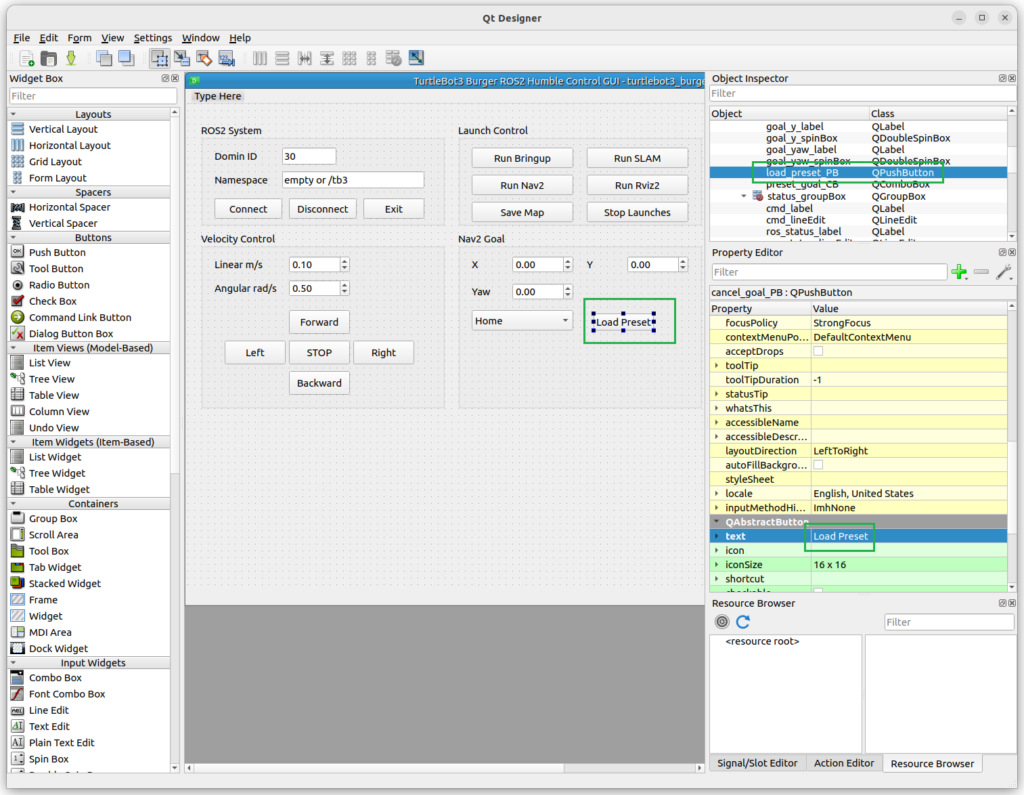
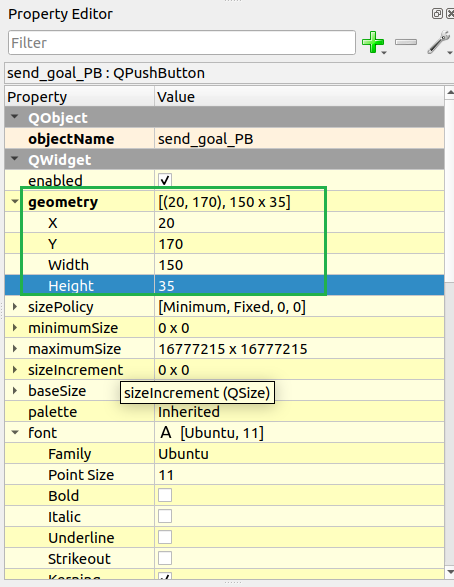
Goal 전송 버튼을 추가합니다.
class: QPushButton
objectName: send_goal_PB
text: Send Goal
geometry:
  x: 20
  y: 170
  width: 150
  height: 35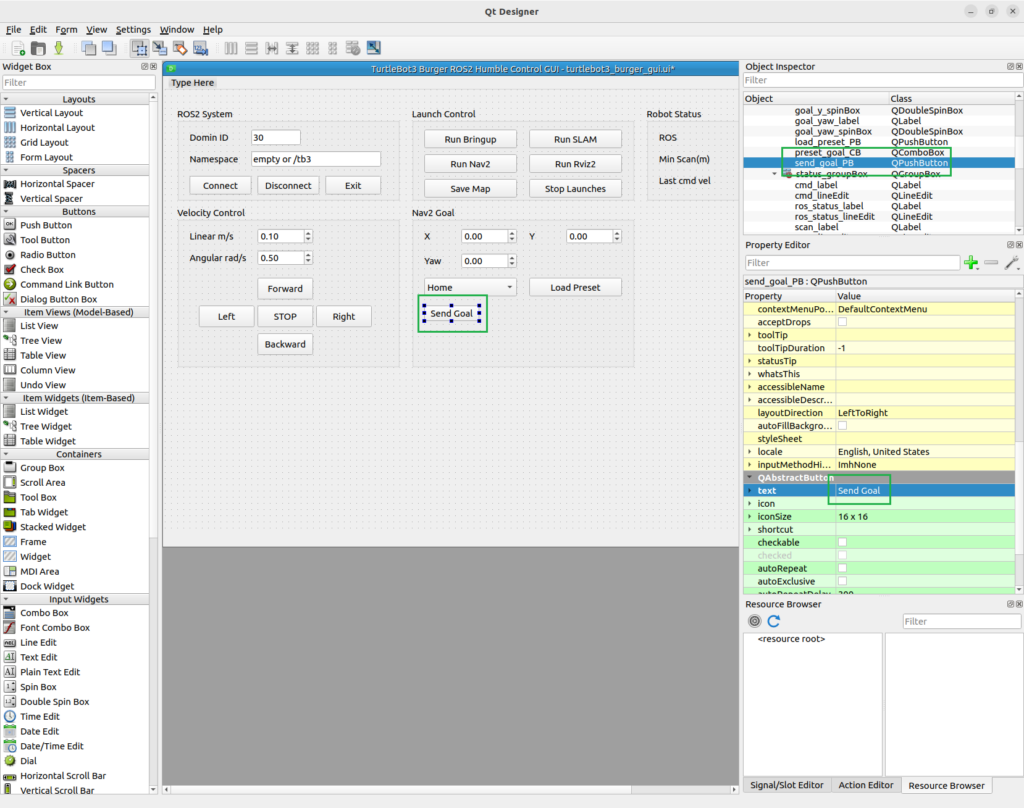
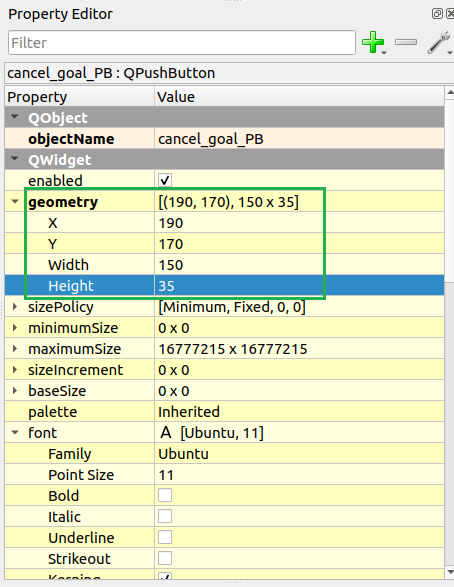
Goal 취소 버튼을 추가합니다.
class: QPushButton
objectName: cancel_goal_PB
text: Cancel Goal
geometry:
  x: 190
  y: 170
  width: 150
  height: 35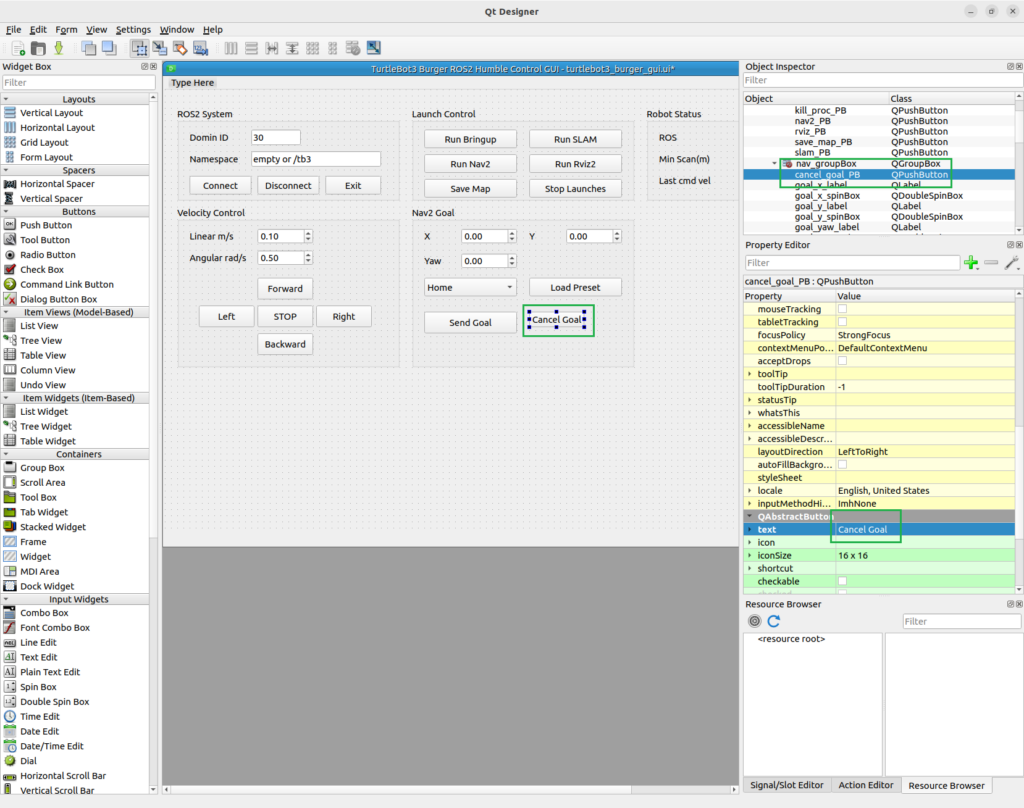
Initial Pose 버튼을 추가합니다.
class: QPushButton
objectName: initial_pose_PB
text: Set Initial Pose
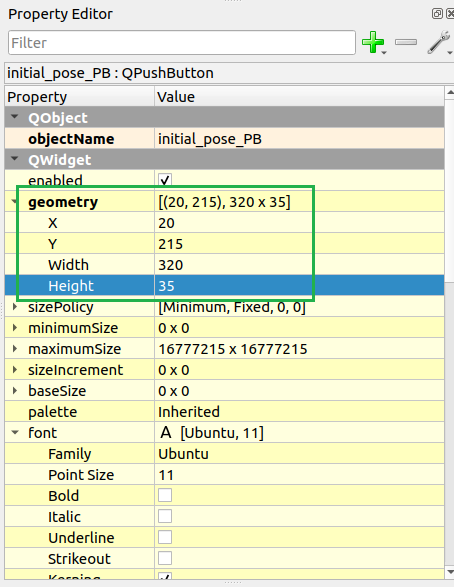
geometry:
  x: 20
  y: 215
  width: 320
  height: 35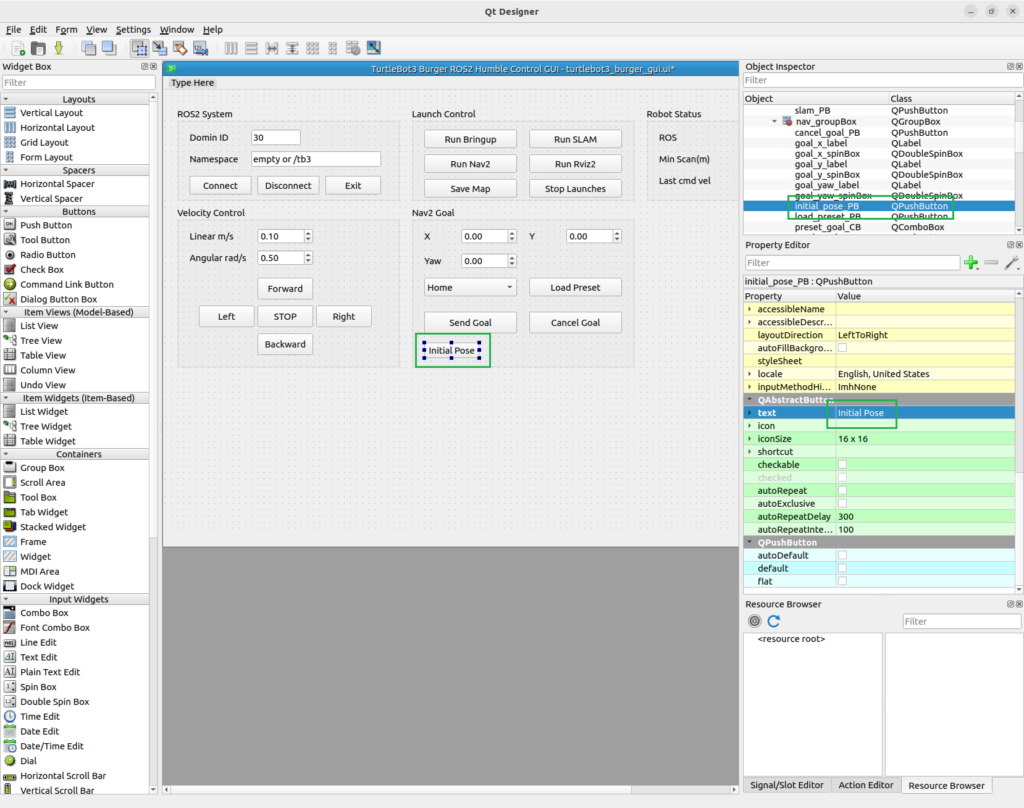
저장합니다.
turtlebot3_burger_gui.ui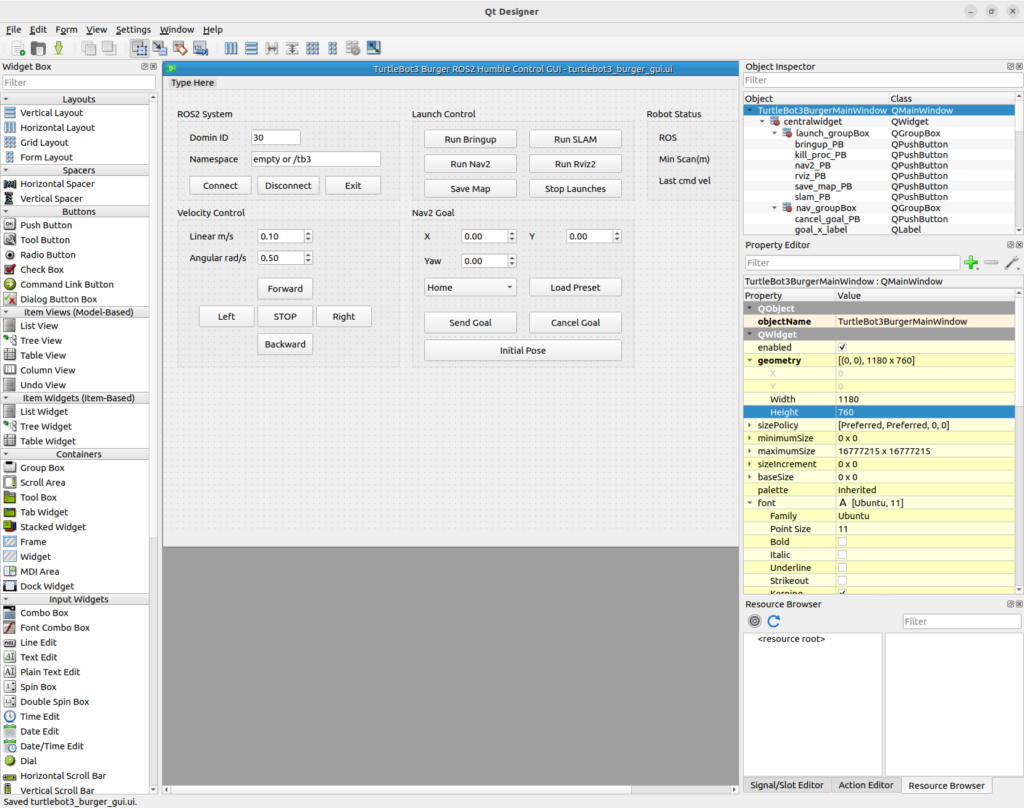
15. Nav2 Goal 컴포넌트 사용하기
먼저 Preset 버튼부터 연결합니다.
connect_signals()에 다음을 추가합니다.
self.load_preset_PB.clicked.connect(self.load_preset_goal)함수를 추가합니다.
def load_preset_goal(self):
    idx = self.preset_goal_CB.currentIndex()

    presets = [
        (0.0, 0.0, 0.0),
        (1.0, 0.0, 0.0),
        (0.0, 1.0, 1.57)
    ]

    x, y, yaw = presets[idx]

    self.goal_x_spinBox.setValue(x)
    self.goal_y_spinBox.setValue(y)
    self.goal_yaw_spinBox.setValue(yaw)

    print(f'Preset loaded: x={x}, y={y}, yaw={yaw}')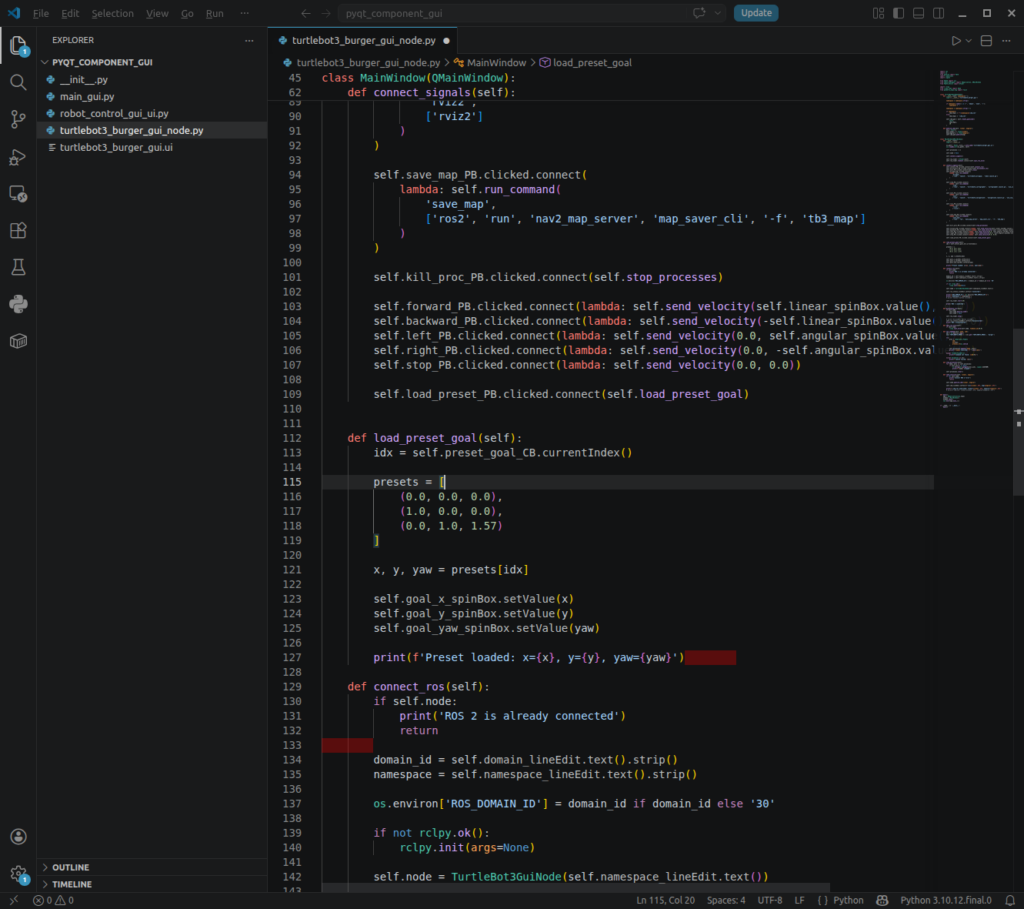
실행해서 확인합니다.
python3 turtlebot3_burger_gui_node.py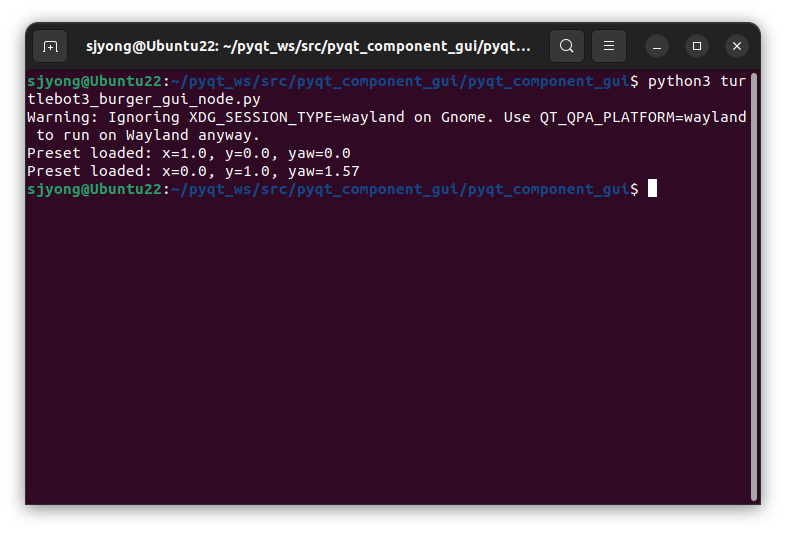
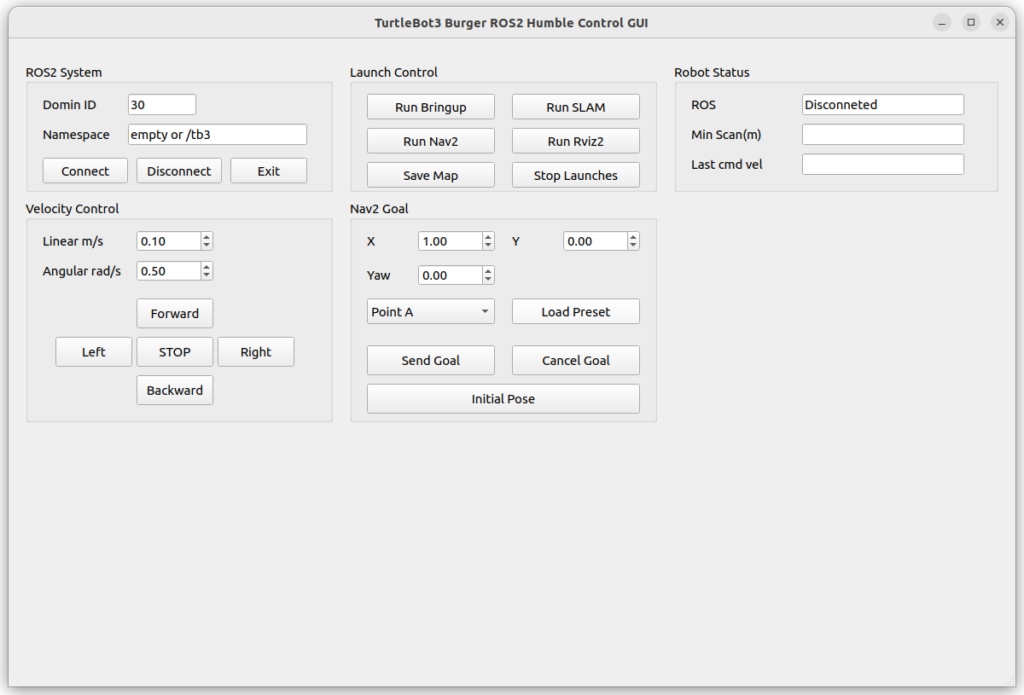
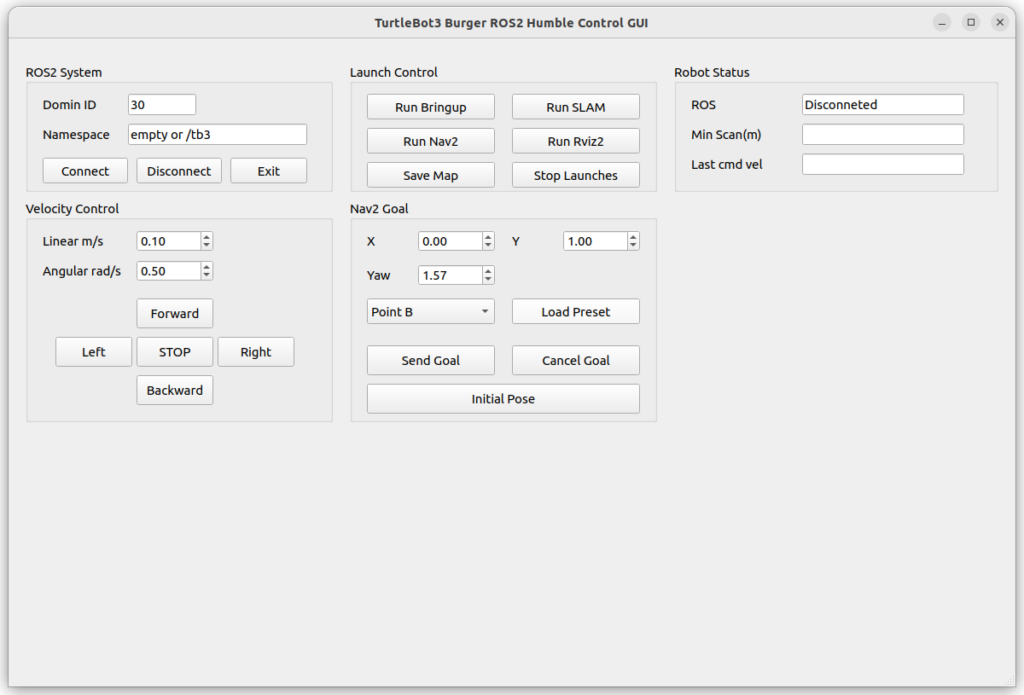
확인 순서는 다음입니다.
- ComboBox에서
Point A선택 Load Preset클릭- X 값이
1.00으로 바뀌는지 확인 - ComboBox에서
Point B선택 Load Preset클릭- Y 값이
1.00, Yaw 값이1.57로 바뀌는지 확인
이 단계에서는 Nav2로 goal을 보내지 않습니다.
먼저 UI 입력값이 Python 코드로 잘 들어오는지 확인하는 단계입니다.
16. Odometry View 영역 만들기
이번에는 /odom 데이터를 화면에 표시합니다.
Qt Designer에서 Group Box를 추가합니다.
objectName: odom_groupBox
title: Odometry View
geometry:
  x: 780
  y: 190
  width: 380
  height: 260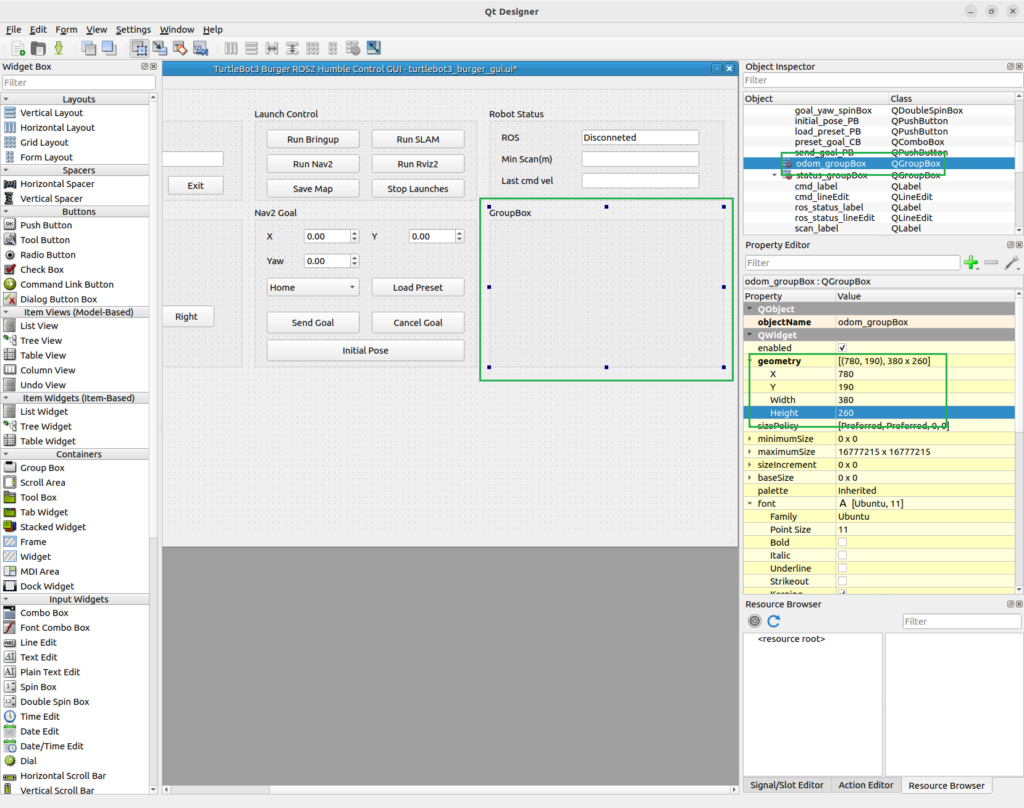
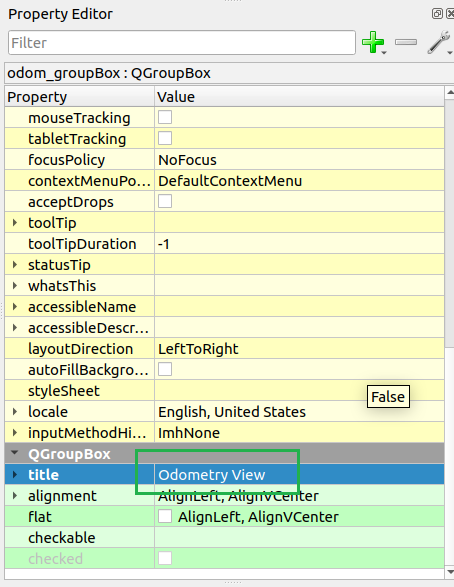
Label 3개를 추가합니다.
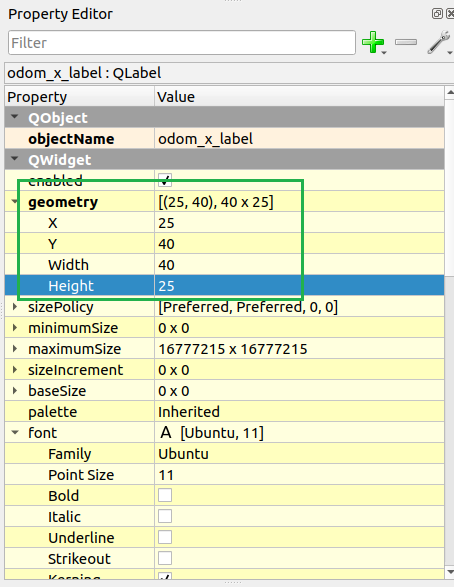
class: QLabel
objectName: odom_x_label
text: X
geometry:
  x: 25
  y: 40
  width: 40
  height: 25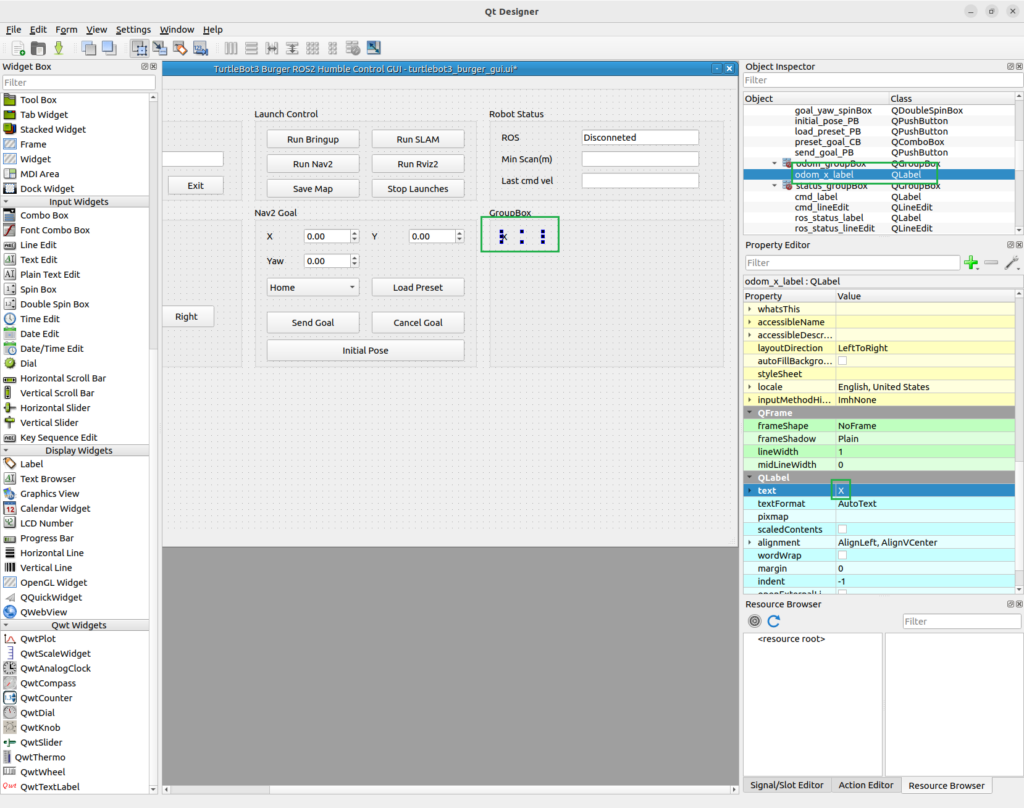
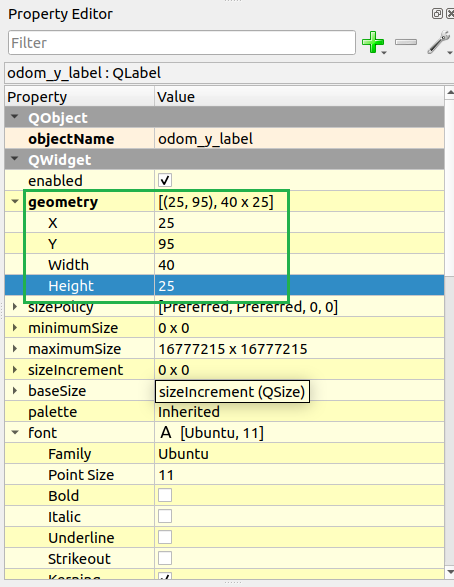
class: QLabel
objectName: odom_y_label
text: Y
geometry:
  x: 25
  y: 95
  width: 40
  height: 25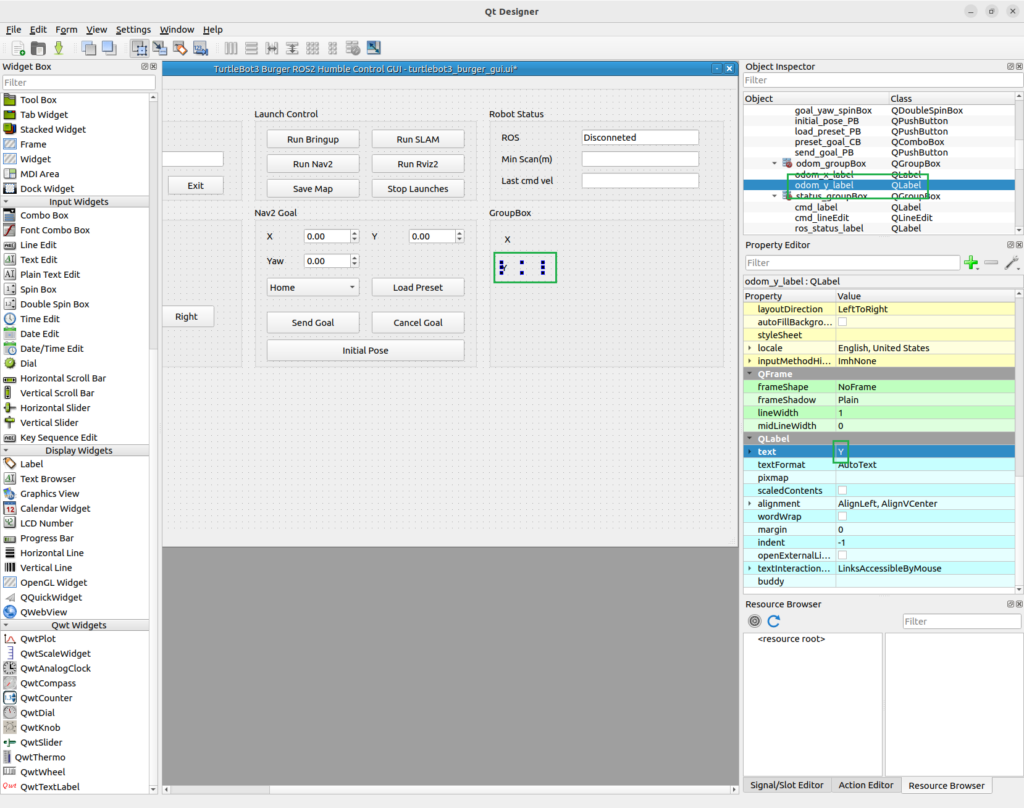
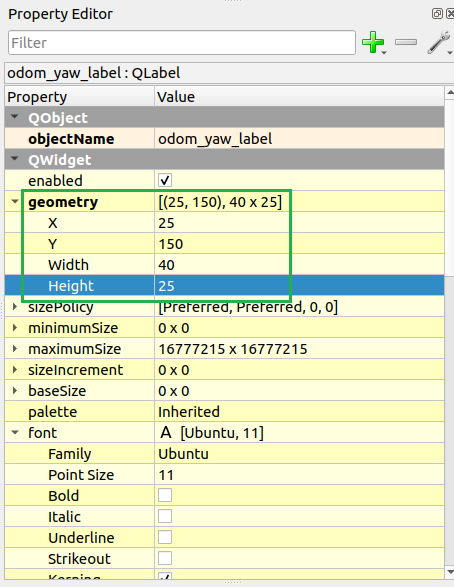
class: QLabel
objectName: odom_yaw_label
text: Yaw
geometry:
  x: 25
  y: 150
  width: 40
  height: 25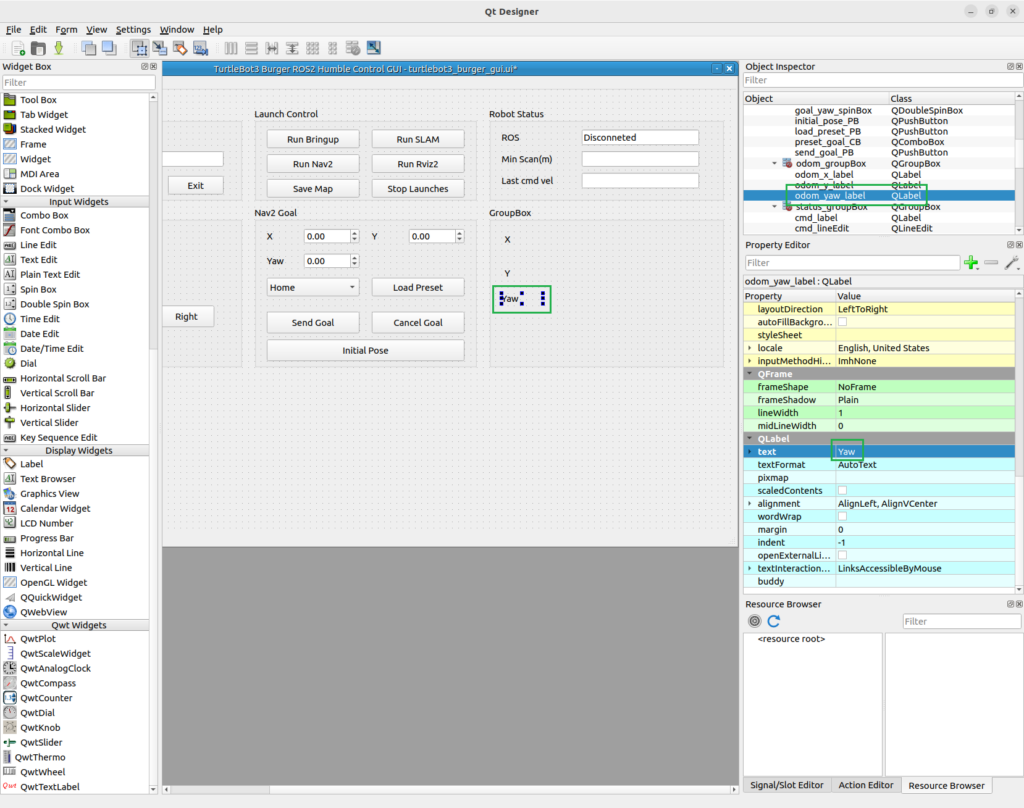
LCD Number 3개를 추가합니다.
class: QLCDNumber
objectName: odom_x_lcd
digitCount: 7
geometry:
  x: 80
  y: 35
  width: 130
  height: 40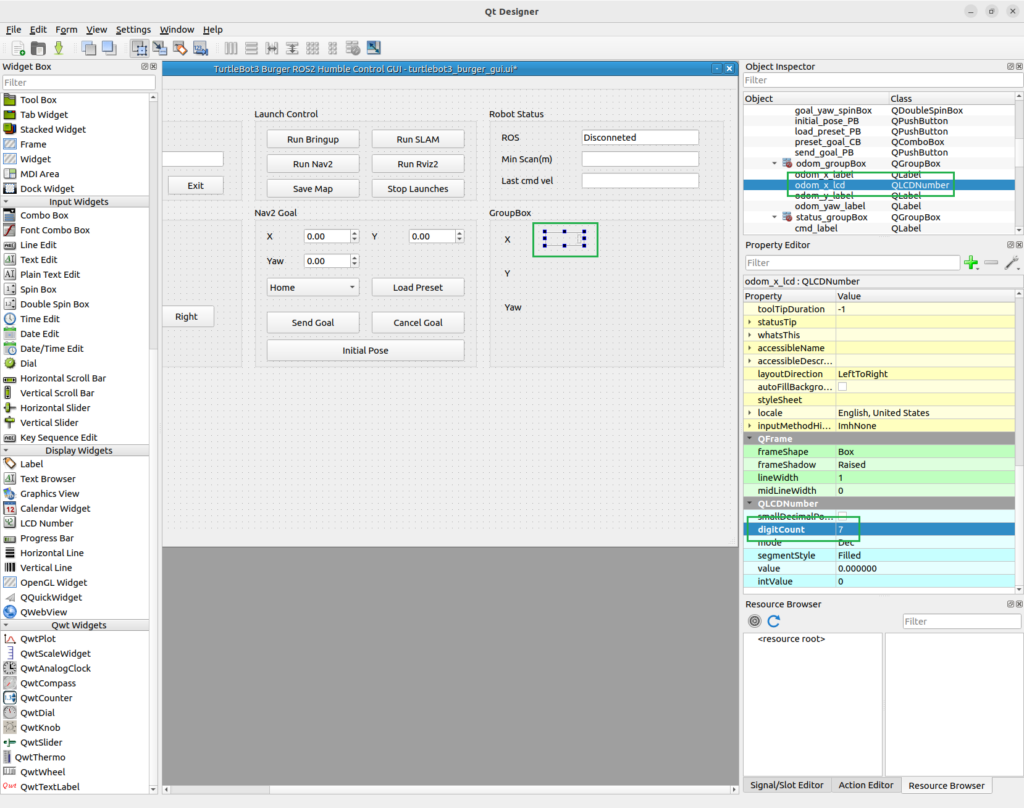
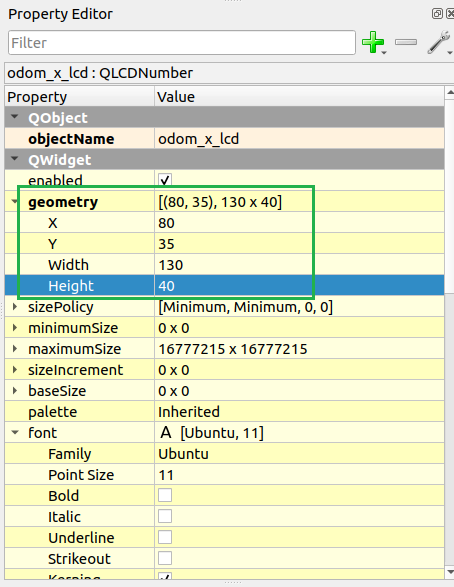
class: QLCDNumber
objectName: odom_y_lcd
digitCount: 7
geometry:
  x: 80
  y: 90
  width: 130
  height: 40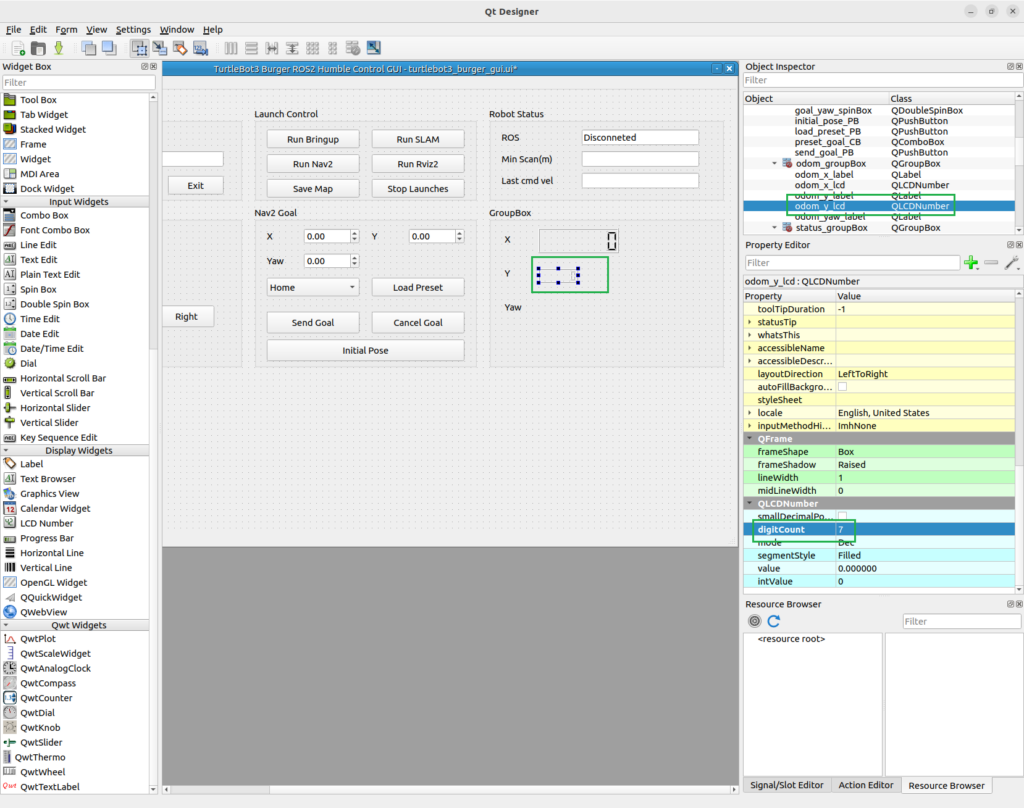
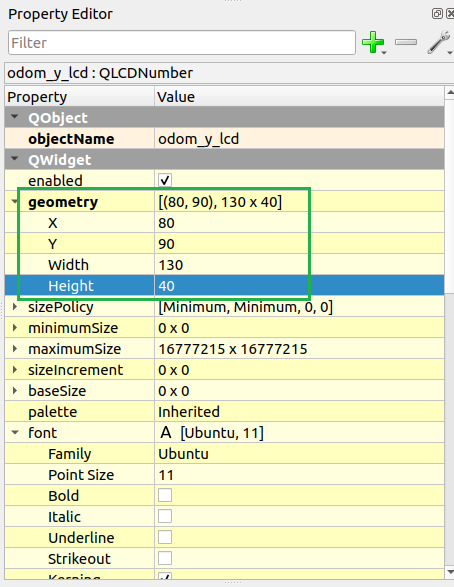
class: QLCDNumber
objectName: odom_yaw_lcd
digitCount: 7
geometry:
  x: 80
  y: 145
  width: 130
  height: 40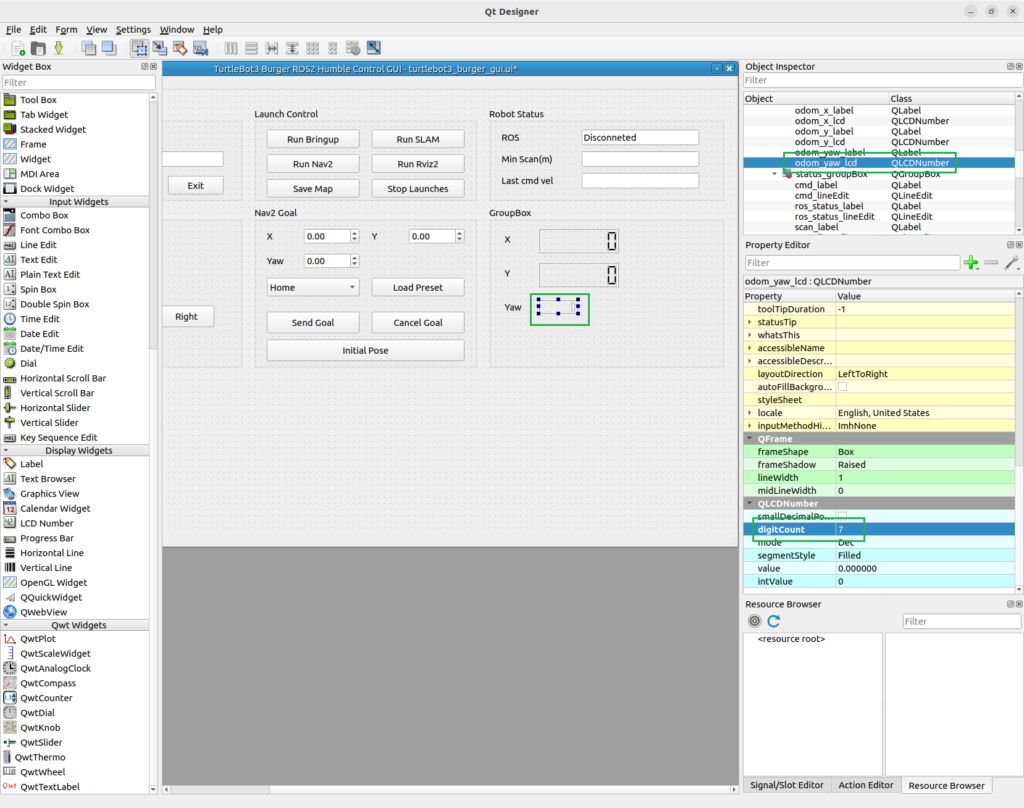
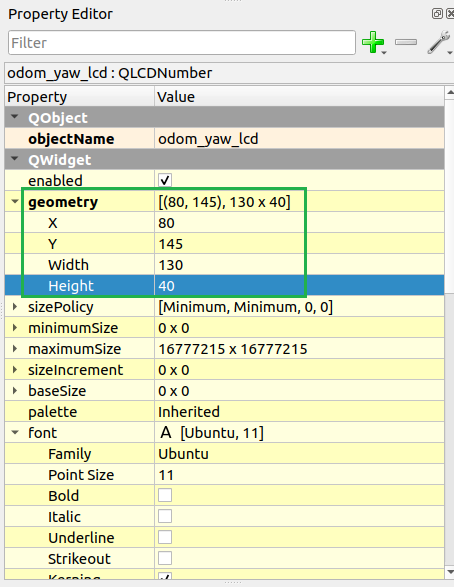
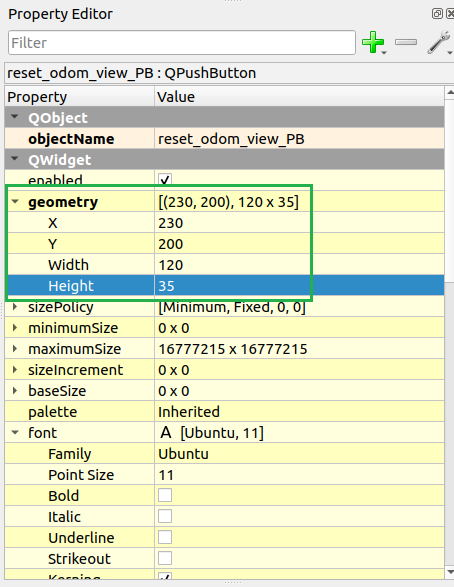
초기화 버튼을 추가합니다.
class: QPushButton
objectName: reset_odom_view_PB
text: Reset View
geometry:
  x: 230
  y: 200
  width: 120
  height: 35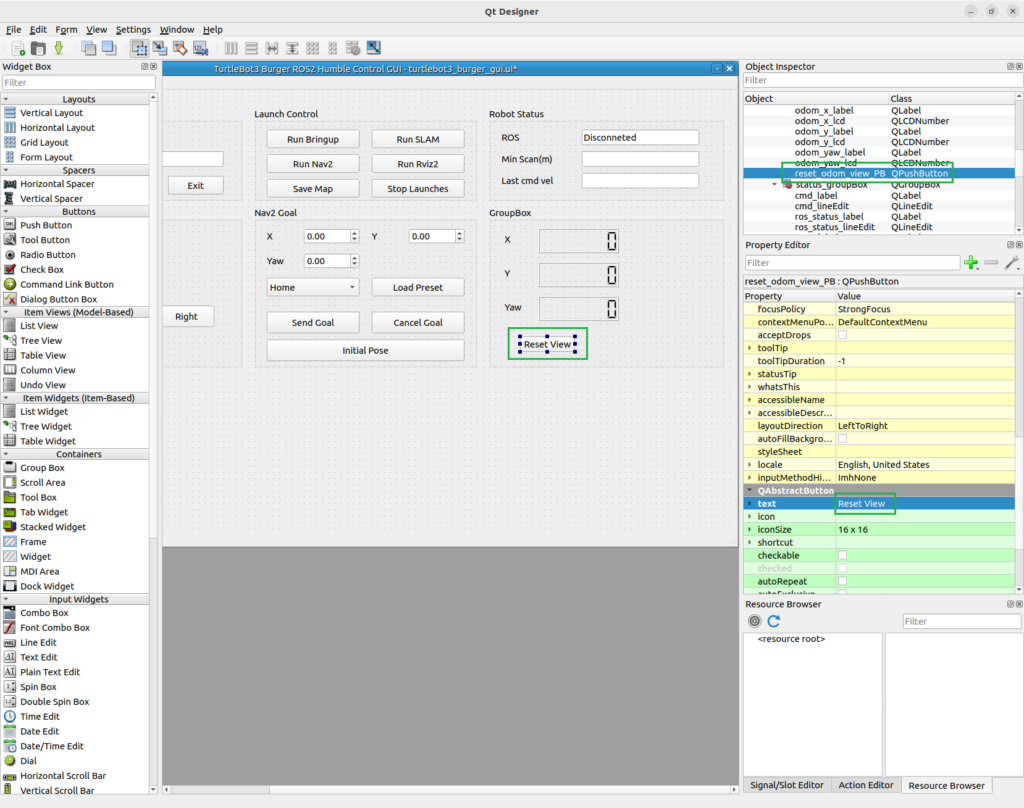
저장합니다.
turtlebot3_burger_gui.ui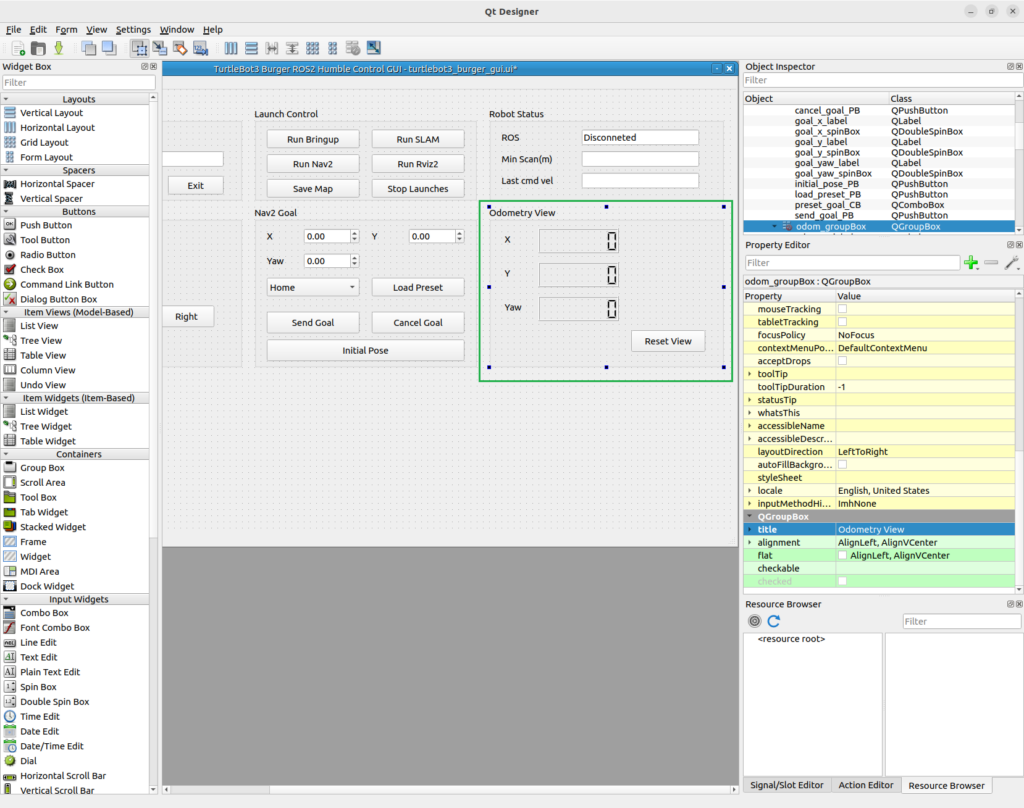
17. /odom 구독 코드 작성하기
상단 import에 Odometry 메시지를 추가합니다.
from nav_msgs.msg import OdometryYaw 계산을 위해 math도 추가합니다.
import mathQuaternion을 yaw로 바꾸는 함수를 추가합니다.
def quaternion_to_yaw(q):
    siny_cosp = 2.0 * (q.w * q.z + q.x * q.y)
    cosy_cosp = 1.0 - 2.0 * (q.y * q.y + q.z * q.z)
    return math.atan2(siny_cosp, cosy_cosp)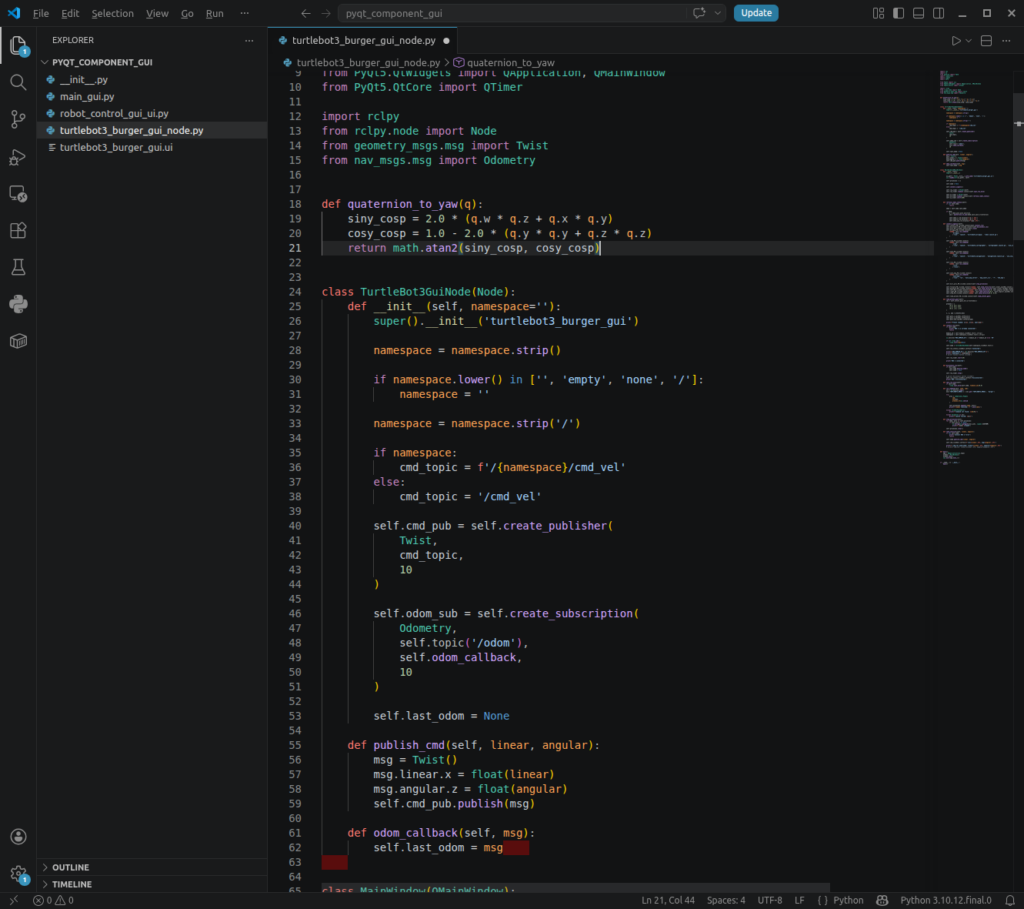
TurtleBot3GuiNode 클래스의 __init__()에 /odom subscriber를 추가합니다.
if namespace:
    odom_topic = f'/{namespace}/odom'
else:
     odom_topic = '/odom'

self.odom_sub = self.create_subscription(
    Odometry,
    odom_topic,
    self.odom_callback,
    10
)

self.last_odom = None
callback 함수를 추가합니다.
def odom_callback(self, msg):
    self.last_odom = msg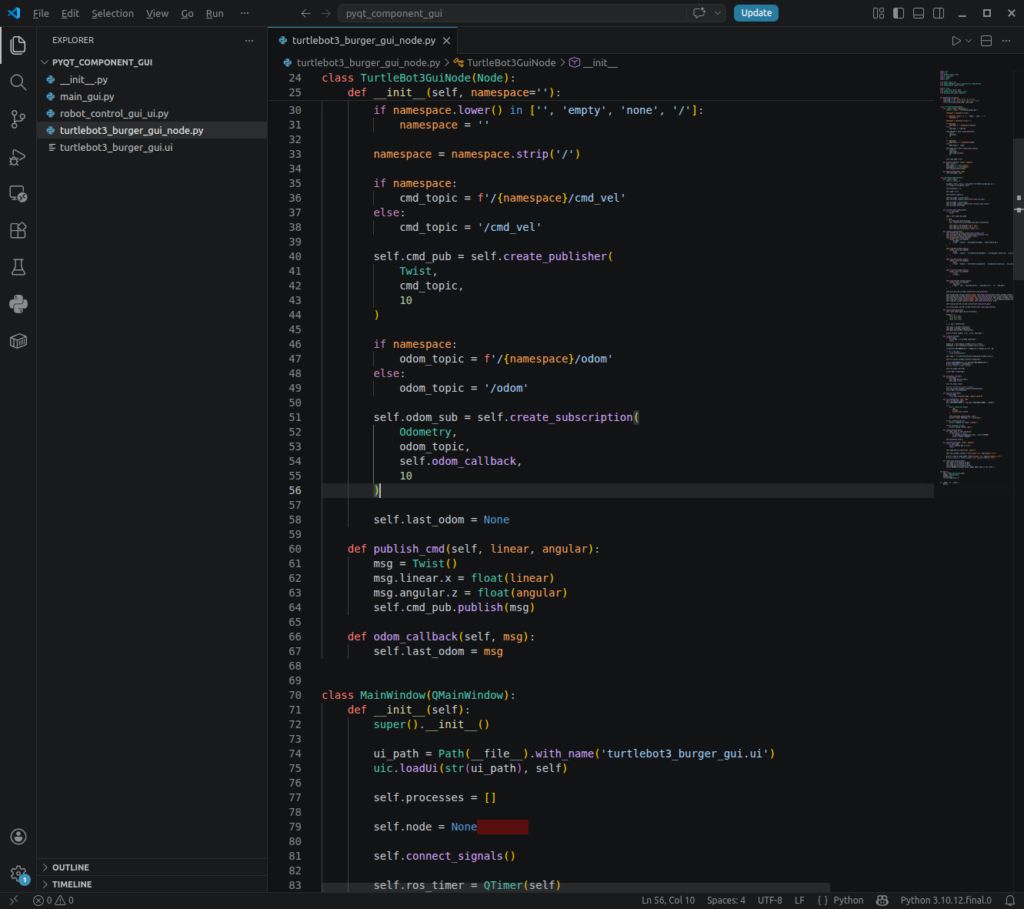
이제 GUI에서 주기적으로 화면을 갱신해야 합니다.
MainWindow.__init__()에 UI 갱신 타이머를 추가합니다.
self.ui_timer = QTimer(self)
self.ui_timer.timeout.connect(self.refresh_robot_status)
self.ui_timer.start(200)
refresh_robot_status() 함수를 추가합니다.
def refresh_robot_status(self):
    if not self.node:
        return

    odom = self.node.last_odom

    if odom:
        p = odom.pose.pose.position
        yaw = quaternion_to_yaw(odom.pose.pose.orientation)

        self.odom_x_lcd.display(f'{p.x:.2f}')
        self.odom_y_lcd.display(f'{p.y:.2f}')
        self.odom_yaw_lcd.display(f'{yaw:.2f}')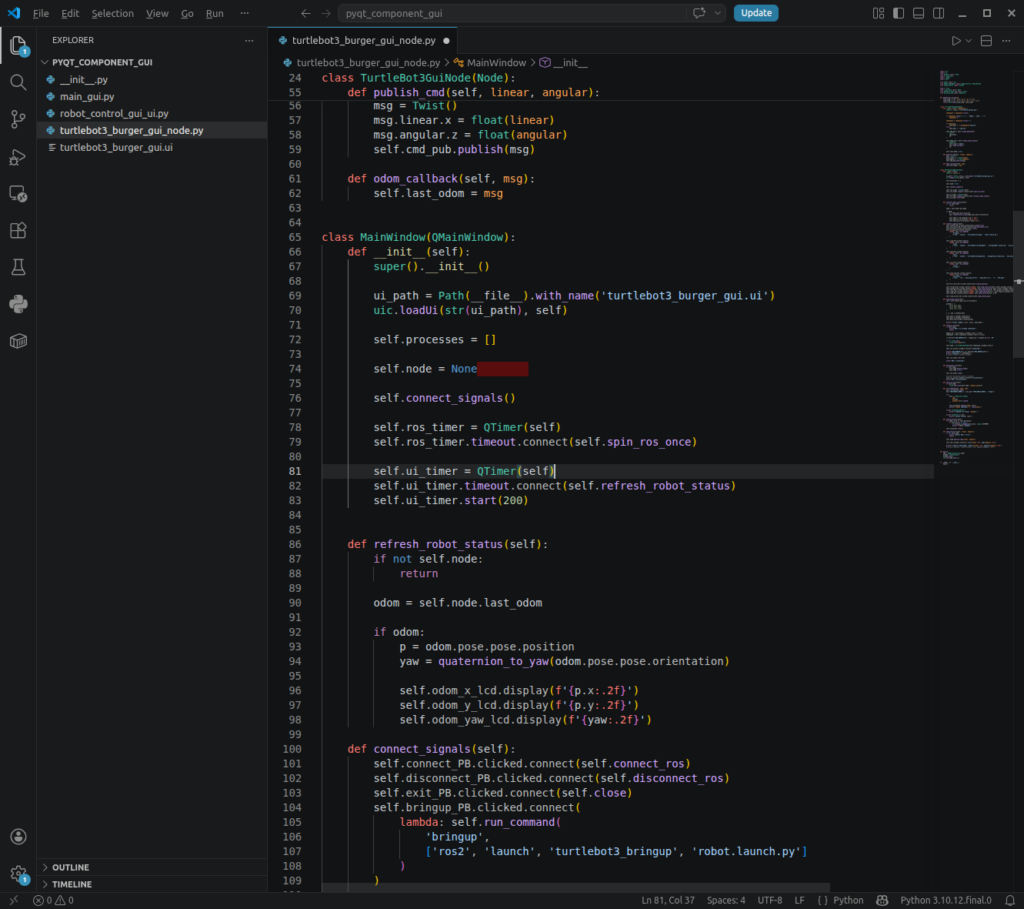
초기화 버튼도 연결합니다.
connect_signals()에 다음을 추가합니다.
self.reset_odom_view_PB.clicked.connect(self.reset_odom_display)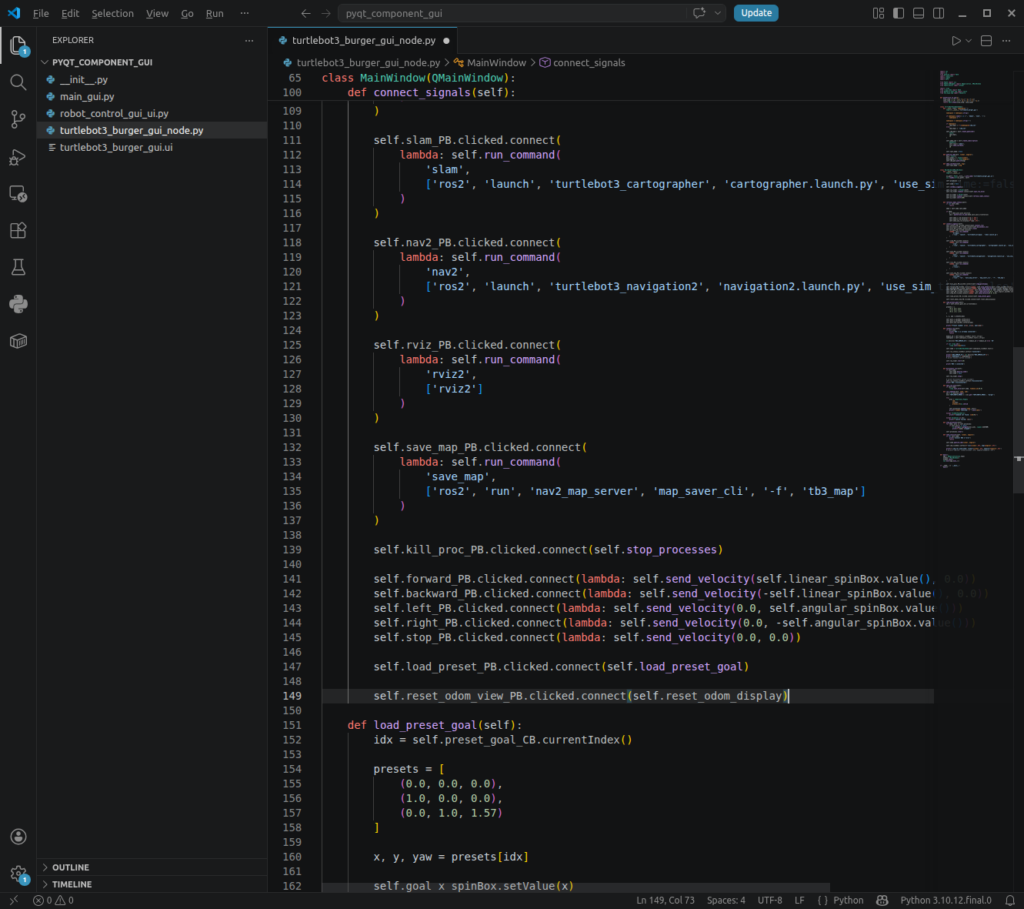
그리고 함수를 추가합니다.
def reset_odom_display(self):
    self.odom_x_lcd.display('0.00')
    self.odom_y_lcd.display('0.00')
    self.odom_yaw_lcd.display('0.00')
    print('Odometry display reset. Robot odom frame is not reset.')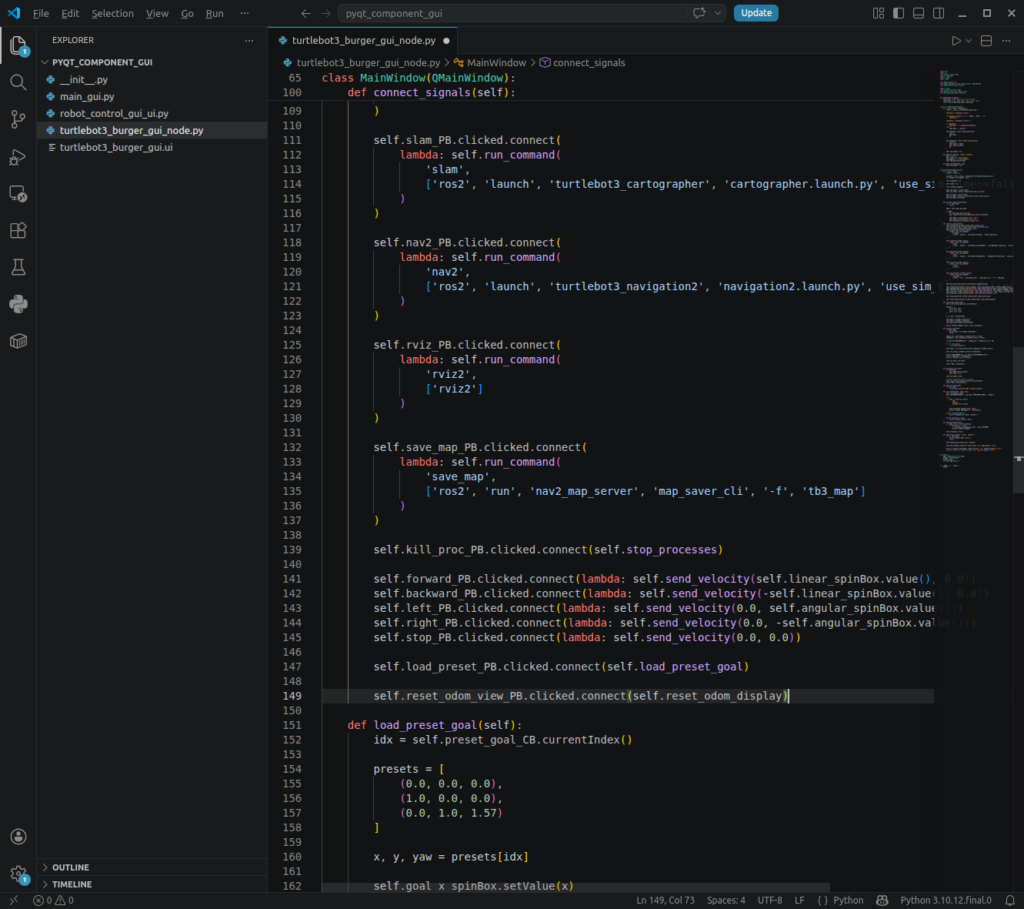
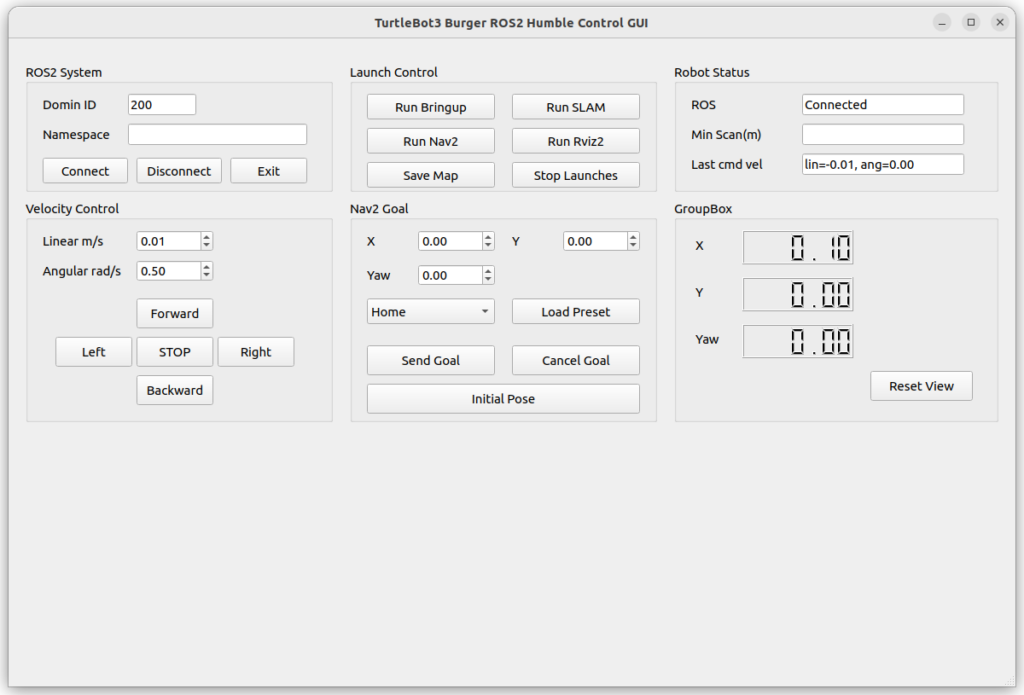
여기서 중요한 점이 있습니다.
Reset View 버튼은 화면 표시만 0으로 바꾸는 버튼입니다. 로봇의 실제 /odom 좌표계를 리셋하는 기능은 아닙니다.
18. Initial Pose 발행하기
Nav2를 사용할 때는 로봇의 초기 위치를 /initialpose로 알려줘야 합니다.
RViz2에서 2D Pose Estimate를 누르는 것과 같은 역할을 GUI 버튼으로 만들겠습니다.
상단 import에 메시지를 추가합니다.
from geometry_msgs.msg import PoseWithCovarianceStampedYaw를 Quaternion으로 바꾸는 함수를 추가합니다.
def yaw_to_quaternion(yaw):
    half = yaw * 0.5

    qx = 0.0
    qy = 0.0
    qz = math.sin(half)
    qw = math.cos(half)

    return qx, qy, qz, qw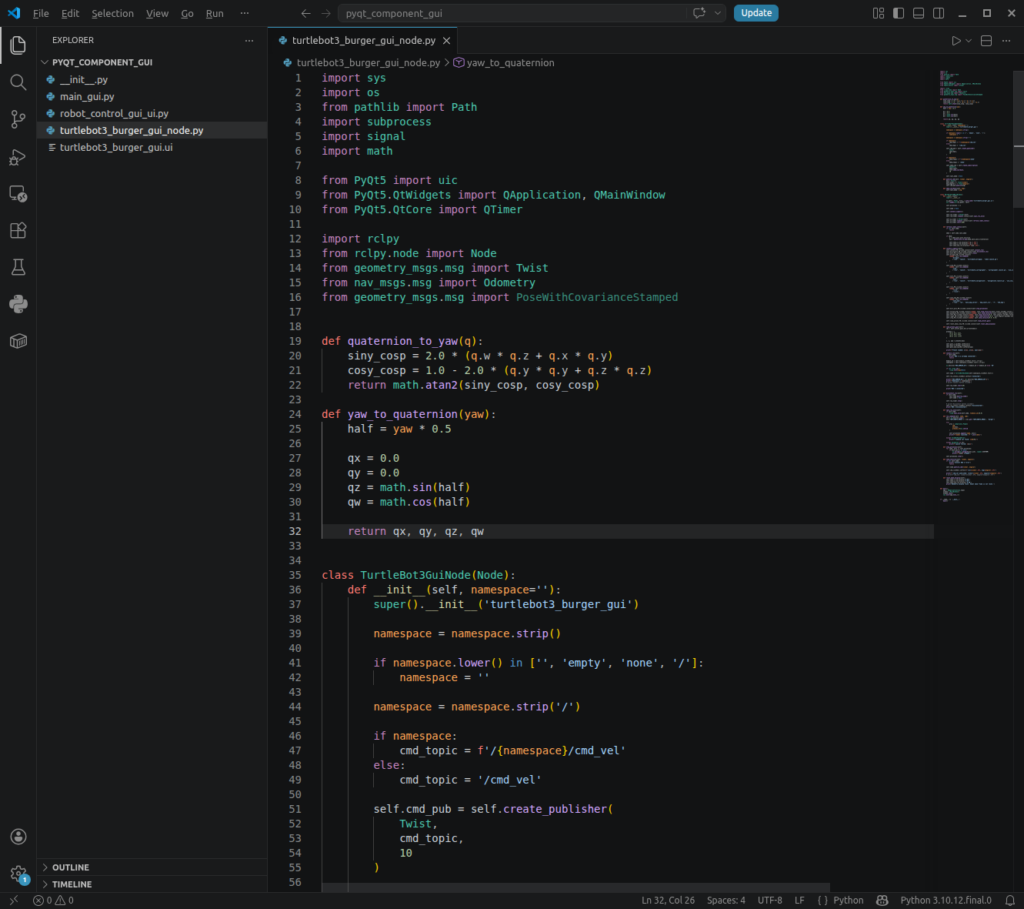
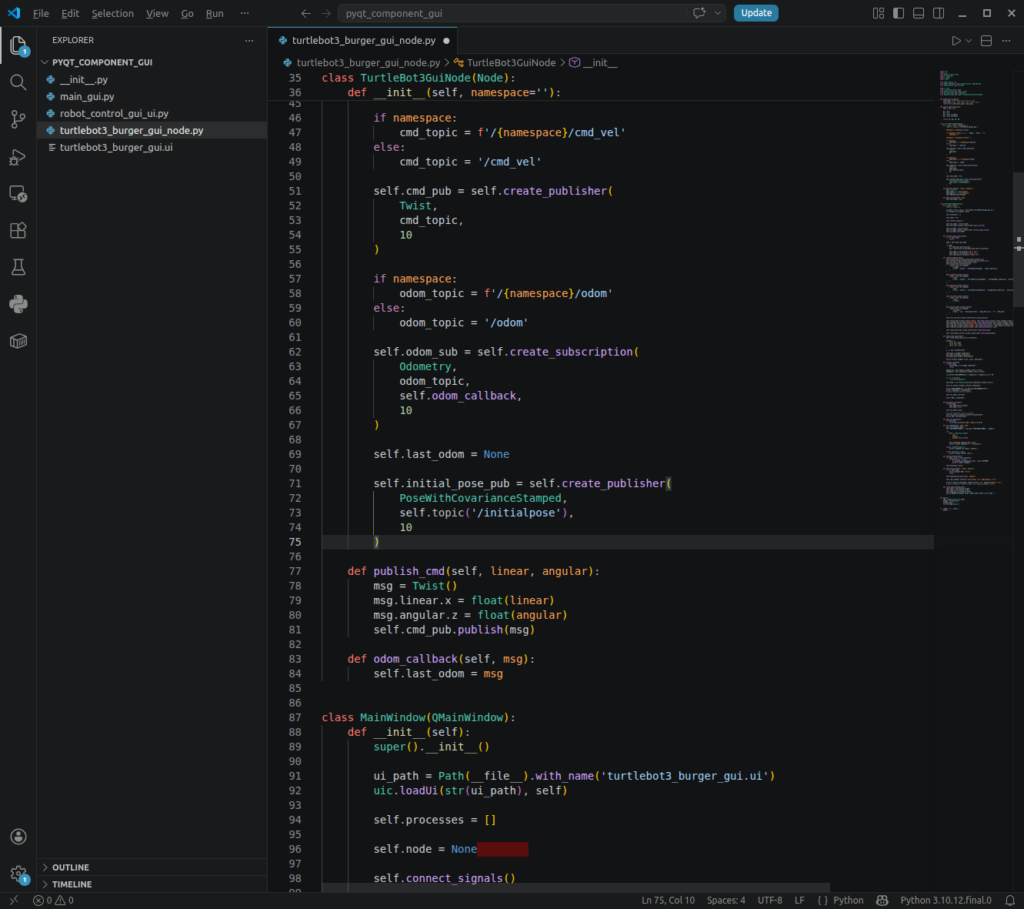
TurtleBot3GuiNode.__init__()에 publisher를 추가합니다.
if namespace:
    initpos_topic = f'/{namespace}/initialpose'
else:
    initpos_topic = '/initialpose'

self.initial_pose_pub = self.create_publisher(
    PoseWithCovarianceStamped,
    initpos_topic,
    10
)
TurtleBot3GuiNode 클래스에 initial pose 발행 함수를 추가합니다.
def publish_initial_pose(self, x, y, yaw):
    msg = PoseWithCovarianceStamped()

    msg.header.frame_id = 'map'
    msg.header.stamp = self.get_clock().now().to_msg()

    msg.pose.pose.position.x = float(x)
    msg.pose.pose.position.y = float(y)

    qx, qy, qz, qw = yaw_to_quaternion(yaw)

    msg.pose.pose.orientation.x = qx
    msg.pose.pose.orientation.y = qy
    msg.pose.pose.orientation.z = qz
    msg.pose.pose.orientation.w = qw

    msg.pose.covariance[0] = 0.25
    msg.pose.covariance[7] = 0.25
    msg.pose.covariance[35] = 0.0685

    self.initial_pose_pub.publish(msg)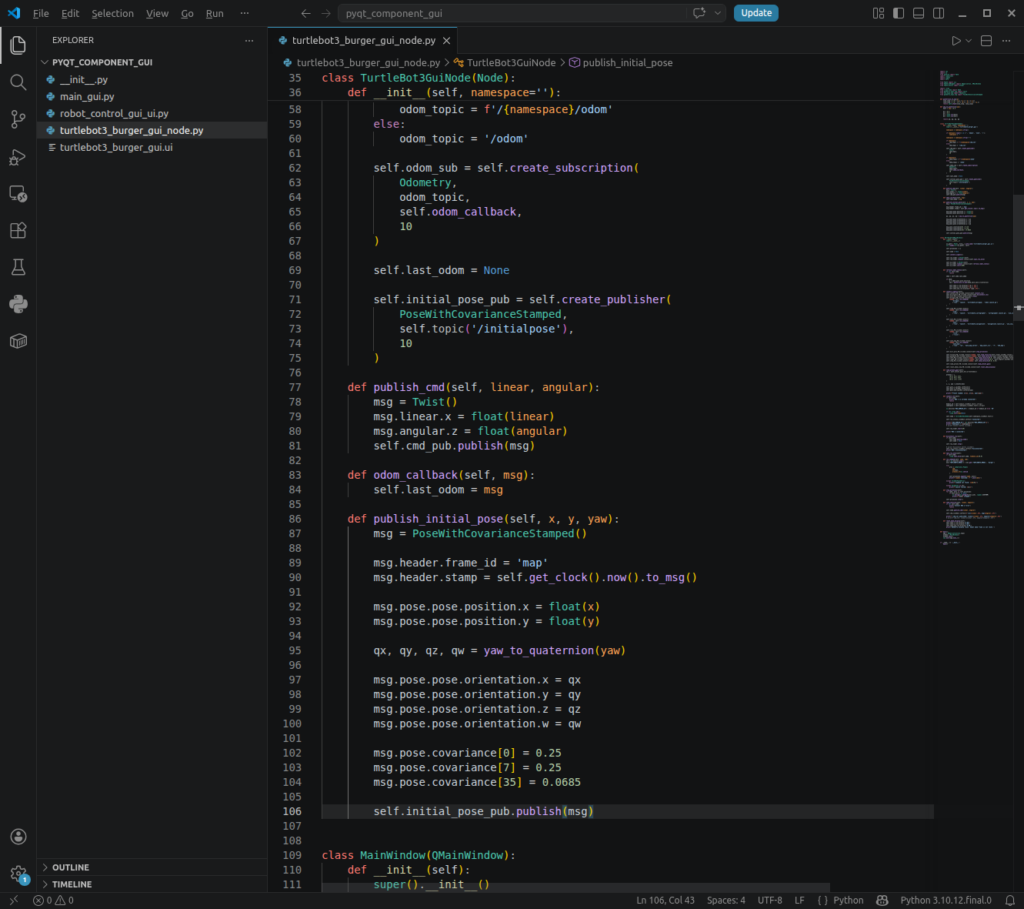
connect_signals()에 버튼 연결을 추가합니다.
self.initial_pose_PB.clicked.connect(self.set_initial_pose)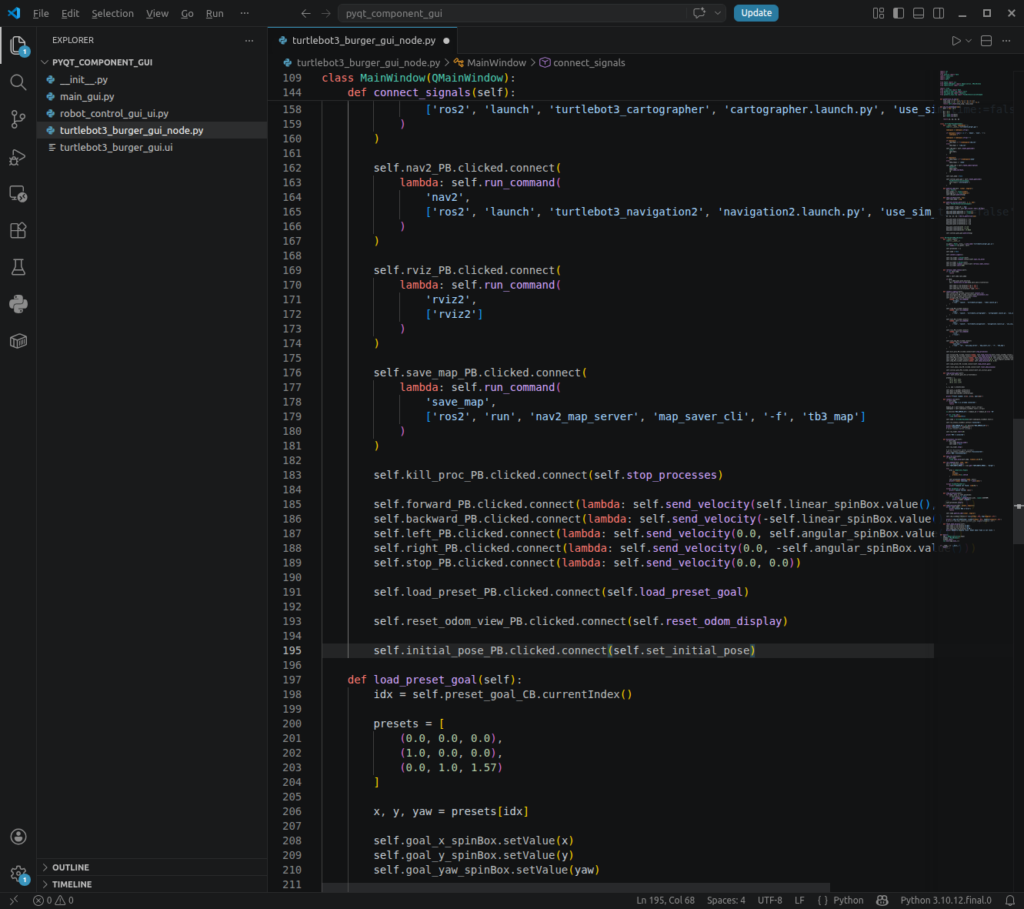
MainWindow 클래스에 함수를 추가합니다.
def set_initial_pose(self):
    if not self.node:
        print('Connect ROS 2 first')
        return

    self.node.publish_initial_pose(
        self.goal_x_spinBox.value(),
        self.goal_y_spinBox.value(),
        self.goal_yaw_spinBox.value()
    )

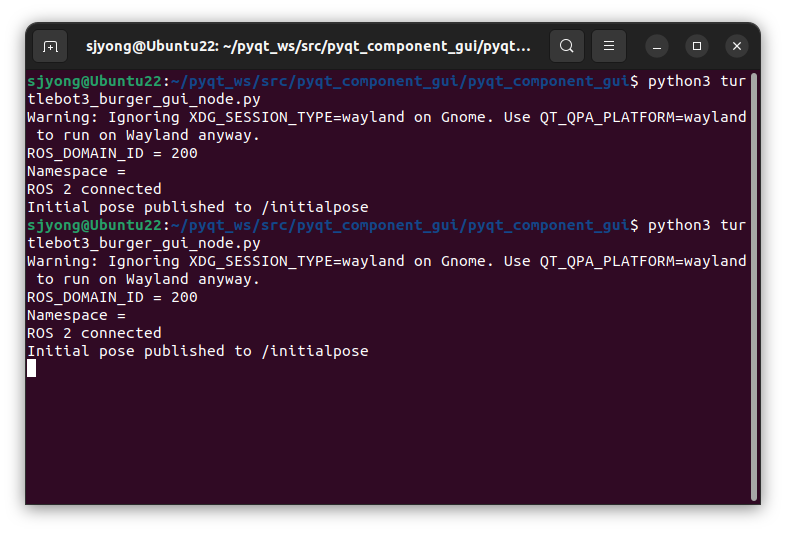
    print('Initial pose published to /initialpose')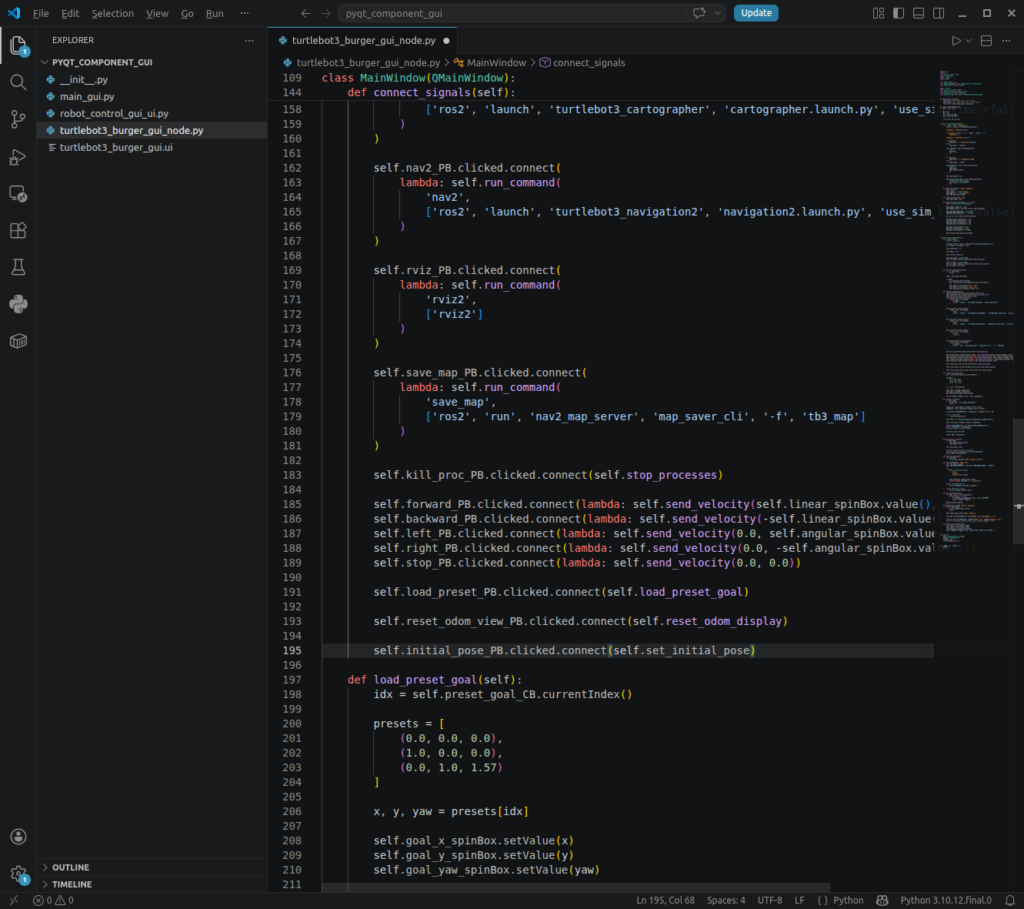
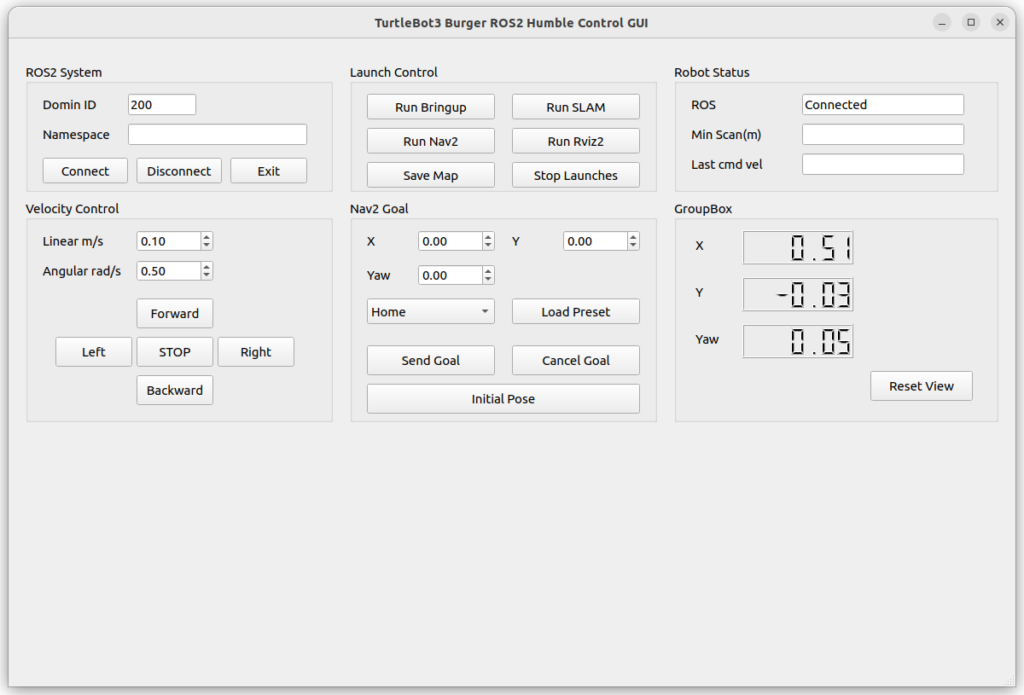
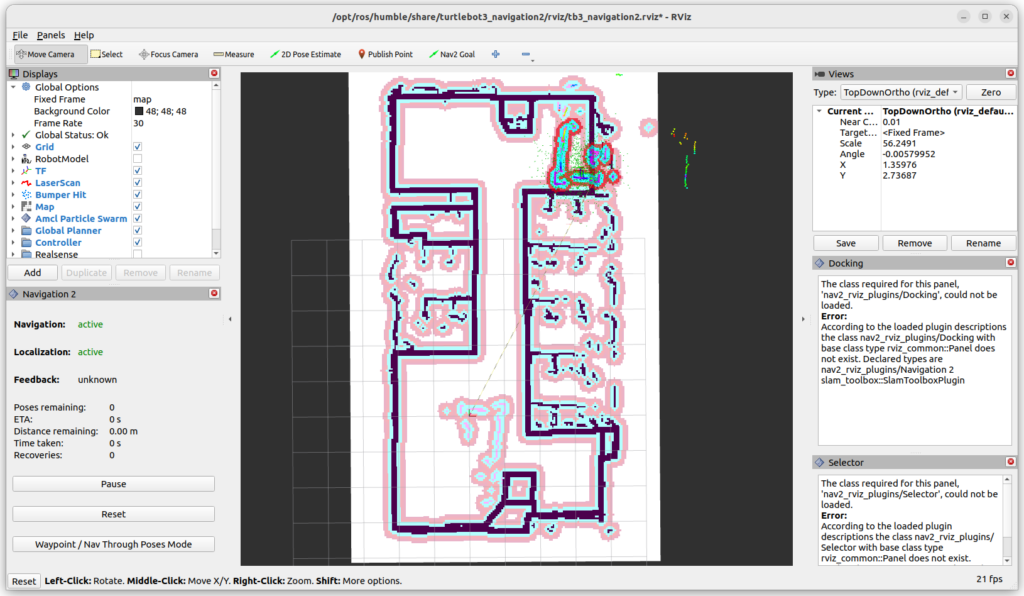
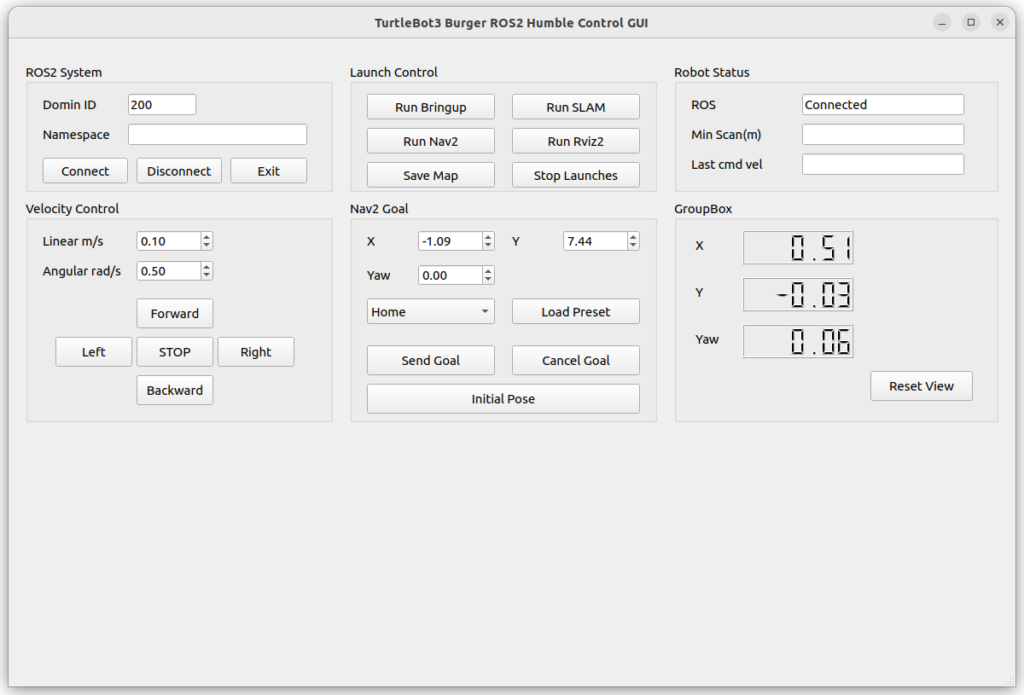
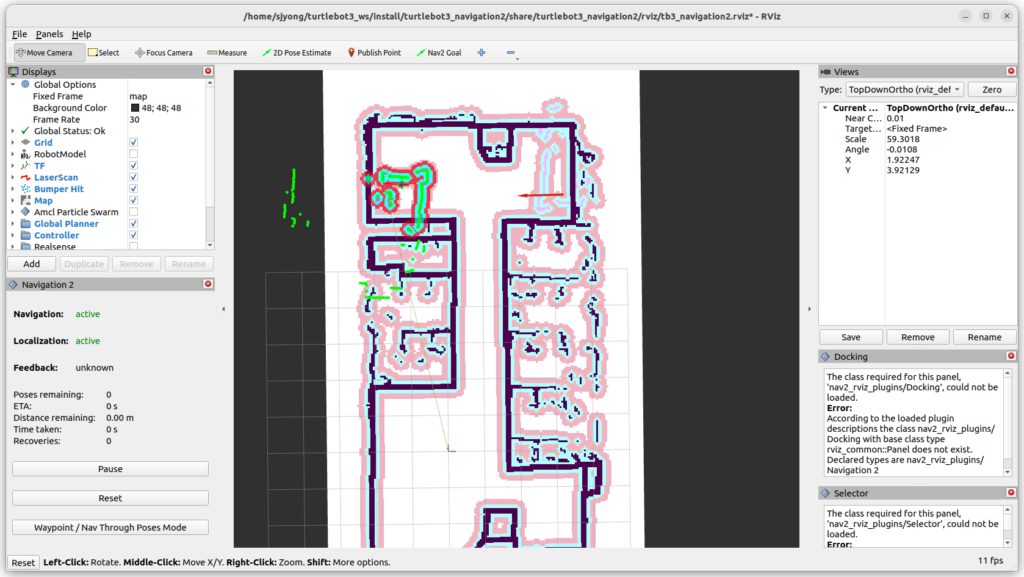
테스트 순서는 다음입니다.
- TurtleBot3 bringup 실행
- Nav2 실행
- RViz2 실행
- GUI 실행
Connect클릭- X, Y, Yaw 입력
Set Initial Pose클릭- RViz2에서 로봇 위치가 반영되는지 확인
19. Nav2 Goal 전송하기
이제 Nav2 action server로 목표 좌표를 보내겠습니다.
상단 import에 다음을 추가합니다.
from rclpy.action import ActionClient
from nav2_msgs.action import NavigateToPose
from geometry_msgs.msg import PoseStamped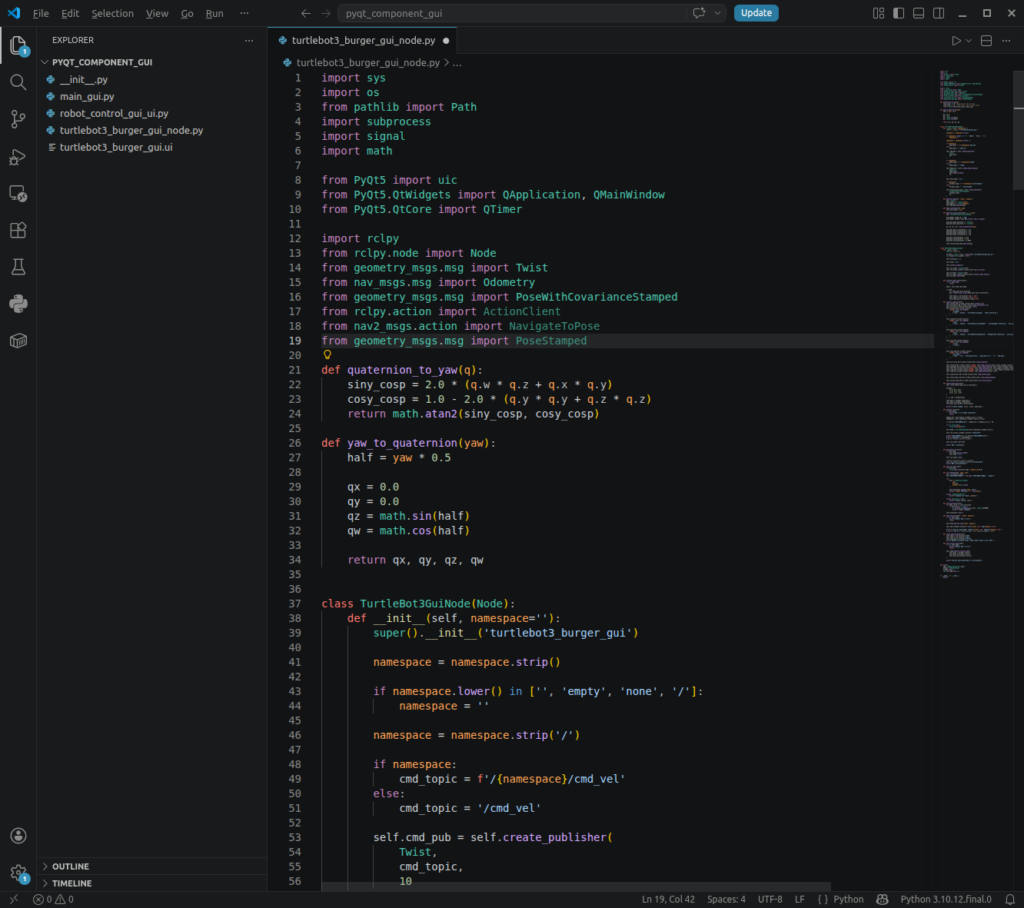
TurtleBot3GuiNode.__init__()에 ActionClient를 추가합니다.
if namespace:
    navpos_topic = f'/{namespace}/navigate_to_pose'
else:
    navpos_topic = '/navigate_to_pose'

self.nav_client = ActionClient(
    self,
    NavigateToPose,
    navpos_topic
)

self.goal_handle = None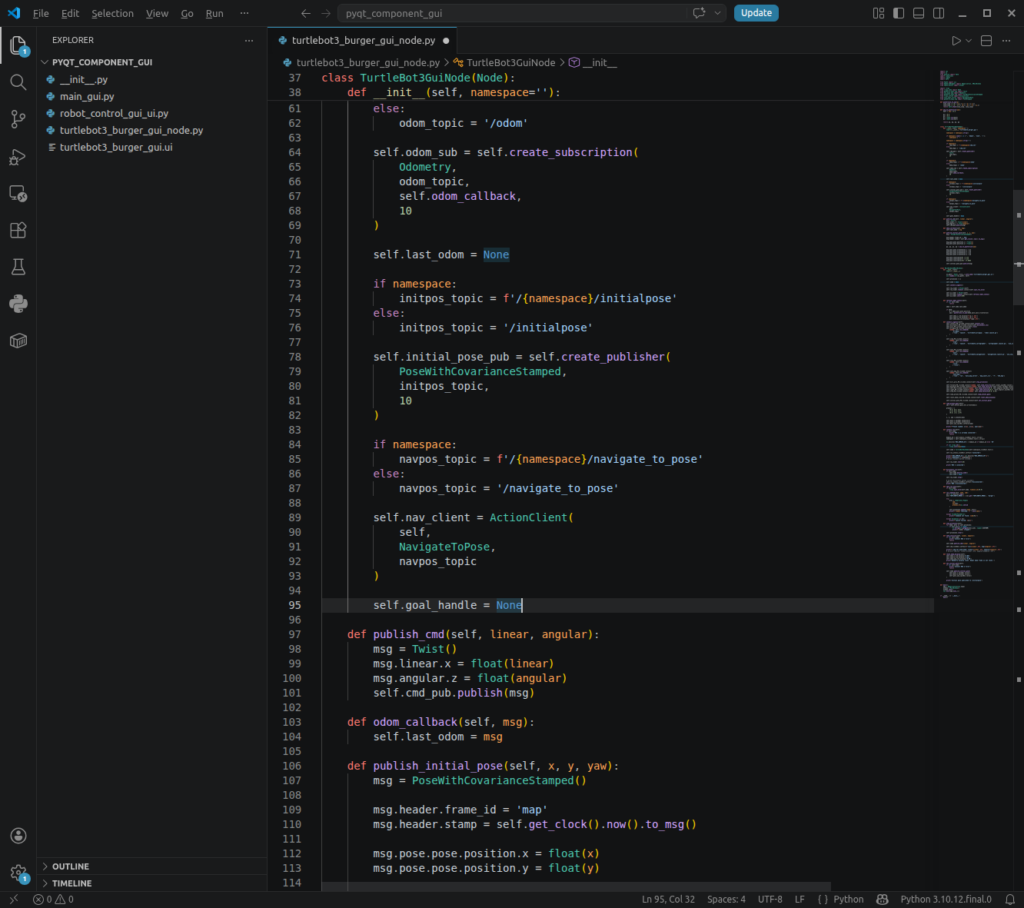
TurtleBot3GuiNode 클래스에 goal 전송 함수를 추가합니다.
def send_goal(self, x, y, yaw):
    goal_msg = NavigateToPose.Goal()

    goal_msg.pose = PoseStamped()
    goal_msg.pose.header.frame_id = 'map'
    goal_msg.pose.header.stamp = self.get_clock().now().to_msg()

    goal_msg.pose.pose.position.x = float(x)
    goal_msg.pose.pose.position.y = float(y)

    qx, qy, qz, qw = yaw_to_quaternion(yaw)

    goal_msg.pose.pose.orientation.x = qx
    goal_msg.pose.pose.orientation.y = qy
    goal_msg.pose.pose.orientation.z = qz
    goal_msg.pose.pose.orientation.w = qw

    if not self.nav_client.wait_for_server(timeout_sec=1.0):
        return False, 'Nav2 action server is not available'

    future = self.nav_client.send_goal_async(goal_msg)
    future.add_done_callback(self._goal_response_callback)

    return True, f'Goal sent: x={x:.2f}, y={y:.2f}, yaw={yaw:.2f}'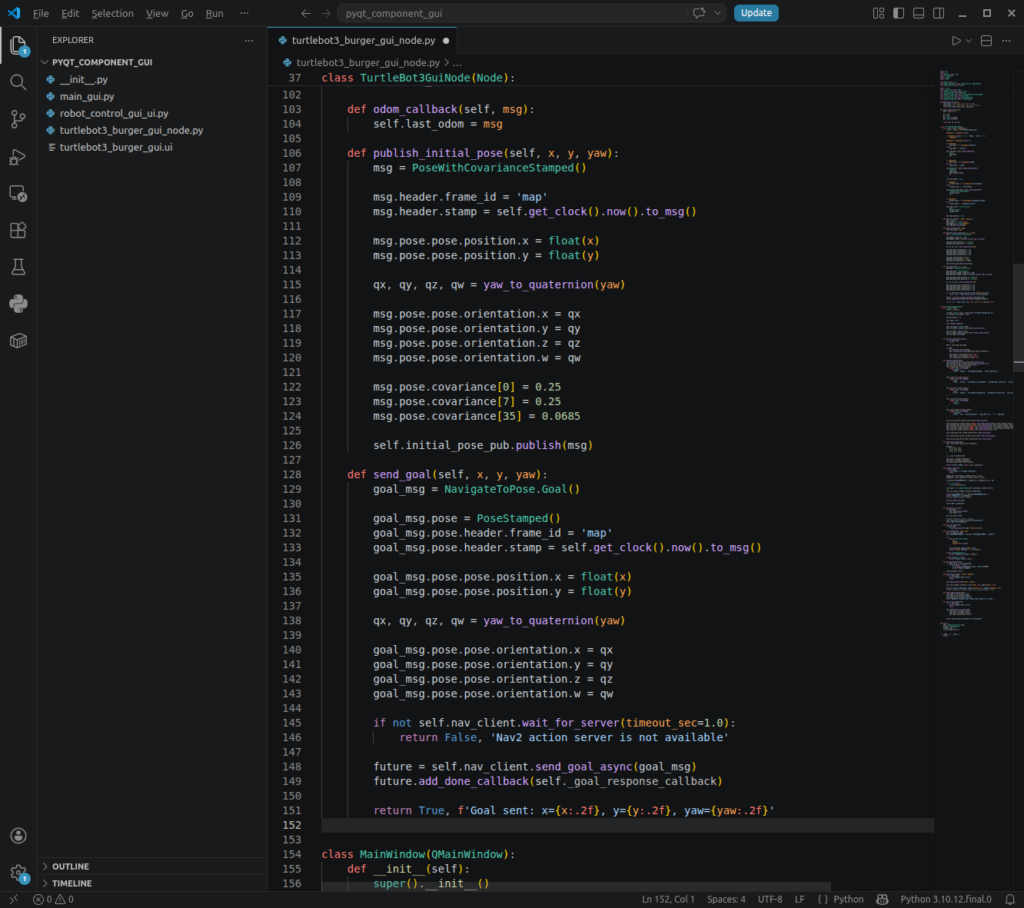
Goal 응답 callback을 추가합니다.
def _goal_response_callback(self, future):
    self.goal_handle = future.result()

    if self.goal_handle and self.goal_handle.accepted:
        self.get_logger().info('Goal accepted')
    else:
        self.get_logger().warn('Goal rejected')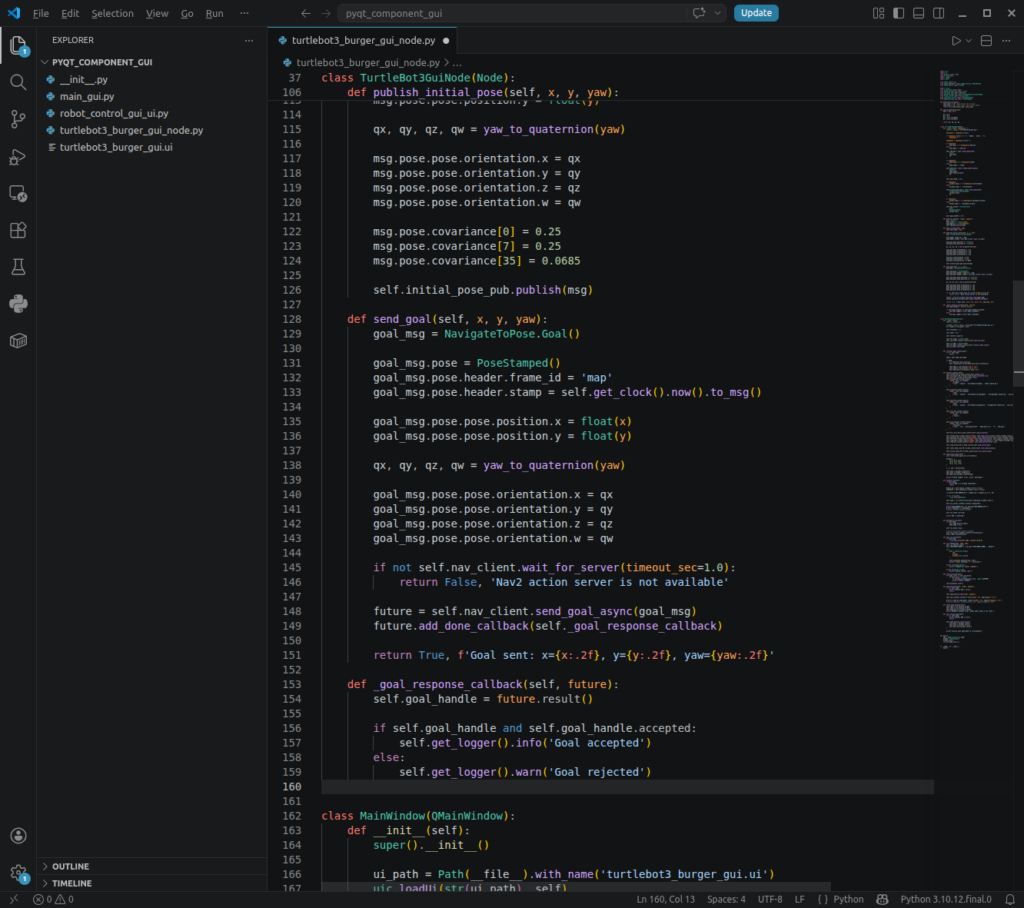
Goal 취소 함수도 추가합니다.
def cancel_goal(self):
    if self.goal_handle:
        self.goal_handle.cancel_goal_async()
        return True

    return False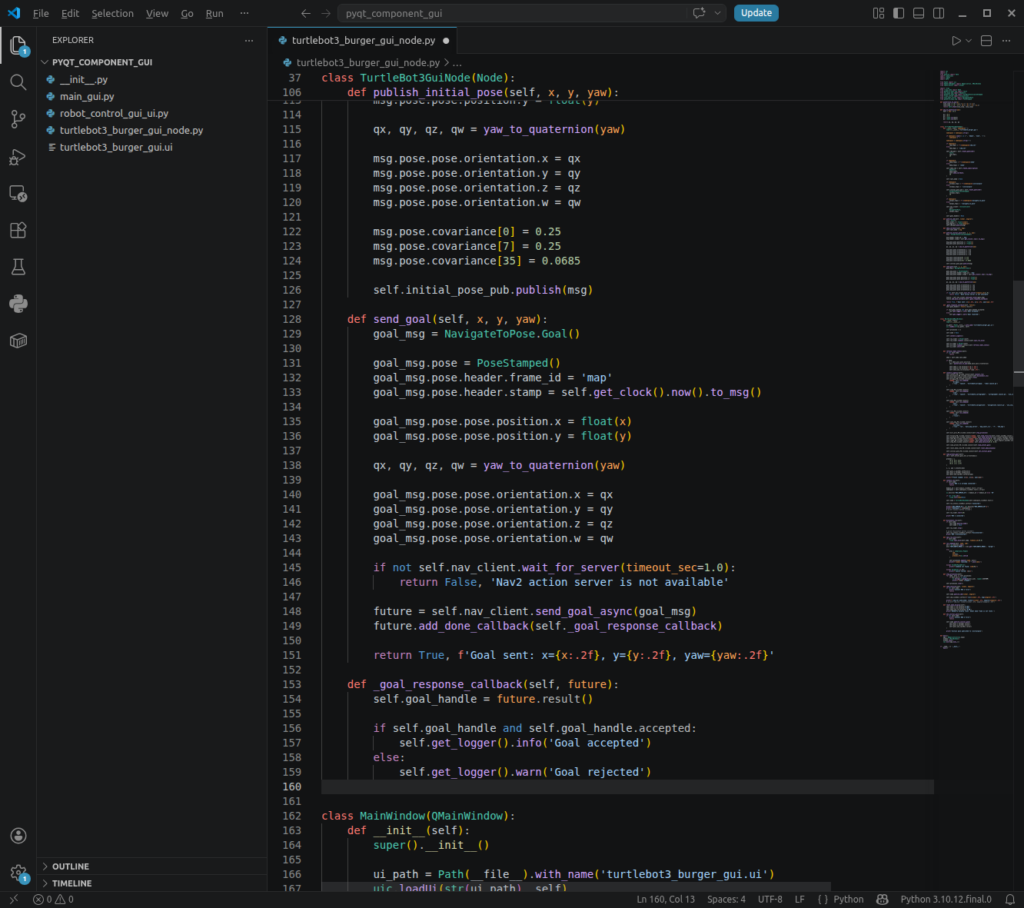
이제 connect_signals()에 버튼 연결을 추가합니다.
self.send_goal_PB.clicked.connect(self.send_nav_goal)
self.cancel_goal_PB.clicked.connect(self.cancel_nav_goal)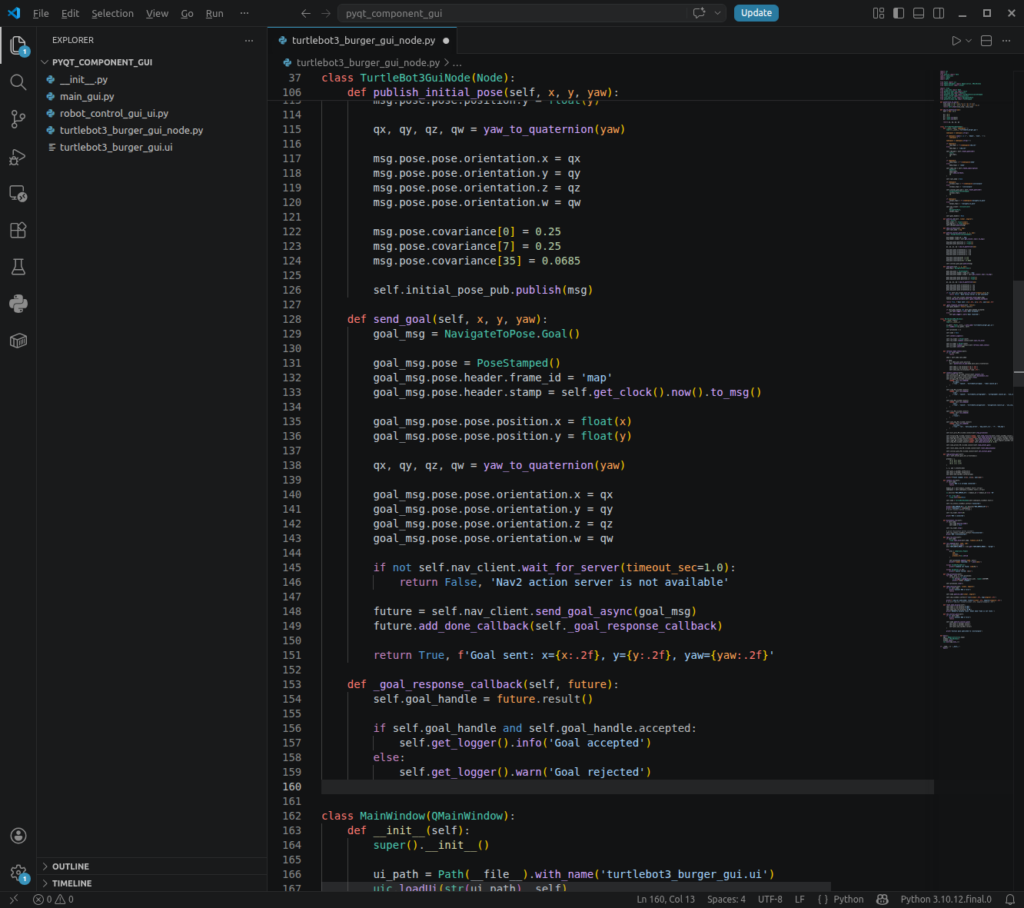
MainWindow 클래스에 함수를 추가합니다.
def send_nav_goal(self):
    if not self.node:
        print('Connect ROS 2 first')
        return

    ok, text = self.node.send_goal(
        self.goal_x_spinBox.value(),
        self.goal_y_spinBox.value(),
        self.goal_yaw_spinBox.value()
    )

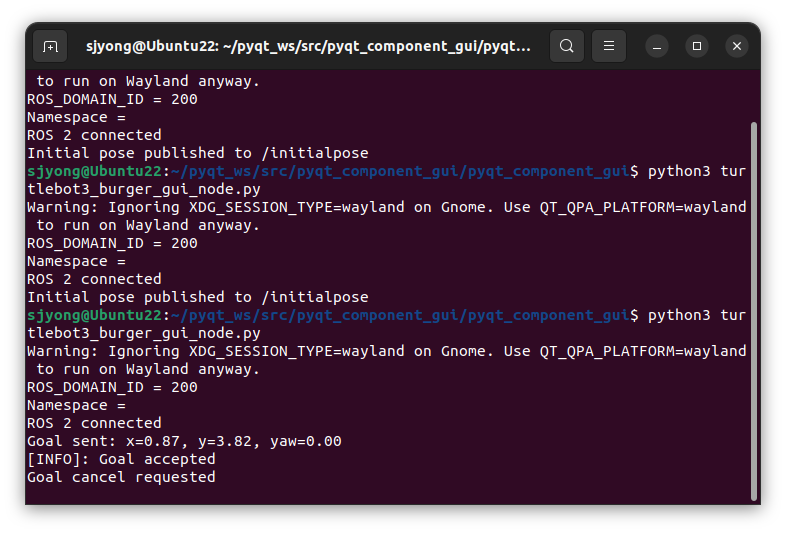
    print(text)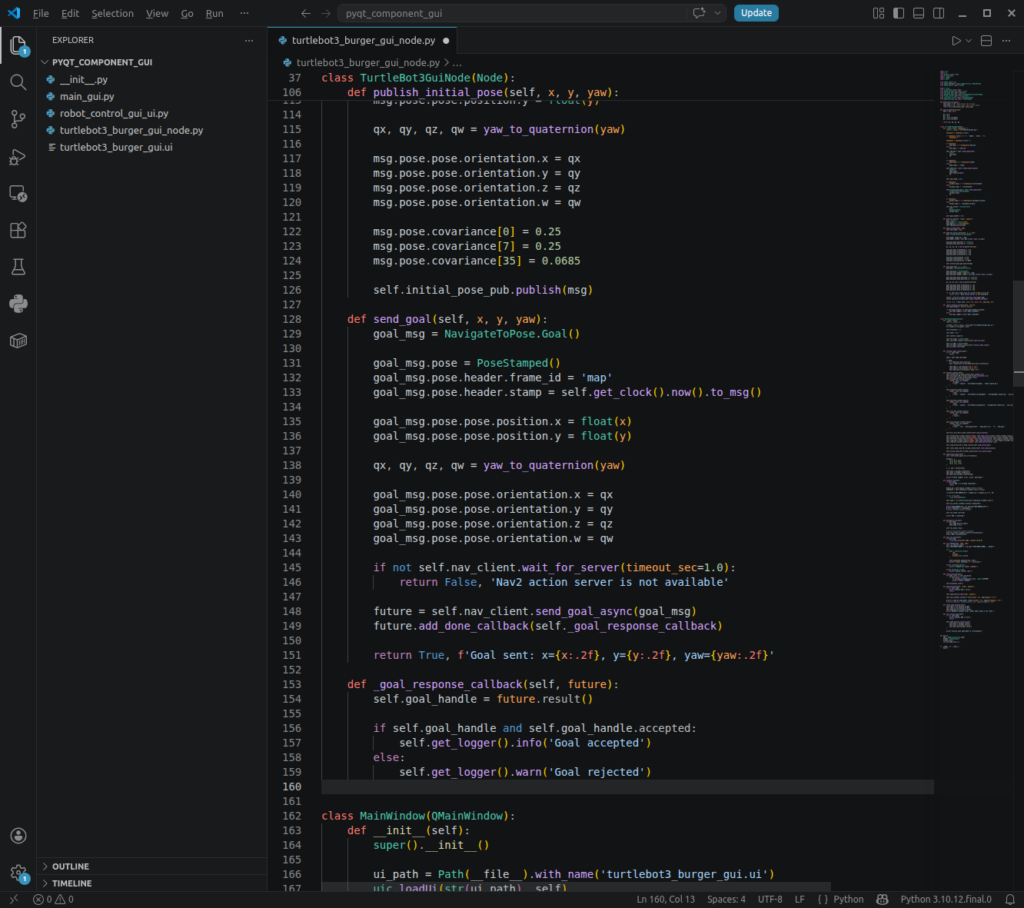
Goal 취소 함수도 추가합니다.
def cancel_nav_goal(self):
    if not self.node:
        print('Connect ROS 2 first')
        return

    if self.node.cancel_goal():
        print('Goal cancel requested')
    else:
        print('No active goal handle')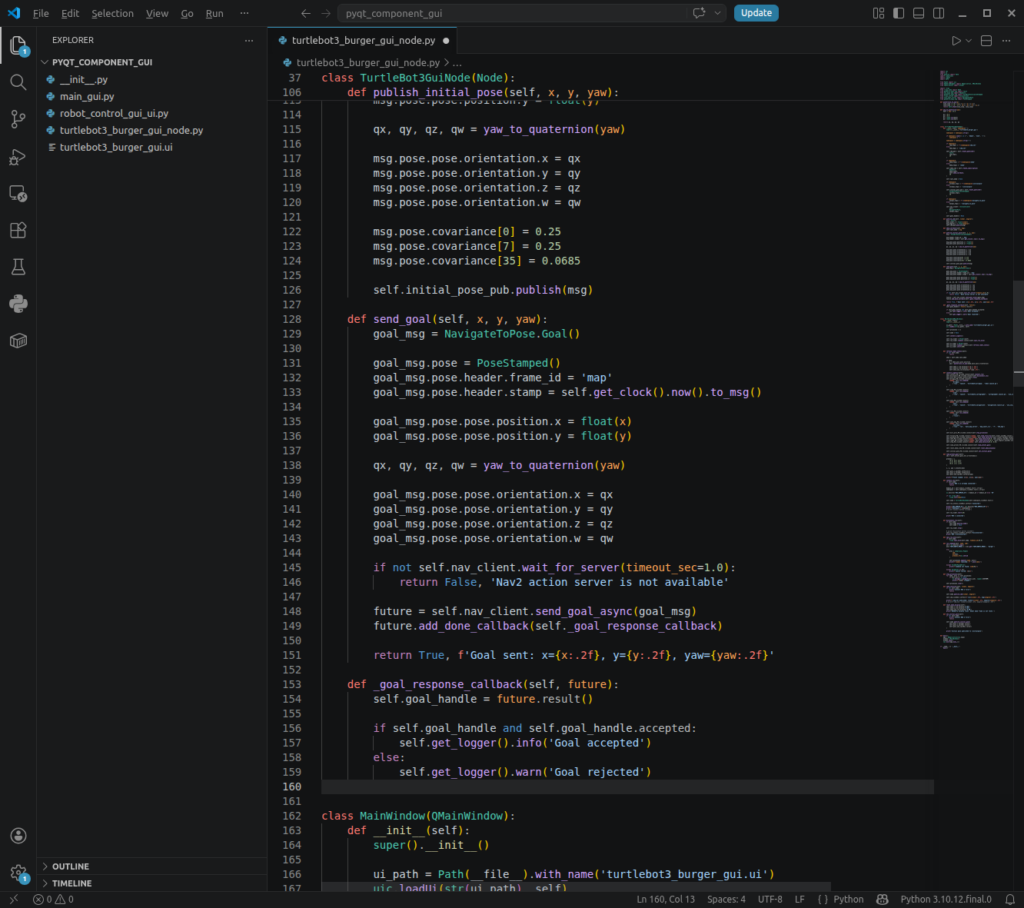
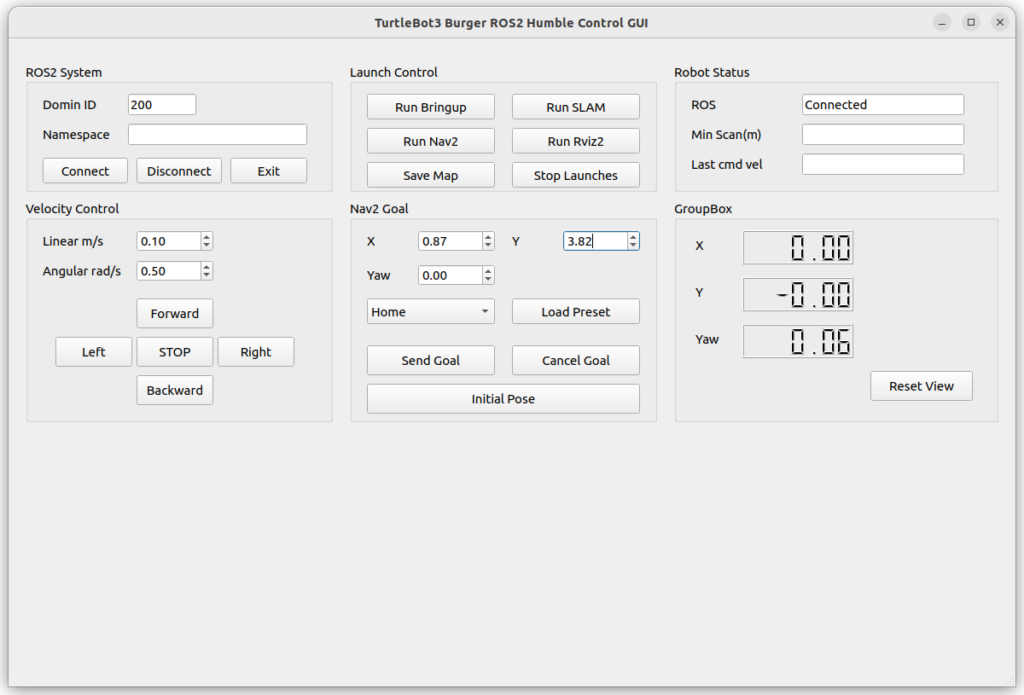
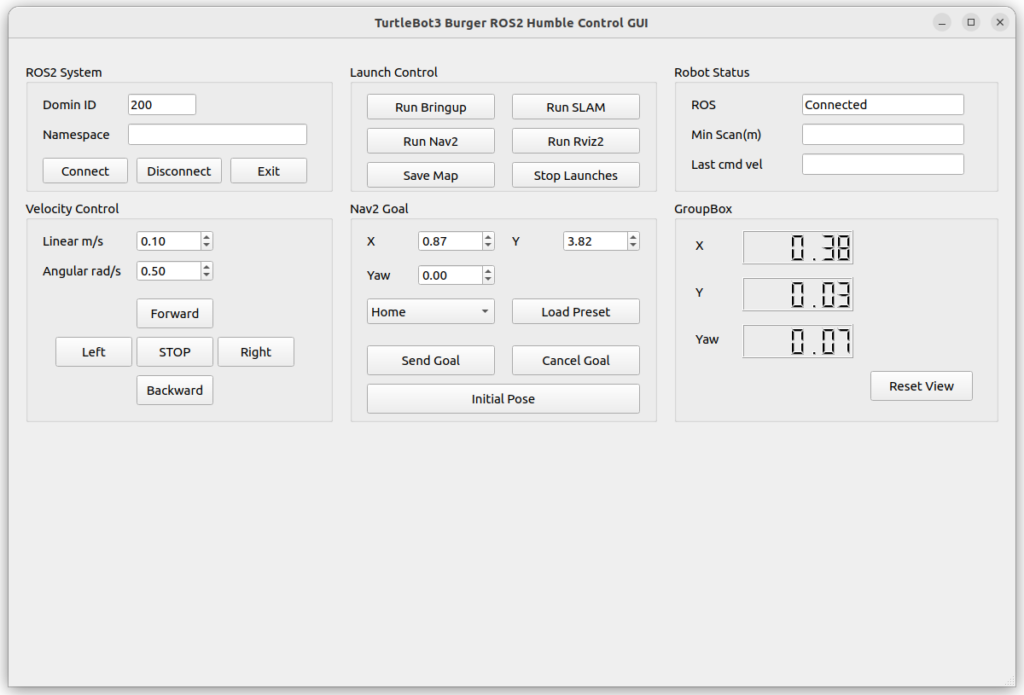
테스트 순서는 다음과 같습니다.
- TurtleBot3 bringup 실행
- SLAM 또는 Navigation2 실행
- 지도와 localization 상태 확인
- GUI 실행
Connect클릭- 목표 X, Y, Yaw 입력
Send Goal클릭- TurtleBot3 Burger가 목표 지점으로 이동하는지 확인
Nav2 goal이 동작하려면 단순히 GUI만 켜져 있으면 안 됩니다.
반드시 Nav2가 실행 중이어야 하고, 지도 또는 localization 상태가 준비되어 있어야 합니다.
20. LaserScan 최소 거리 표시하기
이번에는 /scan 데이터를 구독해서 가장 가까운 장애물 거리를 표시합니다.
상단 import에 LaserScan을 추가합니다.
from rclpy.qos import QoSProfile, ReliabilityPolicy, HistoryPolicy
from sensor_msgs.msg import LaserScan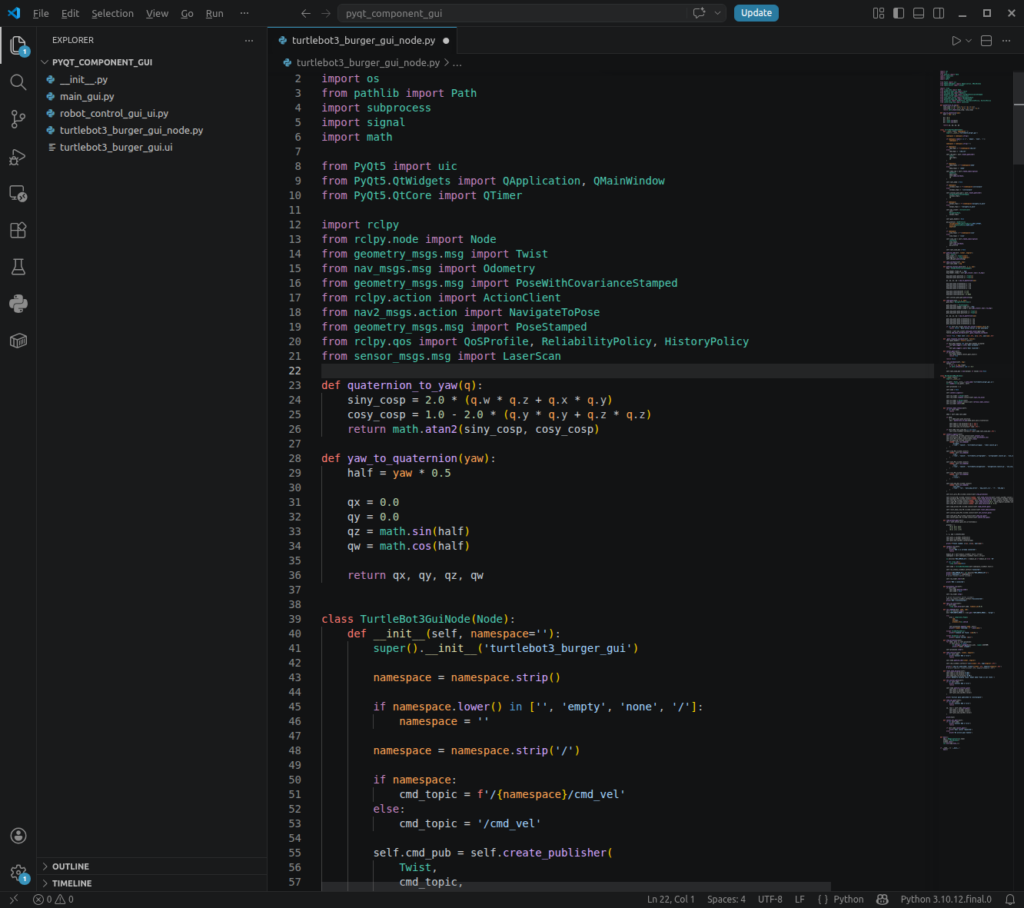
TurtleBot3GuiNode.__init__()에 subscriber를 추가합니다.
qos_profile = QoSProfile(
    reliability=ReliabilityPolicy.BEST_EFFORT,
    history=HistoryPolicy.KEEP_LAST,
    depth=10
)

if namespace:
    scan_topic = f'/{namespace}/scan'
else:
    scan_topic = '/scan'

self.scan_sub = self.create_subscription(
    LaserScan,
    scan_topic,
    self.scan_callback,
    qos_profile
)

self.last_scan_min = None
callback 함수를 추가합니다.
def scan_callback(self, msg):
    values = [
        v for v in msg.ranges
        if math.isfinite(v) and v > 0.0
    ]

    self.last_scan_min = min(values) if values else None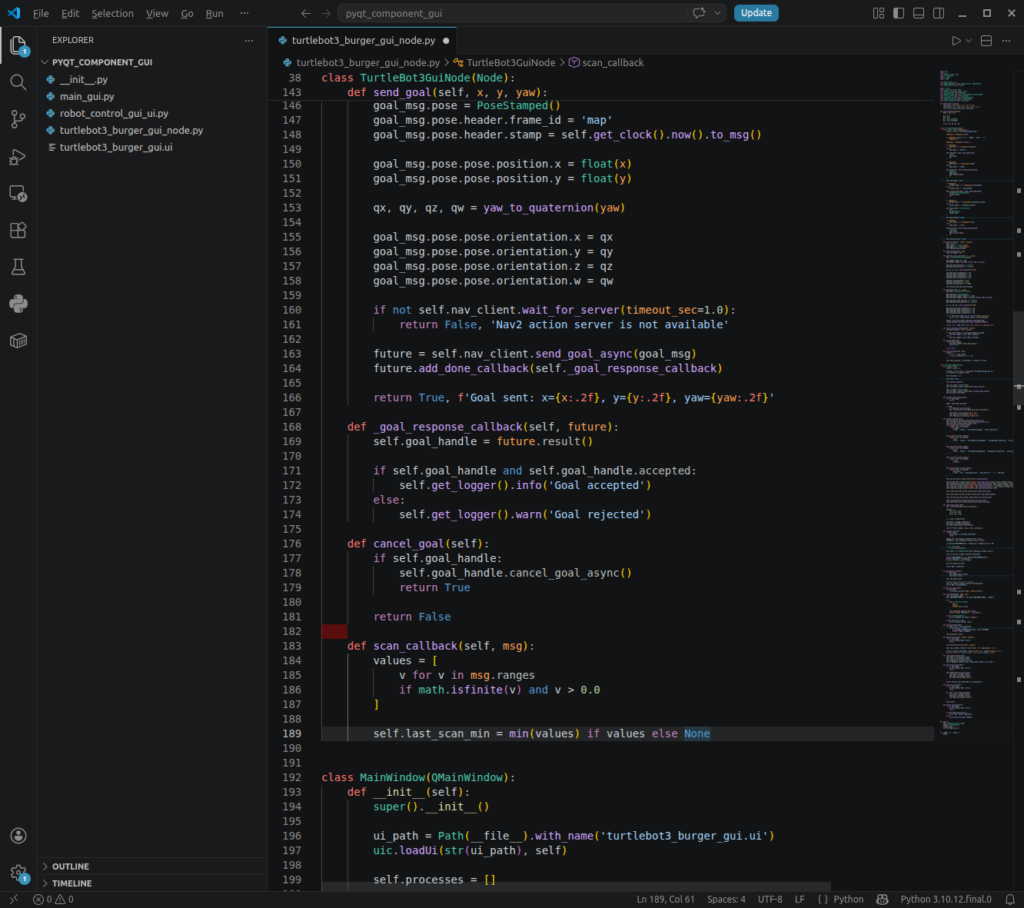
refresh_robot_status() 함수에 scan 표시 코드를 추가합니다.
if self.node.last_scan_min is not None:
    self.scan_lineEdit.setText(f'{self.node.last_scan_min:.2f}')
최종 refresh_robot_status() 함수는 다음과 같습니다.
def refresh_robot_status(self):
    if not self.node:
        return

    odom = self.node.last_odom

    if odom:
        p = odom.pose.pose.position
        yaw = quaternion_to_yaw(odom.pose.pose.orientation)

        self.odom_x_lcd.display(f'{p.x:.2f}')
        self.odom_y_lcd.display(f'{p.y:.2f}')
        self.odom_yaw_lcd.display(f'{yaw:.2f}')

    if self.node.last_scan_min is not None:
        self.scan_lineEdit.setText(f'{self.node.last_scan_min:.2f}')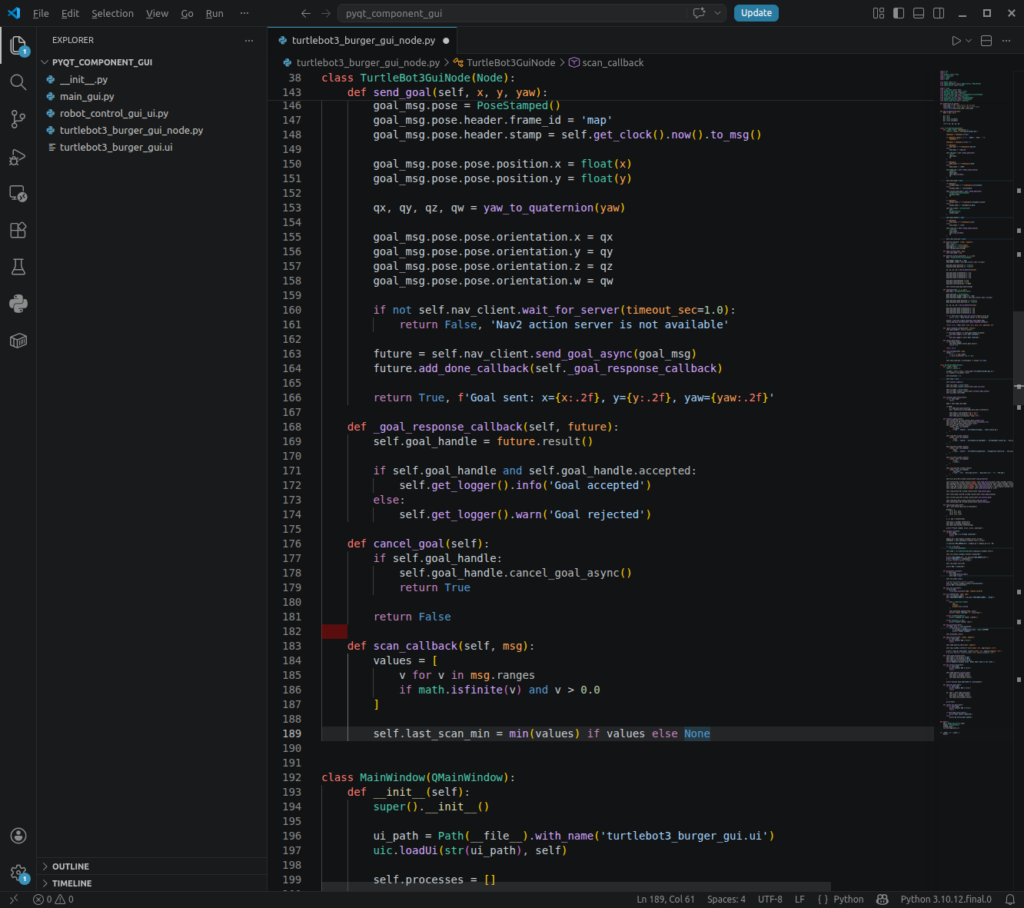
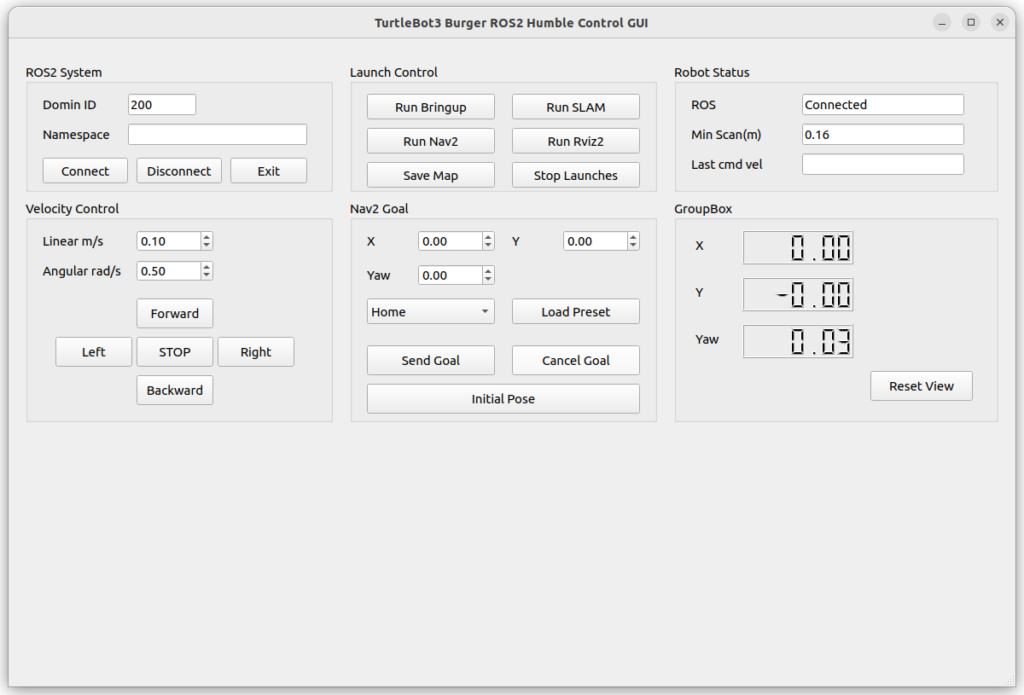
테스트 순서는 다음과 같습니다.
- TurtleBot3 bringup 실행
- GUI 실행
Connect클릭- LiDAR 앞에 물체를 가까이 가져가기
Min Scan(m)값이 변하는지 확인
21. Log 영역 만들기
지금까지는 상태를 터미널에 출력했습니다.
이제 GUI 안에 로그 창을 만들어서 학생들이 버튼을 누를 때마다 화면에서 결과를 확인할 수 있게 하겠습니다.
Qt Designer에서 Group Box를 추가합니다.
objectName: log_groupBox
title: Log
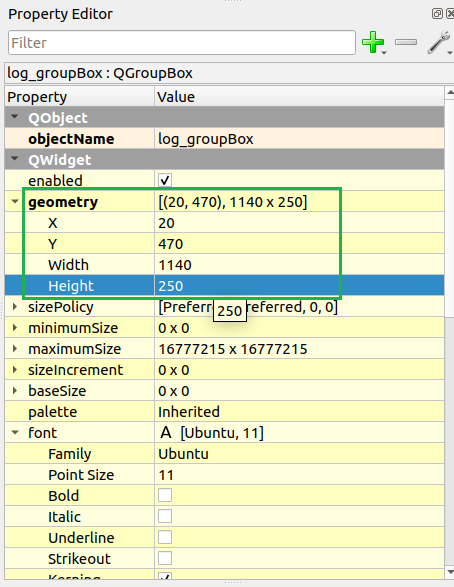
geometry:
  x: 20
  y: 460
  width: 1140
  height: 250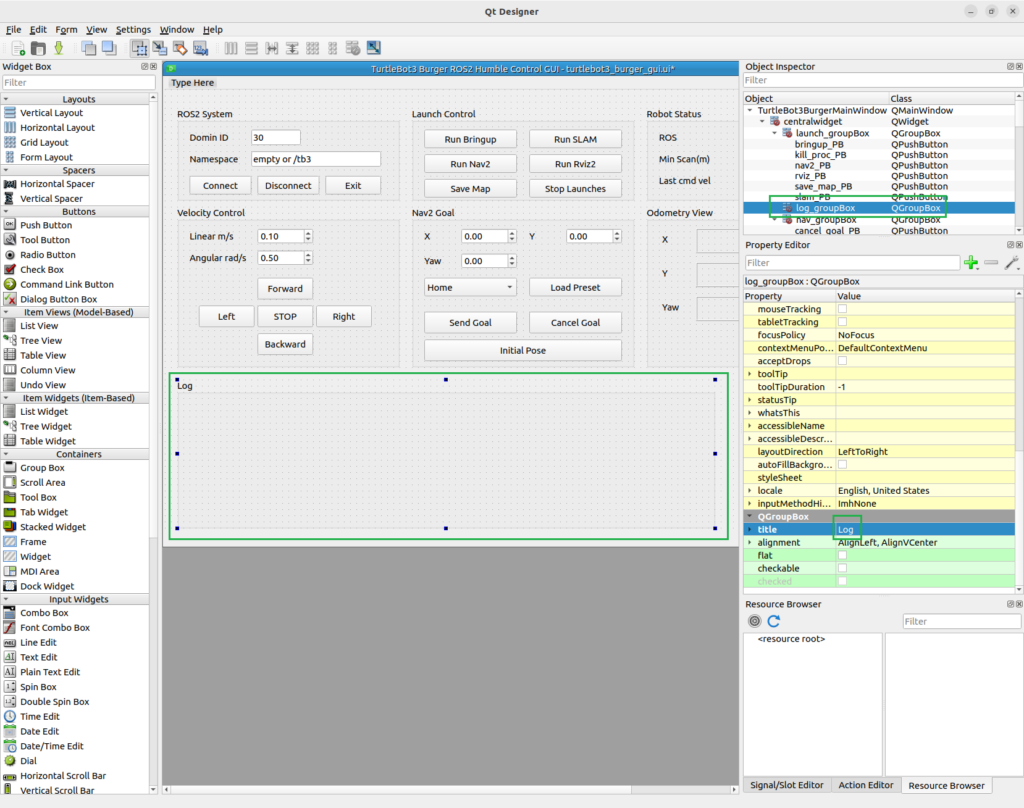
그 안에 QListWidget을 추가합니다.
class: QListWidget
objectName: log_listWidget
geometry:
  x: 20
  y: 35
  width: 1100
  height: 200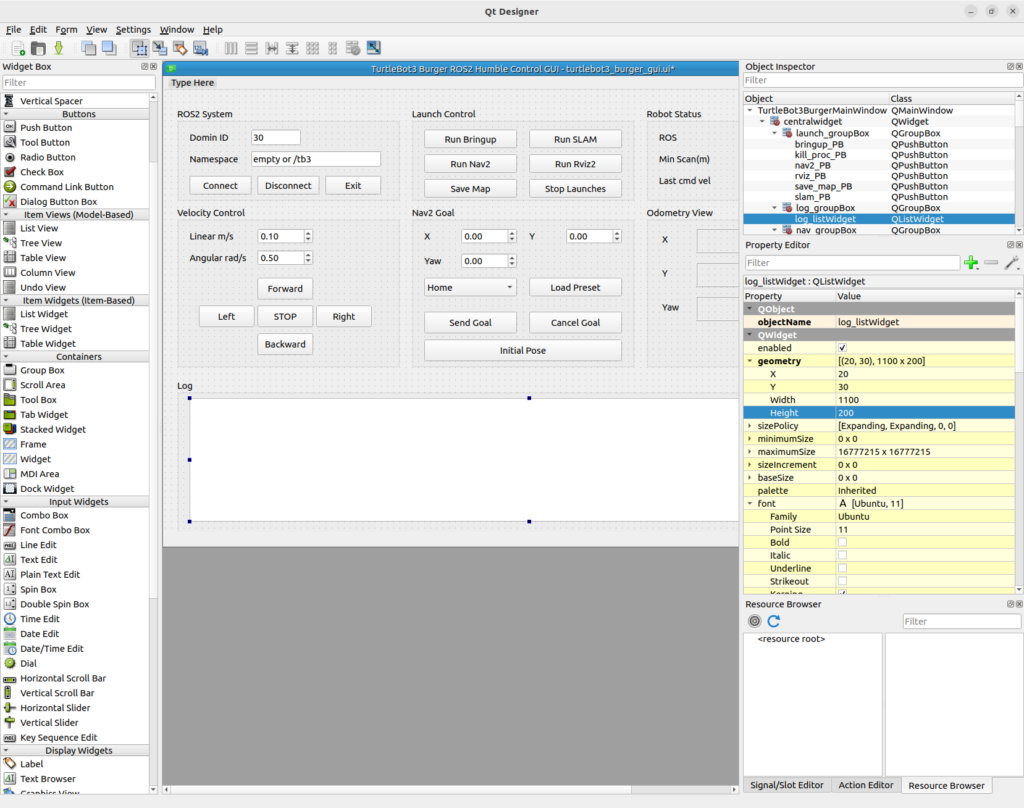
저장합니다.
turtlebot3_burger_gui.ui22. print 대신 GUI 로그 사용하기
MainWindow 클래스에 로그 함수를 추가합니다.
def log(self, text):
    self.log_listWidget.addItem(text)
    self.log_listWidget.scrollToBottom()
이제 기존 print()를 self.log()로 바꿉니다.
예를 들어 connect_ros()는 다음처럼 바꿉니다.
def connect_ros(self):
    if self.node:
        self.log('ROS 2 is already connected')
        return

    domain_id = self.domain_lineEdit.text().strip()
    os.environ['ROS_DOMAIN_ID'] = domain_id if domain_id else '30'

    if not rclpy.ok():
        rclpy.init(args=None)

    self.node = TurtleBot3GuiNode(self.namespace_lineEdit.text())

    self.ros_status_lineEdit.setText('Connected')
    self.ros_timer.start(20)

self.log('ROS 2 connected')send_velocity()도 다음처럼 바꿉니다.
def send_velocity(self, linear, angular):
    if not self.node:
        self.log('Connect ROS 2 first')
        return

    self.node.publish_cmd(linear, angular)
    self.cmd_lineEdit.setText(f'lin={linear:.2f}, ang={angular:.2f}')

    self.log(f'/cmd_vel published: linear={linear:.2f}, angular={angular:.2f}')
__init__() 마지막에 시작 로그도 추가합니다.
self.log('GUI started. Press Connect after ROS 2 environment is sourced.')이제 GUI를 실행하면 아래쪽 로그 창에 동작 결과가 표시됩니다.
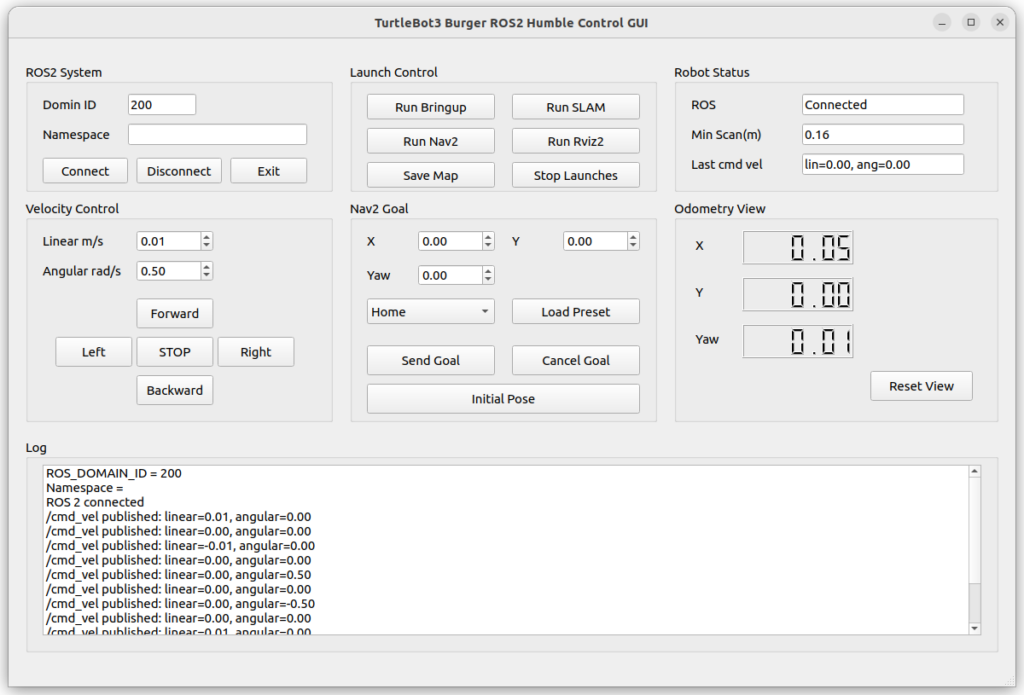
23. 종료 처리 추가하기
GUI를 닫을 때는 로봇이 계속 움직이면 안 됩니다.
그래서 창을 닫기 전에 정지 명령을 보내고, 실행 중인 launch 프로세스를 종료하고, ROS 2 노드를 정리합니다.
MainWindow 클래스에 closeEvent()를 추가합니다.
def closeEvent(self, event):
    if self.node:
        self.send_velocity(0.0, 0.0)

    self.stop_processes()
    self.disconnect_ros()

    if rclpy.ok():
        rclpy.shutdown()

    event.accept()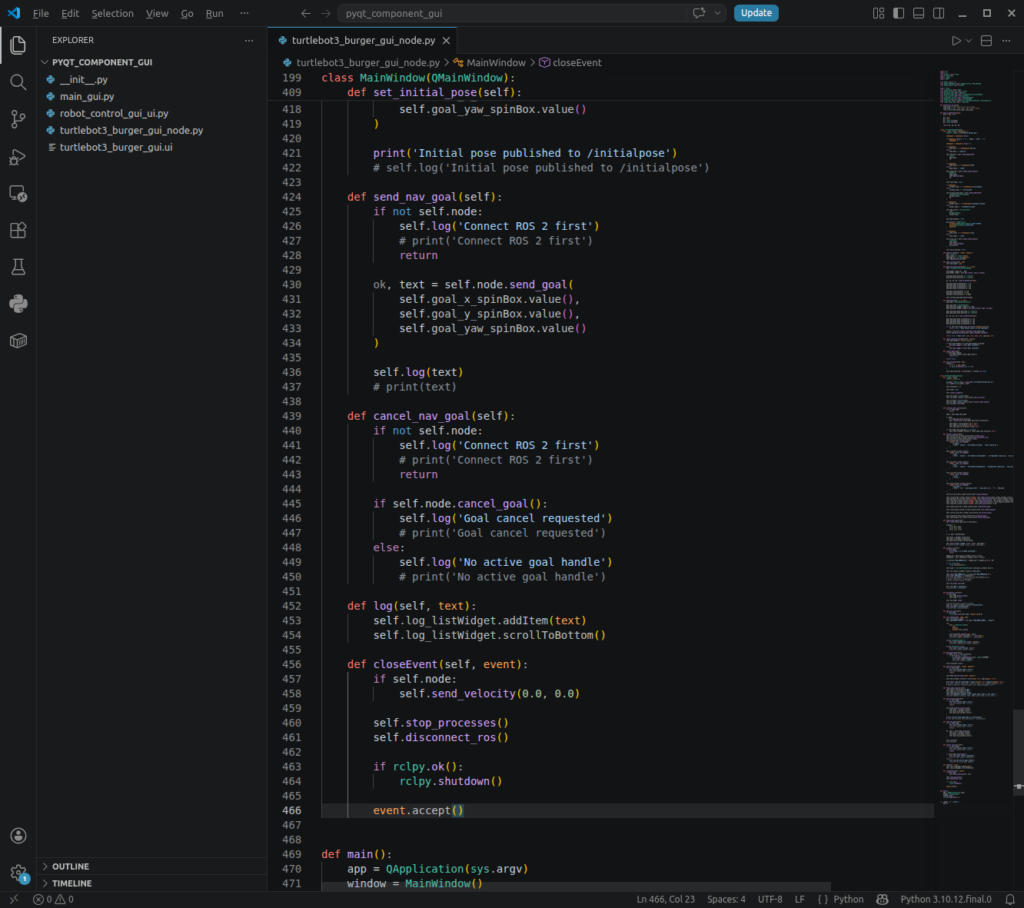
이 코드는 창을 닫을 때 자동으로 호출됩니다.
실제 로봇에서는 종료 시 정지 명령이 매우 중요합니다.
GUI 프로그램이 꺼졌는데 로봇이 마지막 속도 명령을 유지하면 위험한 상황이 생길 수 있습니다.