1. 실습 목표
이번 실습의 목표는 Pi Camera 2 영상 → ROS 2 이미지 토픽 → YOLO 객체 인식 → TurtleBot3 Burger 이동 제어까지 한 번에 연결하는 것입니다.
실습 결과는 다음과 같습니다.
사람이 카메라 앞에 서면 TurtleBot3 Burger가 YOLO로 person을 인식합니다.
인식된 사람의 위치가 화면 중앙에서 벗어나면 로봇이 천천히 회전합니다.
사람이 멀리 있으면 앞으로 조금 이동합니다.
rqt에서는 YOLO 박스가 그려진 영상을 확인할 수 있습니다.
카메라 설치와 토픽 확인은 이미 완료된 상태로 보고, 바로 ROS 2 패키지 생성부터 진행합니다.
2. 패키지 생성
터틀봇3 소스를 컴파일해서 사용 중이라면 보통 작업 공간은 다음 중 하나일 가능성이 큽니다.
~/turtlebot3_ws또는 직접 만든 ROS 2 워크스페이스가 있다면 그 경로를 사용하면 됩니다.
cd ~/turtlebot3_ws/src

ros2 pkg create tb3_yolo_app \
  --build-type ament_python \
  --dependencies rclpy sensor_msgs geometry_msgs std_msgs cv_bridge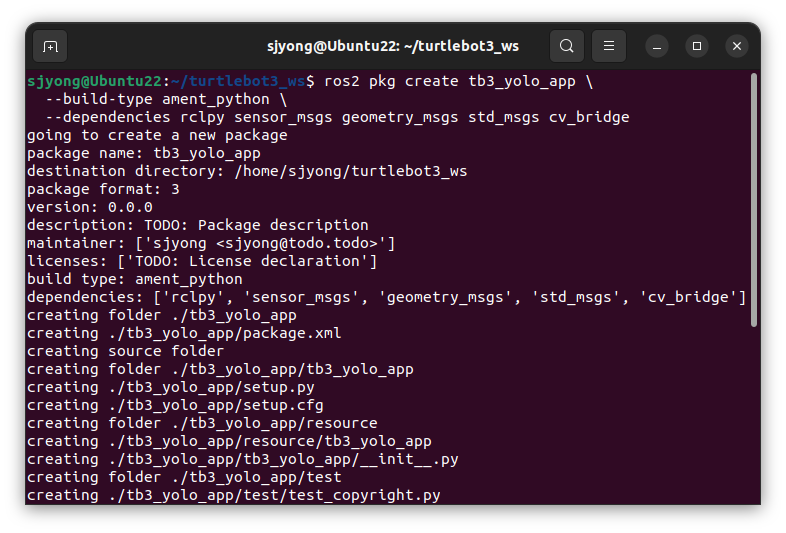
생성 후 구조는 대략 다음과 같습니다.
tb3_yolo_app/
├── package.xml
├── setup.py
├── setup.cfg
├── resource/
│   └── tb3_yolo_app
├── test/
└── tb3_yolo_app/
    └── __init__.py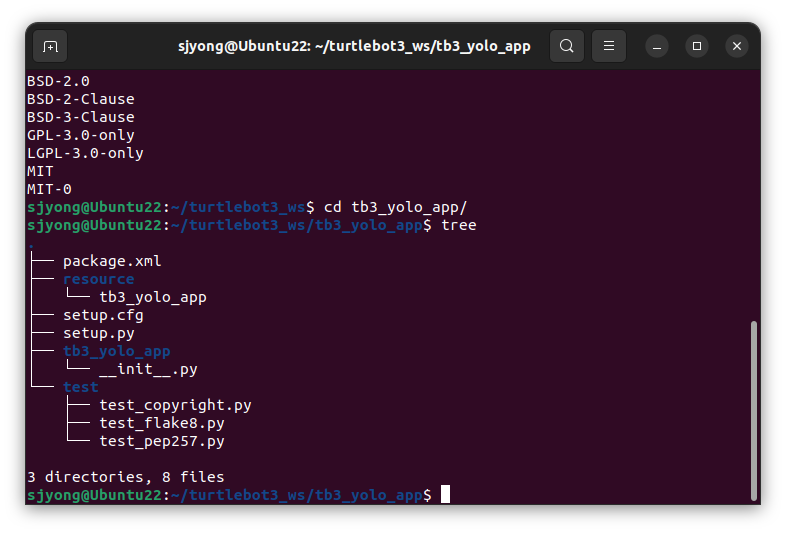
YOLO 노드 파일을 하나 추가합니다.
cd ~/turtlebot3_ws/src/tb3_yolo_app/tb3_yolo_app
touch yolo_person_follower.py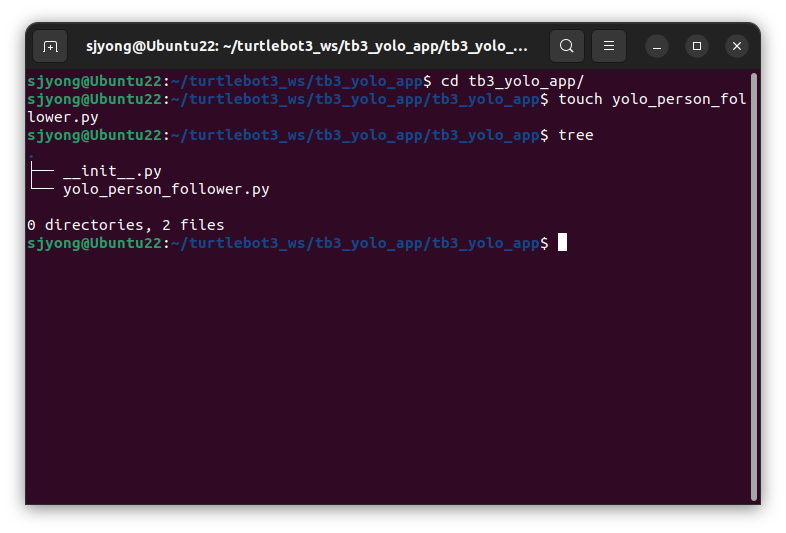
필요한 Python 패키지는 이미 설치하였습니다. 설치가 도지 않은 경우 아래의 명령어를 실행하여 설치를 진행합니다.
sudo apt update
sudo apt install -y python3-pip python3-opencv ros-humble-cv-bridge

python3 -m pip install --user ultralytics
Ultralytics는 pip 설치 방식을 공식적으로 제공합니다.
3. YOLO 사람 추적 노드 소스
아래 내용을 tb3_yolo_app/tb3_yolo_app/yolo_person_follower.py에 넣습니다.
import json
import cv2

import rclpy
from rclpy.node import Node
from rclpy.qos import qos_profile_sensor_data

from sensor_msgs.msg import Image
from geometry_msgs.msg import Twist
from std_msgs.msg import String
from cv_bridge import CvBridge

from ultralytics import YOLO


class YoloPersonFollower(Node):
    def __init__(self):
        super().__init__('yolo_person_follower')

        self.declare_parameter('image_topic', '/camera/image_raw')
        self.declare_parameter('cmd_vel_topic', '/cmd_vel')
        self.declare_parameter('annotated_topic', '/yolo/annotated_image')
        self.declare_parameter('detections_topic', '/yolo/detections')

        self.declare_parameter('model_name', 'yolov8n.pt')
        self.declare_parameter('target_class', 'person')
        self.declare_parameter('confidence_threshold', 0.45)

        self.declare_parameter('enable_motion', False)
        self.declare_parameter('frame_skip', 2)

        self.declare_parameter('max_linear_speed', 0.08)
        self.declare_parameter('max_angular_speed', 0.35)
        self.declare_parameter('angular_gain', 0.55)

        self.declare_parameter('target_area_ratio', 0.18)
        self.declare_parameter('area_tolerance', 0.04)

        self.image_topic = self.get_parameter('image_topic').value
        self.cmd_vel_topic = self.get_parameter('cmd_vel_topic').value
        self.annotated_topic = self.get_parameter('annotated_topic').value
        self.detections_topic = self.get_parameter('detections_topic').value

        self.model_name = self.get_parameter('model_name').value
        self.target_class = self.get_parameter('target_class').value
        self.confidence_threshold = float(
            self.get_parameter('confidence_threshold').value
        )

        self.enable_motion = bool(self.get_parameter('enable_motion').value)
        self.frame_skip = int(self.get_parameter('frame_skip').value)

        self.max_linear_speed = float(self.get_parameter('max_linear_speed').value)
        self.max_angular_speed = float(self.get_parameter('max_angular_speed').value)
        self.angular_gain = float(self.get_parameter('angular_gain').value)

        self.target_area_ratio = float(self.get_parameter('target_area_ratio').value)
        self.area_tolerance = float(self.get_parameter('area_tolerance').value)

        self.bridge = CvBridge()
        self.model = YOLO(self.model_name)

        self.frame_count = 0

        self.image_sub = self.create_subscription(
            Image,
            self.image_topic,
            self.image_callback,
            qos_profile_sensor_data
        )

        self.annotated_pub = self.create_publisher(
            Image,
            self.annotated_topic,
            10
        )

        self.detections_pub = self.create_publisher(
            String,
            self.detections_topic,
            10
        )

        self.cmd_vel_pub = self.create_publisher(
            Twist,
            self.cmd_vel_topic,
            10
        )

        self.get_logger().info('YOLO person follower node started')
        self.get_logger().info(f'image_topic      : {self.image_topic}')
        self.get_logger().info(f'cmd_vel_topic    : {self.cmd_vel_topic}')
        self.get_logger().info(f'annotated_topic  : {self.annotated_topic}')
        self.get_logger().info(f'model_name       : {self.model_name}')
        self.get_logger().info(f'target_class     : {self.target_class}')
        self.get_logger().info(f'enable_motion    : {self.enable_motion}')

    def image_callback(self, msg):
        self.frame_count += 1

        if self.frame_skip > 1:
            if self.frame_count % self.frame_skip != 0:
                return

        try:
            frame = self.bridge.imgmsg_to_cv2(msg, desired_encoding='bgr8')
        except Exception as e:
            self.get_logger().error(f'cv_bridge conversion failed: {e}')
            return

        frame = cv2.flip(frame, -1)

        height, width, _ = frame.shape

        results = self.model.predict(
            source=frame,
            imgsz=320,
            conf=self.confidence_threshold,
            verbose=False
        )

        result = results[0]
        target = self.select_target(result, width, height)

        annotated_frame = frame.copy()

        if target is not None:
            self.draw_target(annotated_frame, target)
            twist = self.make_follow_twist(target)

            if self.enable_motion:
                self.cmd_vel_pub.publish(twist)

            self.publish_detection(target)

        else:
            self.draw_no_target(annotated_frame)

            if self.enable_motion:
                self.publish_stop()

            self.publish_detection(None)

        try:
            annotated_msg = self.bridge.cv2_to_imgmsg(
                annotated_frame,
                encoding='bgr8'
            )
            annotated_msg.header = msg.header
            self.annotated_pub.publish(annotated_msg)

        except Exception as e:
            self.get_logger().error(f'annotated image publish failed: {e}')

    def select_target(self, result, frame_width, frame_height):
        best_target = None
        best_area = 0

        if result.boxes is None:
            return None

        for box in result.boxes:
            cls_id = int(box.cls[0])
            confidence = float(box.conf[0])
            class_name = self.model.names[cls_id]

            if class_name != self.target_class:
                continue

            x1, y1, x2, y2 = box.xyxy[0].tolist()

            x1 = int(max(0, x1))
            y1 = int(max(0, y1))
            x2 = int(min(frame_width - 1, x2))
            y2 = int(min(frame_height - 1, y2))

            box_width = x2 - x1
            box_height = y2 - y1
            area = box_width * box_height

            if area > best_area:
                center_x = int((x1 + x2) / 2)
                center_y = int((y1 + y2) / 2)

                error_x = (center_x - frame_width / 2.0) / (frame_width / 2.0)
                area_ratio = area / float(frame_width * frame_height)

                best_area = area
                best_target = {
                    'class_name': class_name,
                    'confidence': confidence,
                    'x1': x1,
                    'y1': y1,
                    'x2': x2,
                    'y2': y2,
                    'center_x': center_x,
                    'center_y': center_y,
                    'error_x': error_x,
                    'area_ratio': area_ratio,
                    'frame_width': frame_width,
                    'frame_height': frame_height
                }

        return best_target

    def make_follow_twist(self, target):
        twist = Twist()

        error_x = target['error_x']
        area_ratio = target['area_ratio']

        angular_z = -self.angular_gain * error_x

        if angular_z > self.max_angular_speed:
            angular_z = self.max_angular_speed
        elif angular_z < -self.max_angular_speed:
            angular_z = -self.max_angular_speed

        target_min_area = self.target_area_ratio - self.area_tolerance

        if area_ratio < target_min_area:
            center_weight = max(0.0, 1.0 - abs(error_x))
            linear_x = self.max_linear_speed * center_weight
        else:
            linear_x = 0.0

        twist.linear.x = linear_x
        twist.angular.z = angular_z

        return twist

    def draw_target(self, frame, target):
        x1 = target['x1']
        y1 = target['y1']
        x2 = target['x2']
        y2 = target['y2']
        center_x = target['center_x']
        center_y = target['center_y']

        label = (
            f"{target['class_name']} "
            f"{target['confidence']:.2f} "
            f"area:{target['area_ratio']:.2f}"
        )

        cv2.rectangle(frame, (x1, y1), (x2, y2), (0, 255, 0), 2)
        cv2.circle(frame, (center_x, center_y), 5, (0, 0, 255), -1)
        cv2.putText(
            frame,
            label,
            (x1, max(20, y1 - 10)),
            cv2.FONT_HERSHEY_SIMPLEX,
            0.6,
            (0, 255, 0),
            2
        )

        frame_center_x = int(target['frame_width'] / 2)
        frame_center_y = int(target['frame_height'] / 2)

        cv2.line(
            frame,
            (frame_center_x, 0),
            (frame_center_x, target['frame_height']),
            (255, 0, 0),
            1
        )

        cv2.line(
            frame,
            (frame_center_x, frame_center_y),
            (center_x, center_y),
            (0, 255, 255),
            2
        )

    def draw_no_target(self, frame):
        cv2.putText(
            frame,
            'NO TARGET',
            (20, 40),
            cv2.FONT_HERSHEY_SIMPLEX,
            1.0,
            (0, 0, 255),
            2
        )

    def publish_detection(self, target):
        msg = String()

        if target is None:
            payload = {
                'detected': False,
                'target_class': self.target_class
            }
        else:
            payload = {
                'detected': True,
                'class_name': target['class_name'],
                'confidence': round(target['confidence'], 3),
                'center_x': target['center_x'],
                'center_y': target['center_y'],
                'error_x': round(target['error_x'], 3),
                'area_ratio': round(target['area_ratio'], 3)
            }

        msg.data = json.dumps(payload)
        self.detections_pub.publish(msg)

    def publish_stop(self):
        twist = Twist()
        self.cmd_vel_pub.publish(twist)


def main(args=None):
    rclpy.init(args=args)

    node = YoloPersonFollower()

    try:
        rclpy.spin(node)
    except KeyboardInterrupt:
        pass
    finally:
        node.publish_stop()
        node.destroy_node()
        rclpy.shutdown()


if __name__ == '__main__':
    main()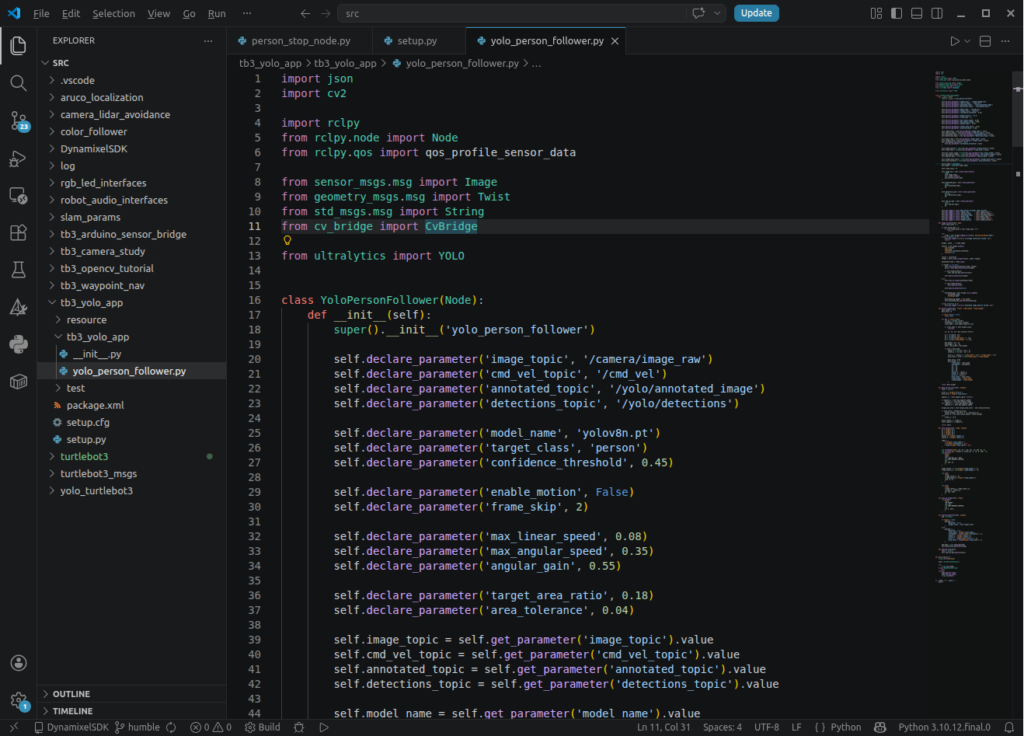
4. 소스 설명
1) ROS 2 파라미터 구성
이 소스는 주요 설정을 코드에 고정하지 않고 ROS 2 파라미터로 선언합니다.
self.declare_parameter('image_topic', '/camera/image_raw')
self.declare_parameter('cmd_vel_topic', '/cmd_vel')
self.declare_parameter('annotated_topic', '/yolo/annotated_image')
self.declare_parameter('detections_topic', '/yolo/detections')
토픽 이름을 파라미터로 분리했기 때문에 카메라나 모바일 로봇이 변경되더라도 소스 수정 없이 실행 옵션이나 YAML 파일만으로 대응할 수 있습니다.
2) YOLO 관련 파라미터
self.declare_parameter('model_name', 'yolov8n.pt')
self.declare_parameter('target_class', 'person')
self.declare_parameter('confidence_threshold', 0.45)model_name은 사용할 YOLO 가중치 파일입니다.
예를 들어 더 높은 정확도가 필요하다면 다음 모델로 변경할 수 있습니다.
yolov8s.pt(Ultralytics YOLOv8 Nano Object Detection Model Pretrained Weights)yolov8m.pt(YOLOv8 Small)- 직접 학습한 사용자 모델
target_class의 기본값은 person입니다. YOLO가 검출한 여러 클래스 중 이 이름과 일치하는 객체만 추종 대상으로 사용합니다.
confidence_threshold는 검출 신뢰도 기준입니다. 기본값 0.45보다 낮은 신뢰도의 객체는 YOLO 검출 결과에서 제외됩니다.
값을 너무 낮추면 오검출이 증가하고, 너무 높이면 사람이 일부 가려졌을 때 검출이 끊길 가능성이 커집니다.
3) 로봇 동작 관련 파라미터
self.declare_parameter('enable_motion', False)
self.declare_parameter('frame_skip', 2)enable_motion의 기본값은 False입니다.
따라서 노드를 처음 실행하면 사람 검출과 결과 영상 발행은 수행하지만 실제 /cmd_vel 명령은 발행하지 않습니다. 검출 성능과 회전 방향을 먼저 확인한 뒤 동작을 활성화할 수 있도록 한 안전 설정입니다.
frame_skip은 영상 프레임을 몇 장마다 처리할 것인지 결정합니다.
기본값이 2이면 한 프레임은 건너뛰고 다음 프레임에서 YOLO 추론을 수행합니다.
카메라가 30 FPS라면 이론상 약 15 FPS 수준으로 검출을 수행하게 됩니다. 실제 처리 속도는 GPU, CPU, 모델 크기와 영상 해상도에 따라 달라집니다.
4) 속도 제어 파라미터
self.declare_parameter('max_linear_speed', 0.08)
self.declare_parameter('max_angular_speed', 0.35)
self.declare_parameter('angular_gain', 0.55)
각 값의 의미는 다음과 같습니다.
max_linear_speed: 최대 직진 속도max_angular_speed: 최대 회전 속도angular_gain: 좌우 위치 오차에 대한 회전 제어 이득
Twist.linear.x의 단위는 일반적으로 m/s이고, Twist.angular.z의 단위는 rad/s입니다.
기본 최대 직진 속도는 0.08 m/s로 상당히 낮게 설정되어 있습니다. 초기 실내 테스트에서 급출발과 충돌 위험을 줄이려는 설정으로 볼 수 있습니다.
5) 거리 유지 관련 파라미터
self.declare_parameter('target_area_ratio', 0.18)
self.declare_parameter('area_tolerance', 0.04)
이 소스는 깊이 카메라나 라이다를 사용하지 않습니다. 대신 사람의 바운딩 박스가 전체 영상에서 차지하는 비율을 이용하여 거리를 간접적으로 판단합니다.
기본값으로 계산되는 직진 시작 기준은 다음과 같습니다.
target_min_area = 0.18 - 0.04
                = 0.14
사람의 바운딩 박스 면적 비율이 전체 화면의 14%보다 작으면 사람이 멀리 있다고 판단하고 전진합니다.
6) 초기화 과정
self.bridge = CvBridge()
self.model = YOLO(self.model_name)
self.frame_count = 0
노드가 시작되면 먼저 ROS 영상 변환을 위한 CvBridge 객체를 생성합니다.
그다음 지정된 YOLO 모델을 로딩합니다. 모델 파일이 로컬에 없으면 Ultralytics 환경에 따라 최초 실행 시 다운로드가 발생할 수 있습니다.
frame_count는 프레임 건너뛰기를 구현하기 위한 카운터입니다.
7) 카메라 영상 구독과 QoS 설정
self.image_sub = self.create_subscription(
    Image,
    self.image_topic,
    self.image_callback,
    qos_profile_sensor_data
)
영상 토픽에는 qos_profile_sensor_data가 적용되어 있습니다.
카메라나 라이다와 같은 센서 데이터는 오래된 데이터를 모두 보존하는 것보다 최신 데이터를 빠르게 처리하는 것이 중요합니다. 센서 데이터용 QoS는 이러한 실시간성 중심의 통신에 적합합니다.
카메라 드라이버가 Best Effort 방식으로 영상을 발행하는 경우 일반적인 Reliable 구독 설정으로는 연결되지 않을 수 있습니다. qos_profile_sensor_data를 사용하면 이러한 ROS 2 QoS 불일치 문제를 줄일 수 있습니다.
from rclpy.qos import (
    QoSProfile,
    QoSReliabilityPolicy,
    QoSHistoryPolicy,
    QoSDurabilityPolicy,
)

sensor_qos = QoSProfile(
    reliability=QoSReliabilityPolicy.BEST_EFFORT,
    durability=QoSDurabilityPolicy.VOLATILE,
    history=QoSHistoryPolicy.KEEP_LAST,
    depth=5,
)
8) 검출 영상 Publisher
self.annotated_pub = self.create_publisher(
    Image,
    self.annotated_topic,
    10
)
바운딩 박스와 중심점이 표시된 영상을 발행합니다.
RViz2나 rqt_image_view에서 /yolo/annotated_image를 확인하면 검출 상태와 제어 기준을 시각적으로 확인할 수 있습니다.
9) 검출 데이터 Publisher
self.detections_pub = self.create_publisher(
    String,
    self.detections_topic,
    10
)
검출 결과를 JSON 문자열로 변환하여 발행합니다.
별도의 사용자 메시지를 정의하지 않아도 다른 노드에서 쉽게 데이터를 읽을 수 있다는 장점이 있습니다.
10) 속도 명령 Publisher
self.cmd_vel_pub = self.create_publisher(
    Twist,
    self.cmd_vel_topic,
    10
)
사람의 위치에 따라 계산된 직진 속도와 회전 속도를 /cmd_vel로 발행합니다.
일반적인 차동 구동 모바일 로봇에서는 다음 두 값이 사용됩니다.
twist.linear.x
twist.angular.z
11) 프레임 건너뛰기 처리
self.frame_count += 1

if self.frame_skip > 1:
    if self.frame_count % self.frame_skip != 0:
returnframe_skip이 2라면 프레임 번호가 2, 4, 6인 경우에만 아래 처리를 수행합니다.
YOLO 추론이 카메라 입력 속도보다 느리면 콜백이 계속 밀릴 수 있습니다. 프레임을 적절히 건너뛰면 처리 지연과 CPU 또는 GPU 부하를 줄일 수 있습니다.
다만 값을 지나치게 높이면 빠르게 움직이는 사람을 늦게 추적하게 되고 로봇 제어가 계단식으로 끊겨 보일 수 있습니다.
12) ROS 영상을 OpenCV 영상으로 변환
try:
    frame = self.bridge.imgmsg_to_cv2(
        msg,
        desired_encoding='bgr8'
    )
except Exception as e:
    self.get_logger().error(
        f'cv_bridge conversion failed: {e}'
    )
    return
카메라 메시지의 인코딩이 예상과 다르거나 데이터가 손상된 경우 변환 예외가 발생할 수 있습니다.
이 소스는 예외 발생 시 노드를 종료하지 않고 현재 프레임만 무시합니다. 실시간 시스템에서는 일시적인 영상 오류 때문에 전체 추종 노드가 종료되는 것을 방지해야 하므로 적절한 처리입니다.
13) 영상 방향 보정
frame = cv2.flip(frame, -1)cv2.flip()의 두 번째 인자에 -1을 사용하면 영상을 수평과 수직 방향으로 모두 뒤집습니다. 결과적으로 영상을 180도 회전한 것과 같은 효과가 발생합니다.
카메라가 로봇에 거꾸로 장착된 환경을 보정하기 위한 코드로 해석할 수 있습니다.
카메라가 정상 방향으로 장착되어 있다면 이 코드를 제거해야 합니다. 불필요하게 180도 회전하면 화면의 좌우 방향과 로봇 회전 방향이 예상과 다르게 동작할 수 있습니다.
14) YOLO 추론 수행
results = self.model.predict(
    source=frame,
    imgsz=320,
    conf=self.confidence_threshold,
    verbose=False
)
주요 옵션은 다음과 같습니다.
source
현재 OpenCV 영상 프레임을 YOLO 입력으로 전달합니다.
imgsz=320
YOLO 추론 입력 크기를 320으로 설정합니다.
입력 크기를 줄이면 연산량이 감소하여 속도가 빨라지지만 멀리 있는 작은 사람을 놓칠 가능성이 커집니다.
사람 추종 로봇에서는 대상이 화면에서 어느 정도 크게 보이는 경우가 많으므로 320 크기는 처리 속도를 우선한 합리적인 설정입니다.
conf
앞에서 선언한 신뢰도 기준을 적용합니다.
verbose=False
프레임마다 출력되는 YOLO 로그를 비활성화합니다. 영상이 초당 여러 번 들어오는 환경에서 콘솔 로그가 과도하게 발생하는 것을 방지합니다.
15) 여러 사람 중 추종 대상 선택
target = self.select_target(
    result,
    width,
    height
)
select_target() 함수는 YOLO가 검출한 객체 중 목표 클래스와 일치하는 객체를 검색합니다.
if class_name != self.target_class:
    continue
기본 목표 클래스가 person이므로 자동차, 의자, 가방 등 다른 객체는 무시됩니다.
여러 사람이 동시에 검출되면 바운딩 박스 면적이 가장 큰 사람을 선택합니다.
if area > best_area:
    best_area = area
    best_target = ...
일반적으로 영상에서 크게 보이는 사람은 카메라와 가장 가까울 가능성이 높습니다. 따라서 별도의 객체 추적 ID 없이도 가까운 사람을 추종할 수 있습니다.
다만 두 사람의 크기가 비슷하거나 서로 교차하는 경우 추종 대상이 프레임마다 바뀔 수 있습니다. 특정 한 사람을 안정적으로 따라가야 한다면 ByteTrack, BoT-SORT, DeepSORT 또는 특징 기반 재식별 기법이 필요합니다.
16) 바운딩 박스 좌표 보정
YOLO의 바운딩 박스 좌표는 다음 순서로 제공됩니다.
x1, y1, x2, y2 = box.xyxy[0].tolist()각 값은 다음 위치를 나타냅니다.
x1: 왼쪽 좌표y1: 위쪽 좌표x2: 오른쪽 좌표y2: 아래쪽 좌표
좌표가 영상 영역을 벗어나지 않도록 다음과 같이 제한합니다.
x1 = int(max(0, x1))
y1 = int(max(0, y1))
x2 = int(min(frame_width - 1, x2))
y2 = int(min(frame_height - 1, y2))
이 처리를 하지 않으면 객체가 영상 경계에 걸쳐 있을 때 사각형 그리기나 면적 계산에서 비정상적인 값이 발생할 수 있습니다.
17) 대상 중심점 계산
center_x = int((x1 + x2) / 2)
center_y = int((y1 + y2) / 2)
바운딩 박스의 중심점은 로봇의 회전 방향을 결정하는 기준으로 사용됩니다.
여기서 회전 제어에는 세로 위치인 center_y보다 가로 위치인 center_x가 중요합니다.
사람이 영상 중심보다 오른쪽에 있으면 로봇이 오른쪽으로 회전하고, 왼쪽에 있으면 왼쪽으로 회전하도록 제어합니다.
18) 정규화된 좌우 오차 계산
error_x = (
    center_x - frame_width / 2.0
) / (
    frame_width / 2.0
)
이 계산은 대상 중심점과 화면 중심 사이의 가로 오차를 약 -1.0에서 1.0 사이로 정규화합니다.
- 대상이 화면 왼쪽 끝에 있으면 약
-1.0 - 대상이 화면 중앙에 있으면
0.0 - 대상이 화면 오른쪽 끝에 있으면 약
1.0
픽셀 단위 오차를 그대로 사용하지 않고 정규화하면 카메라 해상도가 변경되어도 같은 제어 이득을 사용할 수 있습니다.
예를 들어 640픽셀 영상과 1280픽셀 영상에서 대상이 화면의 같은 상대 위치에 있다면 유사한 error_x 값이 계산됩니다.
19) 바운딩 박스 면적 비율 계산
box_width = x2 - x1
box_height = y2 - y1
area = box_width * box_height

area_ratio = area / float(
    frame_width * frame_height
)area_ratio는 사람 바운딩 박스가 전체 영상 면적에서 차지하는 비율입니다.
예를 들어 전체 영상이 640×480이고 사람 바운딩 박스가 200×300이라면 다음과 같이 계산됩니다.
전체 영상 면적 = 640 × 480 = 307,200
사람 박스 면적 = 200 × 300 = 60,000
면적 비율 = 60,000 / 307,200
          ≒ 0.195
면적 비율이 클수록 사람이 가까이 있고, 작을수록 멀리 있다고 간주합니다.
이 방식은 깊이 센서가 없어도 구현할 수 있지만 사람의 자세, 옷, 카메라 각도, 상반신 가림 정도에 따라 값이 달라질 수 있습니다. 따라서 정확한 거리 측정이 아니라 단순한 접근·정지 판단에 적합합니다.
20) 회전 속도 계산
angular_z = -self.angular_gain * error_x회전 속도는 비례 제어 방식으로 계산합니다.
수식으로 표현하면 다음과 같습니다.
회전 속도 = -회전 이득 × 좌우 오차error_x가 양수이면 사람이 화면 오른쪽에 있다는 의미입니다. 이 경우 angular_z는 음수가 되어 일반적인 ROS 좌표계에서 로봇이 오른쪽으로 회전합니다.
반대로 사람이 화면 왼쪽에 있으면 error_x가 음수가 되고 angular_z는 양수가 되어 왼쪽으로 회전합니다.
실제 모터 드라이버나 베이스 컨트롤러의 회전 방향이 반대로 구성되어 있다면 음수 부호를 제거하거나 축 방향 설정을 확인해야 합니다.
21) 회전 속도 제한
if angular_z > self.max_angular_speed:
    angular_z = self.max_angular_speed
elif angular_z < -self.max_angular_speed:
    angular_z = -self.max_angular_speed
대상이 화면 가장자리에 있을수록 좌우 오차가 커지고 회전 속도도 증가합니다.
그러나 속도 제한이 없으면 높은 제어 이득을 설정했을 때 로봇이 급격하게 회전할 수 있습니다.
이 소스는 계산된 회전 속도를 다음 범위로 제한합니다.
-max_angular_speed ≤ angular_z ≤ max_angular_speed기본 설정에서는 최대 회전 속도가 ±0.35 rad/s로 제한됩니다.
22) 직진 여부 판단
target_min_area = (
    self.target_area_ratio -
    self.area_tolerance
)
현재 설정에서는 면적 비율이 0.14보다 작을 때만 전진합니다.
if area_ratio < target_min_area:
    ...
else:
    linear_x = 0.0
사람이 충분히 가까워져 면적 비율이 기준 이상이 되면 직진 속도를 0으로 설정합니다.
중요한 점은 현재 코드가 사람이 지나치게 가까워졌을 때 후진하지는 않는다는 것입니다.
따라서 동작은 다음 두 가지로 구분됩니다.
- 사람이 멀면 전진
- 사람이 충분히 가까우면 정지
target_area_ratio + area_tolerance에 해당하는 상한 기준은 현재 코드에서 사용되지 않습니다. 이름만 보면 목표 면적 주변에 허용 범위를 설정한 것처럼 보이지만 실제 제어에서는 하한 기준만 사용됩니다.
정확한 거리 유지가 목적이라면 다음 세 구간으로 나누는 것이 더 적합합니다.
- 사람이 멀면 전진
- 목표 거리 범위에서는 정지
- 사람이 너무 가까우면 후진
23) 화면 중앙 정렬에 따른 직진 속도 보정
center_weight = max(
    0.0,
    1.0 - abs(error_x)
)

linear_x = (
    self.max_linear_speed *
    center_weight
)
이 부분은 단순한 직진 제어보다 한 단계 개선된 구조입니다.
사람이 화면 중앙에 있으면 error_x가 0에 가까워지고 center_weight는 1에 가까워집니다. 따라서 최대 직진 속도로 접근합니다.
사람이 화면 가장자리에 있으면 abs(error_x)가 커지고 center_weight가 작아집니다. 이때 직진 속도를 줄이고 회전 동작에 집중합니다.
예를 들면 다음과 같습니다.
error_x | center_weight | 직진 속도 비율 |
| 0.0 | 1.0 | 100% |
| 0.2 | 0.8 | 80% |
| 0.5 | 0.5 | 50% |
| 0.8 | 0.2 | 20% |
| 1.0 | 0.0 | 0% |
사람이 옆에 있는데도 로봇이 빠르게 전진하면 대상과 다른 방향으로 진행하거나 주변 장애물과 충돌할 수 있습니다. 이 가중치는 먼저 사람을 정면으로 맞춘 다음 접근하도록 유도합니다.
24) 최종 Twist 메시지 구성
twist.linear.x = linear_x
twist.angular.z = angular_z
사용하지 않는 축은 기본값 0으로 유지됩니다.
따라서 실제 제어에 사용되는 값은 다음 두 가지입니다.
- 전후 이동:
linear.x - 좌우 회전:
angular.z
측면 이동이 불가능한 차동 구동 로봇이나 일반적인 2륜 모바일 로봇에 적합한 방식입니다.
25) 실제 주행 명령의 안전한 활성화
if self.enable_motion:
    self.cmd_vel_pub.publish(twist)
검출과 속도 계산은 항상 수행하지만 enable_motion이 True일 때만 실제 명령을 발행합니다.
이 구조를 이용하면 다음 순서로 안전하게 시험할 수 있습니다.
enable_motion=False상태에서 카메라 방향 확인- 바운딩 박스와 중심선 확인
error_x부호 확인- 회전 방향 계산 확인
- 낮은 속도로 실제 구동 활성화
영상 처리 노드는 정상인데 회전 방향 부호가 잘못되면 로봇이 사람 반대편으로 회전할 수 있으므로 실제 구동 전 확인이 중요합니다.
26) 대상이 없을 때 처리
사람이 검출되지 않으면 다음 코드가 실행됩니다.
self.draw_no_target(annotated_frame)

if self.enable_motion:
    self.publish_stop()

self.publish_detection(None)
대상을 놓친 상태에서 마지막 속도 명령이 계속 유지되면 로봇이 빈 방향으로 주행할 수 있습니다.
이 소스는 대상이 없을 때 0으로 초기화된 Twist 메시지를 발행하여 즉시 정지하도록 처리합니다.
def publish_stop(self):
    twist = Twist()
self.cmd_vel_pub.publish(twist)Twist()를 새로 생성하면 모든 속도 값이 0으로 초기화됩니다.
27) 검출 대상 시각화
draw_target() 함수는 검출 결과를 영상 위에 표시합니다.
바운딩 박스
cv2.rectangle(
    frame,
    (x1, y1),
    (x2, y2),
    (0, 255, 0),
    2
)
검출된 사람 영역을 녹색 사각형으로 표시합니다.
대상 중심점
cv2.circle(
    frame,
    (center_x, center_y),
    5,
    (0, 0, 255),
    -1
)
바운딩 박스의 중심을 빨간색 점으로 표시합니다.
검출 정보 문자열
label = (
    f"{target['class_name']} "
    f"{target['confidence']:.2f} "
    f"area:{target['area_ratio']:.2f}"
)
영상에는 다음 정보가 함께 표시됩니다.
- 검출 클래스
- 검출 신뢰도
- 화면 면적 비율
예시는 다음과 같습니다.
person 0.91 area:0.1628) 화면 중심선과 추종 오차 표시
cv2.line(
    frame,
    (frame_center_x, 0),
    (frame_center_x, target['frame_height']),
    (255, 0, 0),
    1
)
화면 중앙에는 수직 기준선이 표시됩니다.
추가로 화면 중앙과 대상 중심을 연결하는 선을 그립니다.
cv2.line(
    frame,
    (frame_center_x, frame_center_y),
    (center_x, center_y),
    (0, 255, 255),
    2
)
이 선을 통해 대상이 화면 중심에서 얼마나 벗어났는지 직관적으로 확인할 수 있습니다.
제어 이득을 조정할 때 수치만 보는 것보다 영상에서 중심선과 대상 중심점의 움직임을 함께 확인하는 것이 효과적입니다.
29) 대상 미검출 상태 표시
cv2.putText(
    frame,
    'NO TARGET',
    (20, 40),
    cv2.FONT_HERSHEY_SIMPLEX,
    1.0,
    (0, 0, 255),
    2
)
사람이 검출되지 않으면 영상 좌측 상단에 NO TARGET을 표시합니다.
이 표시는 다음 상황을 구분하는 데 유용합니다.
- 실제로 사람이 없는 경우
- 신뢰도 기준이 너무 높은 경우
- 카메라 영상이 어두운 경우
- 사람이 너무 작게 보이는 경우
- 모델이 정상적으로 로딩되었지만 검출에 실패한 경우
30) JSON 형식 검출 정보 발행
검출 결과는 std_msgs/String에 JSON 문자열로 담아 발행합니다.
사람이 검출된 경우의 데이터 형식은 다음과 같습니다.
{
  "detected": true,
  "class_name": "person",
  "confidence": 0.923,
  "center_x": 341,
  "center_y": 228,
  "error_x": 0.066,
  "area_ratio": 0.172
}
사람이 검출되지 않은 경우에는 다음과 같이 발행됩니다.
{
  "detected": false,
  "target_class": "person"
}
이 데이터를 사용하면 별도의 ROS 2 노드에서 다음 기능을 구현할 수 있습니다.
- 사람 검출 여부에 따른 LED 제어
- 검출 신뢰도 기록
- 추종 상태 모니터링
- 웹 대시보드 연동
- 음성 안내
- 대상 소실 경고
- 추종 시작과 종료 판단
JSON 문자열은 개발 초기에는 편리하지만 데이터 형식이 엄격하게 보장되지는 않습니다. 시스템 규모가 커지면 detected, confidence, error_x, area_ratio 등을 필드로 갖는 사용자 정의 ROS 2 메시지를 만드는 편이 좋습니다.
31) 검출 영상 재변환과 발행
annotated_msg = self.bridge.cv2_to_imgmsg(
    annotated_frame,
    encoding='bgr8'
)
OpenCV에서 처리한 영상을 다시 ROS 2 이미지 메시지로 변환합니다.
annotated_msg.header = msg.header원본 영상의 헤더를 그대로 복사하므로 카메라의 타임스탬프와 frame_id가 유지됩니다.
센서 융합, 녹화 데이터 분석 또는 다른 영상 처리 노드와 시간 동기화를 수행할 때 중요한 부분입니다.
5. setup.py 설정
tb3_yolo_app/setup.py를 아래처럼 수정합니다.
from setuptools import find_packages, setup

package_name = 'tb3_yolo_app'

setup(
    name=package_name,
    version='0.0.1',
    packages=find_packages(exclude=['test']),
    data_files=[
        (
            'share/ament_index/resource_index/packages',
            ['resource/' + package_name]
        ),
        (
            'share/' + package_name,
            ['package.xml']
        ),
    ],
    install_requires=['setuptools'],
    zip_safe=True,
    maintainer='turtlebot3',
    maintainer_email='turtlebot3@example.com',
    description='YOLO based TurtleBot3 Burger person following example',
    license='Apache-2.0',
    tests_require=['pytest'],
    entry_points={
        'console_scripts': [
            'yolo_person_follower = tb3_yolo_app.yolo_person_follower:main',
        ],
    },
)
여기서 새롭게 중요한 부분은 이 줄입니다.
'yolo_person_follower = tb3_yolo_app.yolo_person_follower:main',6. package.xml 확인
package.xml에는 최소한 다음 의존성이 들어가 있어야 합니다.
<?xml version="1.0"?>
<package format="3">
  <name>tb3_yolo_app</name>
  <version>0.0.1</version>
  <description>YOLO based TurtleBot3 Burger person following example</description>
  <maintainer email="turtlebot3@example.com">turtlebot3</maintainer>
  <license>Apache-2.0</license>

  <depend>rclpy</depend>
  <depend>sensor_msgs</depend>
  <depend>geometry_msgs</depend>
  <depend>std_msgs</depend>
  <depend>cv_bridge</depend>

  <test_depend>ament_copyright</test_depend>
  <test_depend>ament_flake8</test_depend>
  <test_depend>ament_pep257</test_depend>
  <test_depend>python3-pytest</test_depend>

  <export>
    <build_type>ament_python</build_type>
  </export>
</package>
특히 아래 부분은 빠지면 안 됩니다.
<export>
  <build_type>ament_python</build_type>
</export>
Python 패키지에서 이 부분이 빠지면 빌드는 된 것처럼 보여도 실행 단계에서 패키지 인식 문제가 생길 수 있습니다.
7. 컴파일
워크스페이스 루트로 이동합니다.
cd ~/turtlebot3_ws특정 패키지만 빌드합니다.
colcon build --packages-select tb3_yolo_app환경을 다시 적용합니다.
source install/setup.bash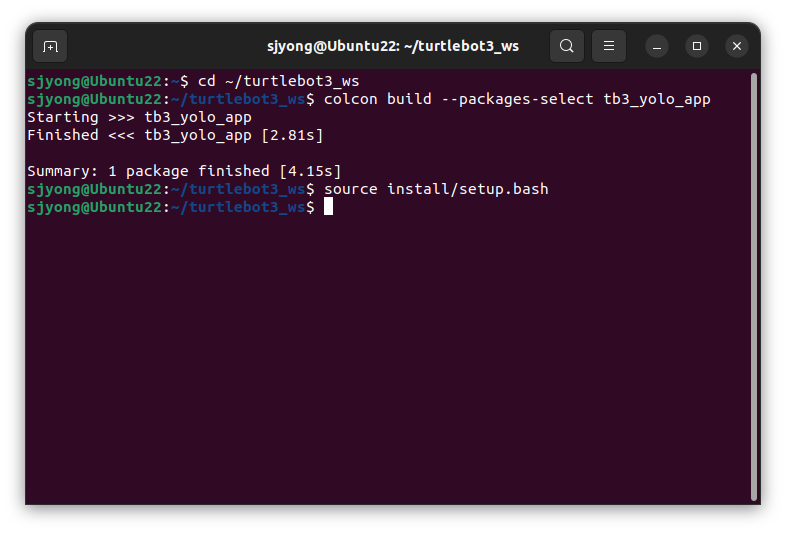
실행 파일이 등록되었는지 확인합니다.
ros2 pkg executables tb3_yolo_app정상이라면 다음과 비슷하게 나옵니다.
tb3_yolo_app yolo_person_follower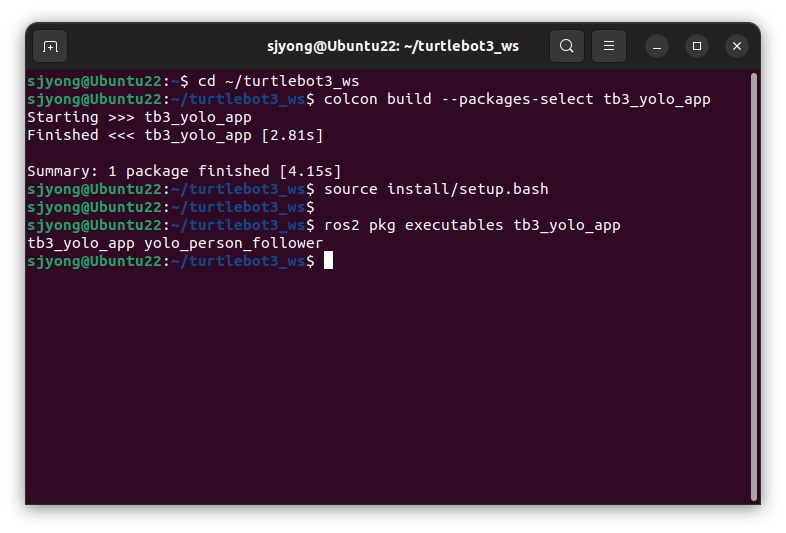
8. 실행
TurtleBot3 bringup을 실행합니다.
ros2 launch turtlebot3_bringup robot.launch.py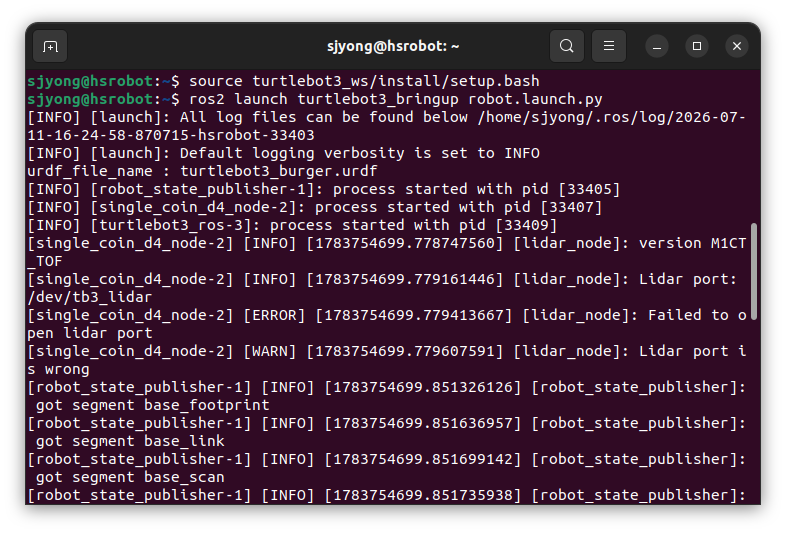
카메라 launch를 실행합니다.
ros2 launch turtlebot3_bringup camera.launch.py format:=BGR888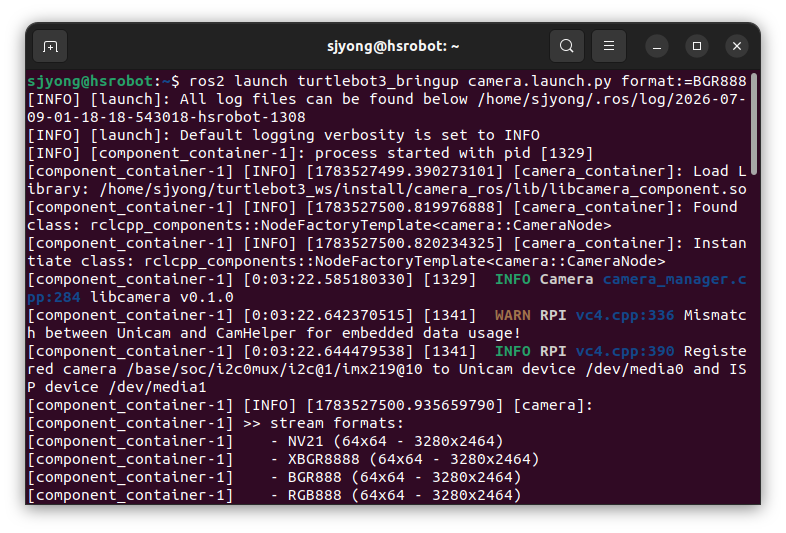
먼저 로봇이 움직이지 않는 상태로 YOLO 영상만 확인합니다.
ros2 run tb3_yolo_app yolo_person_follower \
  --ros-args \
  -p image_topic:=/camera/image_raw \
  -p enable_motion:=false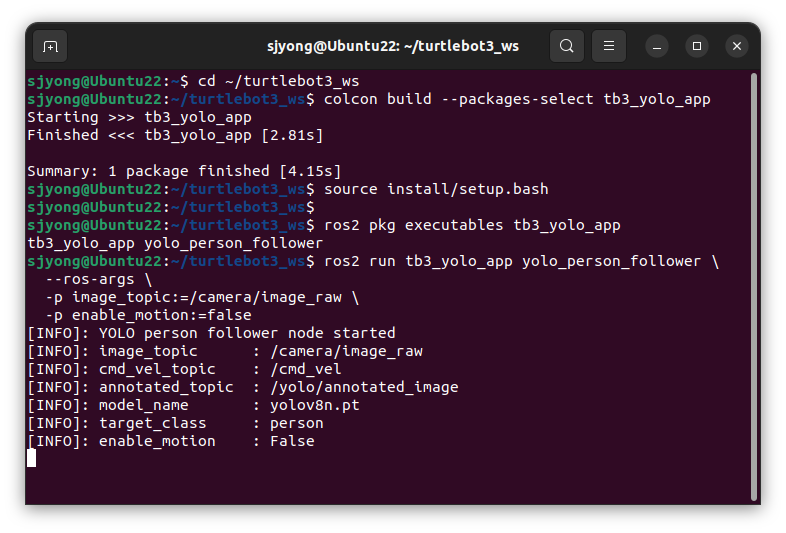
rqt에서 다음 이미지 토픽을 확인합니다.
/yolo/annotated_image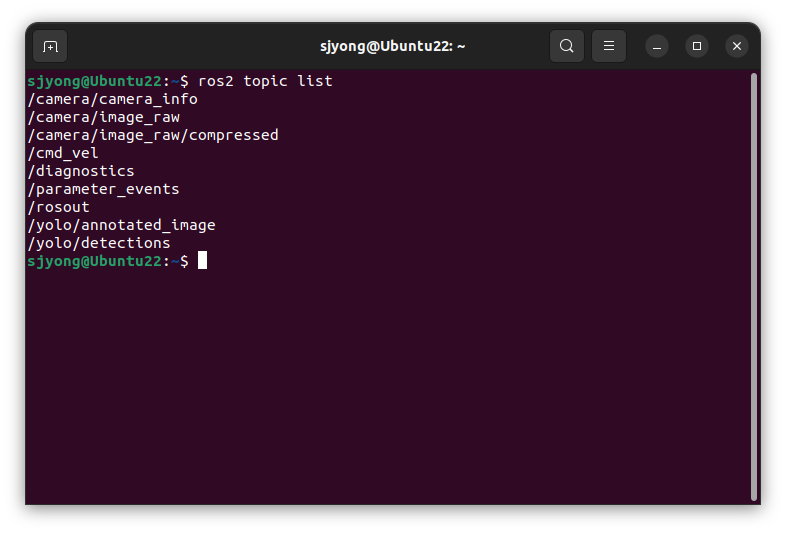
인식 결과 문자열도 확인합니다.
ros2 topic echo /yolo/detections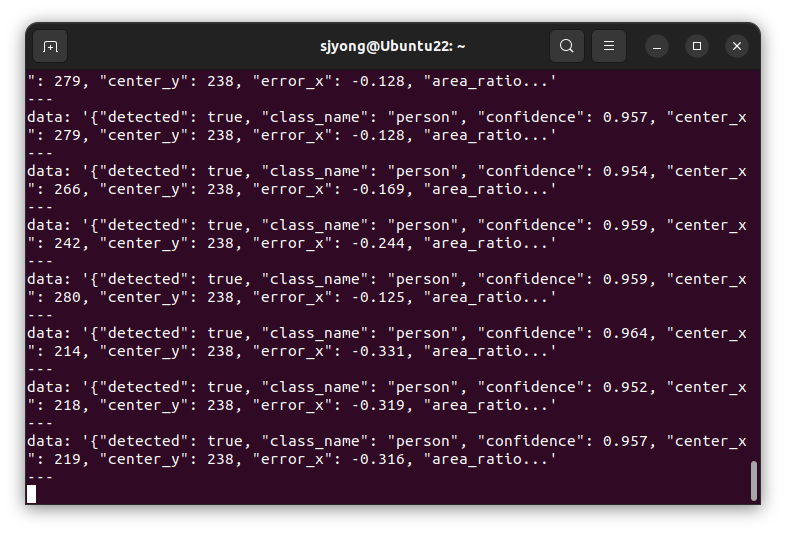
문제가 없으면 로봇 이동을 활성화합니다.
ros2 run tb3_yolo_app yolo_person_follower \
  --ros-args \
  -p image_topic:=/camera/image_raw \
  -p enable_motion:=true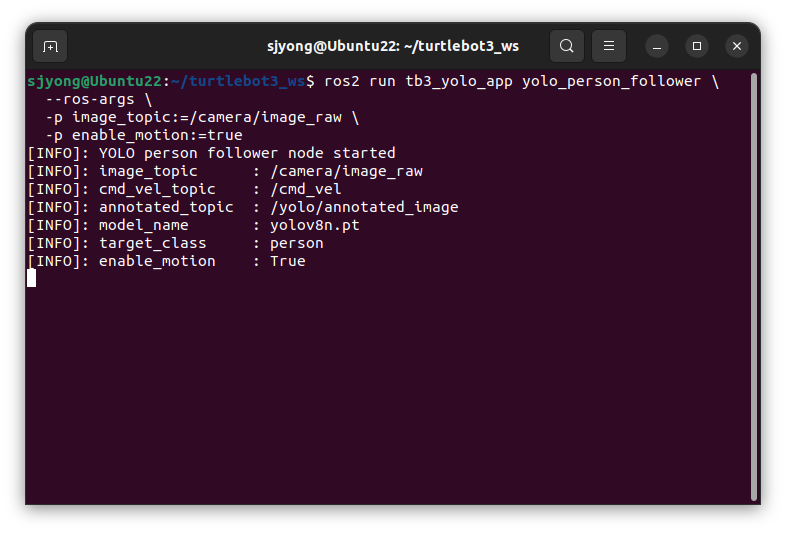
움직임이 너무 빠르면 속도를 낮춥니다.
ros2 run tb3_yolo_app yolo_person_follower \
  --ros-args \
  -p image_topic:=/camera/image_raw \
  -p enable_motion:=true \
  -p max_linear_speed:=0.04 \
  -p max_angular_speed:=0.20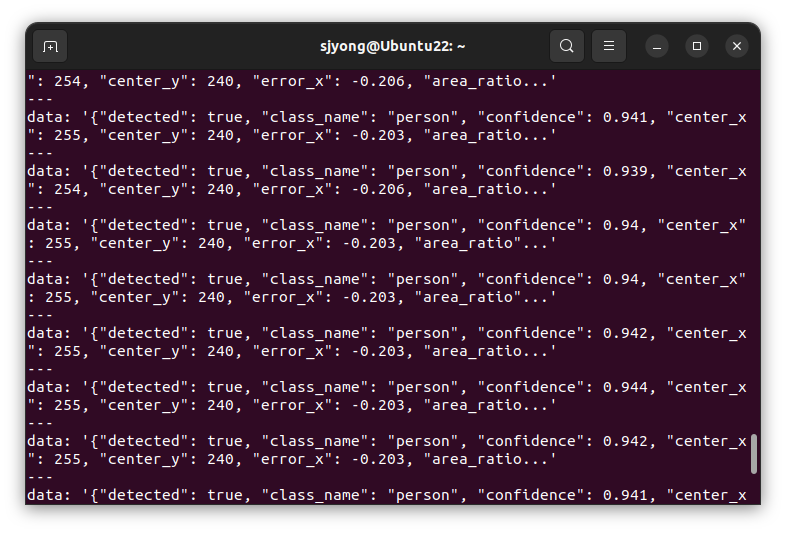
CPU 부하가 크면 프레임 스킵을 늘립니다.
ros2 run tb3_yolo_app yolo_person_follower \
  --ros-args \
  -p image_topic:=/camera/image_raw \
  -p enable_motion:=true \
  -p frame_skip:=4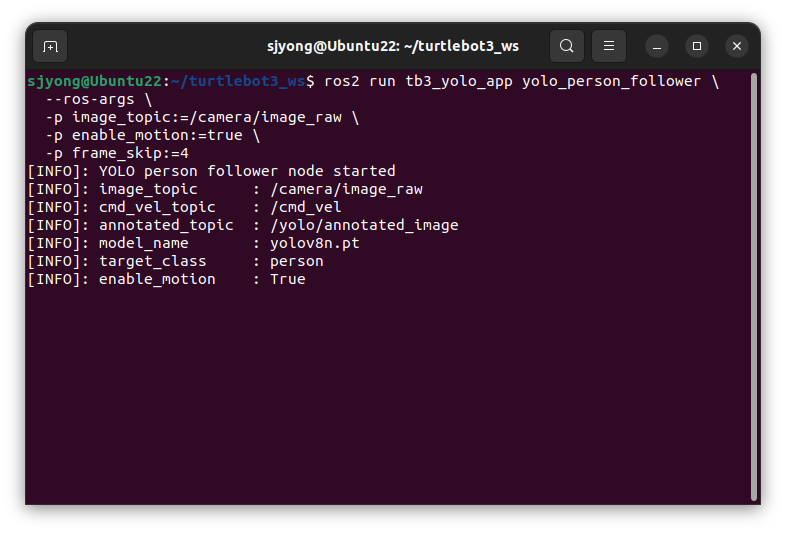
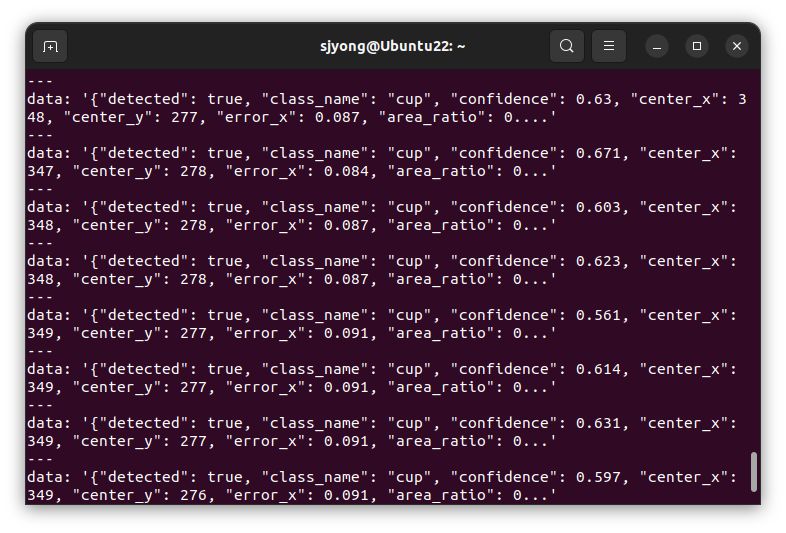
대상을 바꾸고 싶으면 target_class를 바꿉니다.
ros2 run tb3_yolo_app yolo_person_follower \
  --ros-args \
  -p image_topic:=/camera/image_raw \
  -p target_class:=cup \
  -p enable_motion:=true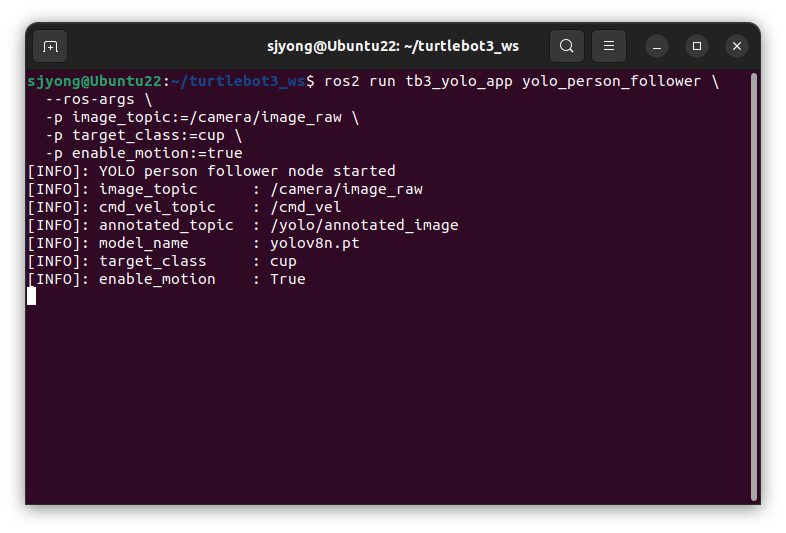
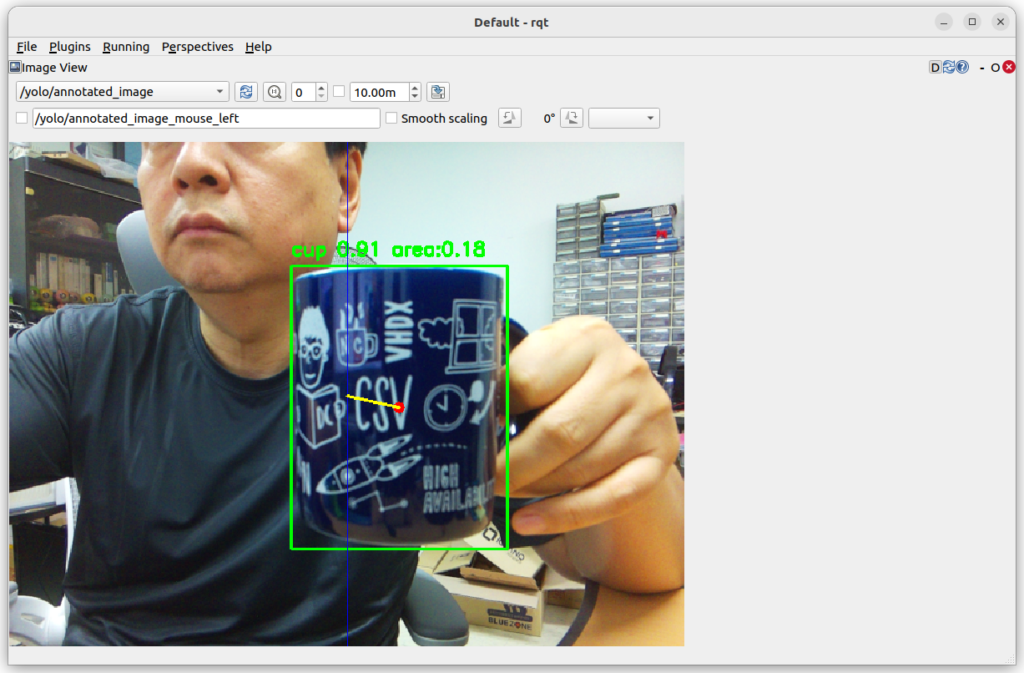
9. rqt에서 확인할 토픽
rqt 이미지 뷰어에서 확인할 토픽은 다음입니다.
/yolo/annotated_image터미널에서 확인할 토픽은 다음입니다.
ros2 topic echo /yolo/detections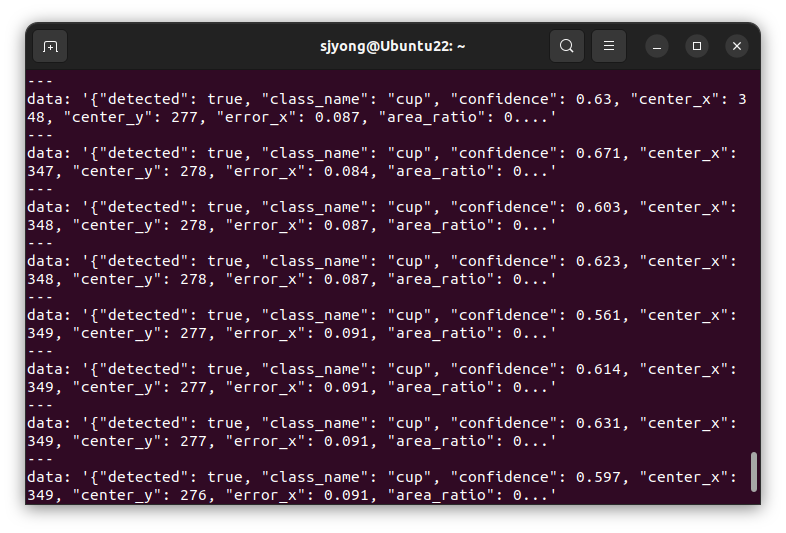
로봇 속도 명령을 확인하려면 다음을 봅니다.
ros2 topic echo /cmd_vel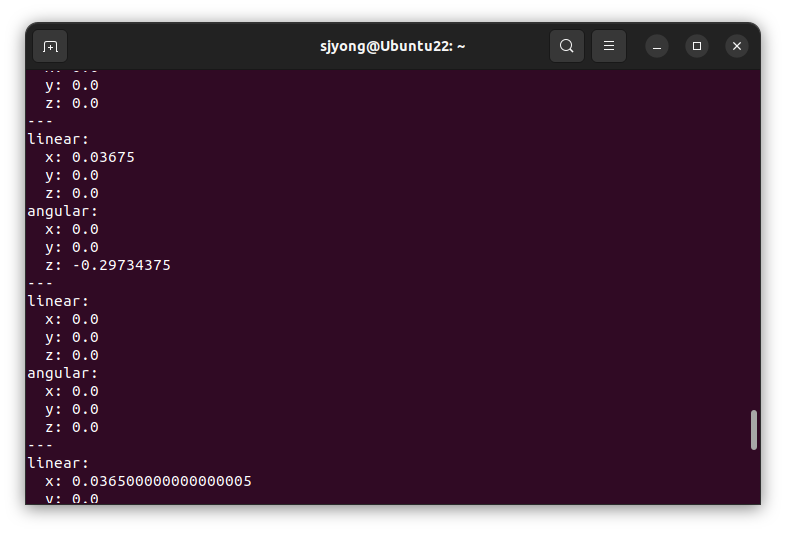
실습 중 /cmd_vel이 계속 0이면 다음 중 하나입니다.
enable_motion이 false입니다.
YOLO가 person을 인식하지 못했습니다.confidence_threshold가 너무 높습니다.target_class 이름이 잘못되었습니다.
카메라 토픽 이름이 실제 토픽과 다릅니다.
confidence 기준을 낮춰서 테스트할 수 있습니다.
-p confidence_threshold:=0.30